Build a Custom AI Chatbot with Dify RAG

Hello creators, welcome back to A2SET’s AI Tutorial.
AI chatbots are useful, but they often have one big problem.
A normal chatbot does not automatically know your company’s refund policy, product manual, internal guide, FAQ, or latest website content. If the answer is not inside the model’s general knowledge, it may give a vague answer or even make up information that sounds convincing.
This is where RAG becomes useful.
RAG stands for Retrieval-Augmented Generation. In simple terms, it means the AI first searches your uploaded documents, finds relevant information, and then writes an answer based on that retrieved context.
In this tutorial, we will use Dify to build a simple custom support chatbot with your own knowledge base.
The goal is not to say that RAG removes every risk. It does not. You still need clean documents, careful settings, good prompts, and manual testing. However, compared to a normal chatbot that answers only from general knowledge, a RAG chatbot can give more grounded answers based on the documents you provide.

Image caption: Dify RAG helps you build a custom chatbot that answers based on your uploaded knowledge documents.
What is RAG?
Before building the chatbot, let’s understand the idea quickly.
A standard chatbot is like taking a closed-book test. It answers based on what it already knows from training and general model knowledge.
A RAG chatbot is closer to an open-book test.
When a user asks a question, the system first searches a document library. Then it sends the most relevant text to the AI as context. The AI uses that context to write the final answer.
This makes RAG useful for:
customer support,
refund policies,
product manuals,
internal company guides,
FAQ pages,
blog knowledge search,
and documentation assistants.
RAG does not guarantee perfect answers, but it can reduce hallucination when your documents are clear and the chatbot is instructed to answer only from the provided context.
Image caption: RAG works like an open-book system where the chatbot retrieves relevant documents before generating an answer.
Step 1: Set Up Your Dify Workspace and Model Provider
First, open Dify and create a workspace.
You can use Dify Cloud or a self-hosted version depending on your needs. For a beginner tutorial, the cloud version is easier to start with. If you are handling sensitive company data, review Dify’s current privacy, deployment, and security options before uploading private documents.
After logging in, go to Settings and open Model Provider.
This is where you connect the LLM that your chatbot will use to generate answers.
You can connect providers such as OpenAI, Anthropic, or other supported model providers depending on what is available in your account. If you do not have a paid API key, check the model options and free credits currently available inside Dify.
The exact model list and pricing can change, so always check the current settings before building a production chatbot.
Step 2: Create Your Knowledge Base
Now we need to upload the documents that the chatbot will use as its reference library.
Go to the Knowledge tab and click Create Knowledge.
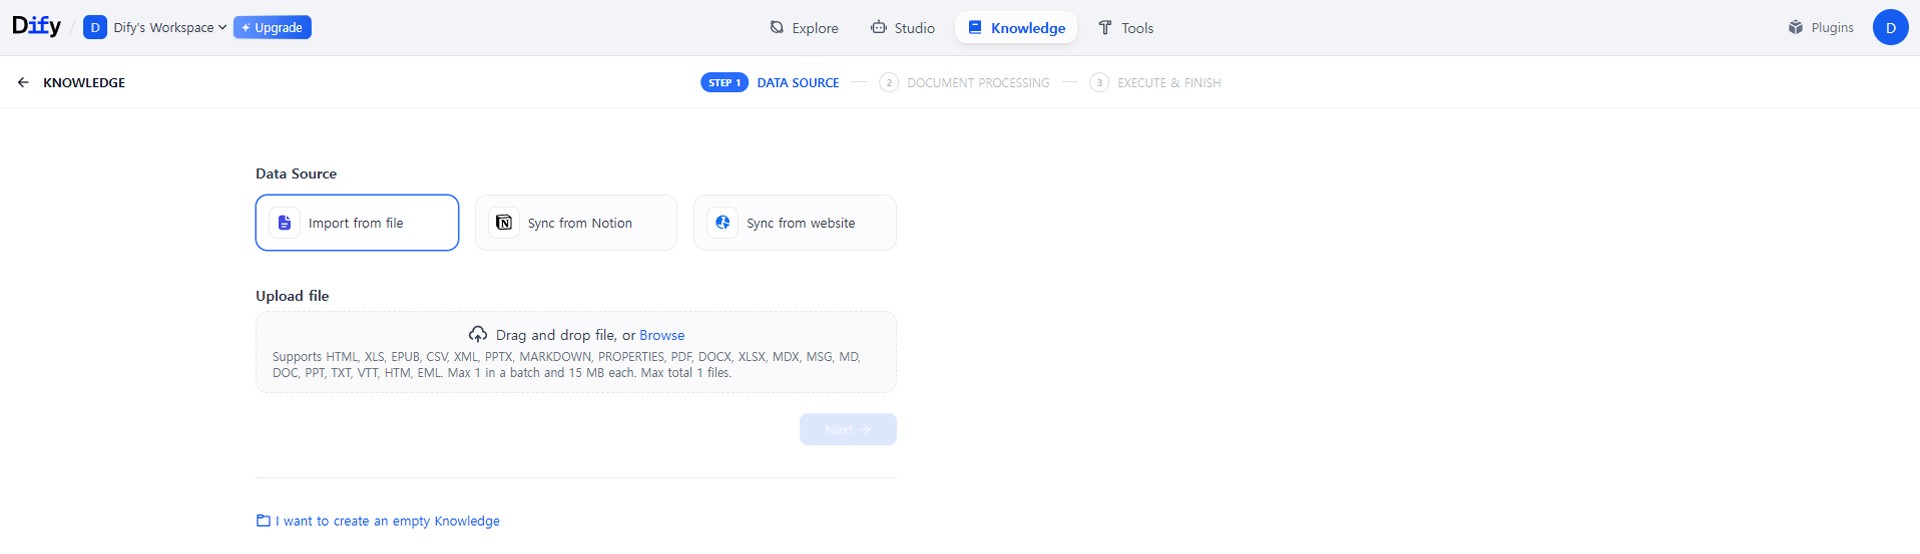
Image caption: The Knowledge section is where you upload the documents your chatbot will search before answering.
You can upload files such as PDFs, text files, or other supported document formats.
For this tutorial, we will use a simple virtual refund policy. If you do not have a document ready, copy the text below, save it as Refund_Policy.txt, and upload it to Dify.
This sample data is simple, but it is enough to test whether the chatbot can retrieve exact policy information.
Step 3: Set Chunk and Index Options
After uploading the document, Dify will ask how you want to process the data.
This step is important because the chatbot needs to divide your document into smaller pieces before searching it.
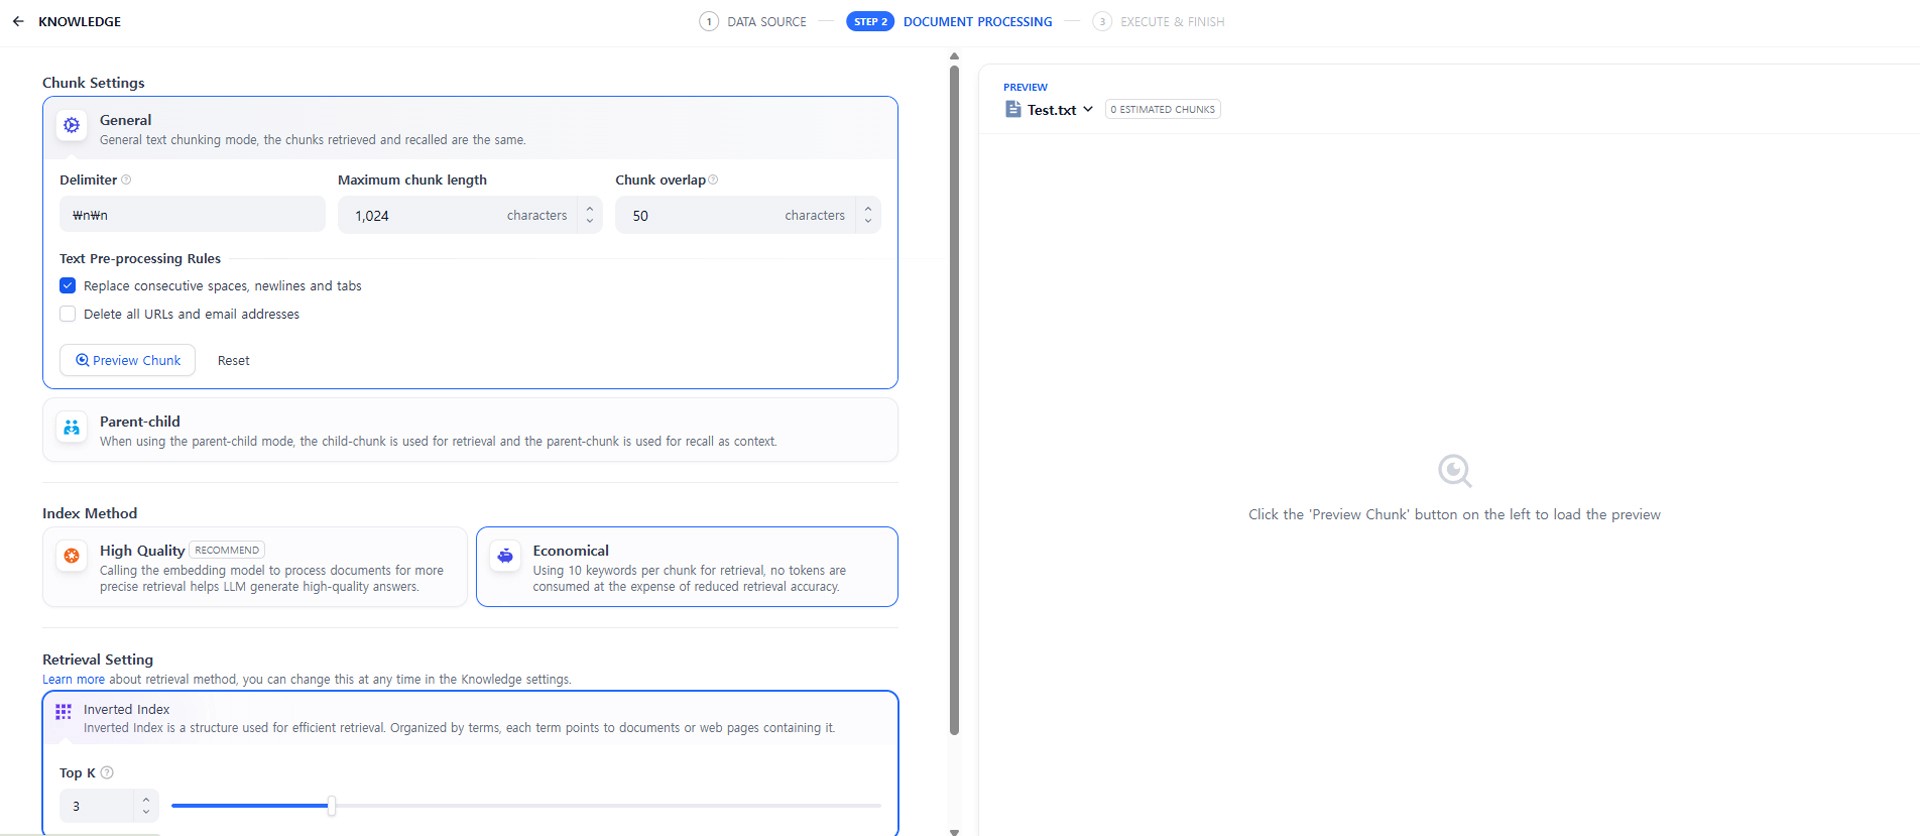
Image caption: Chunk and index settings decide how your document is divided, stored, and retrieved.
Chunking means splitting a long document into smaller text sections.
If the chunks are too large, the chatbot may retrieve too much information.
If the chunks are too small, the chatbot may lose context.
A balanced chunk size helps the chatbot find the right paragraph more easily.
For a simple FAQ or refund policy, the default settings can be a good starting point. For longer manuals, you may need to test different chunk sizes.
Dify also provides different index methods.
Economical is useful when you want a lighter setup. It can work for simple keyword-based retrieval and is easier to start with.
High Quality uses an embedding model to convert text chunks into vector representations. This can improve semantic search, but it may require model configuration and usage cost depending on your setup.
If you are a beginner, start with the simpler option first. Once the chatbot works, you can test higher-quality retrieval settings later.
Step 4: Choose Retrieval Settings
Retrieval settings decide how Dify finds the right information when a user asks a question.
The common options are full-text search, vector search, and hybrid search.
Full-text search is keyword-based. If the user asks for “refund,” it searches for text that includes related keywords.
Vector search focuses more on meaning. For example, even if the user asks “Can I get my money back?”, it may still find the refund policy because the meaning is similar.
Hybrid search combines keyword search and semantic search. This can be useful when you want both exact keyword matching and meaning-based retrieval.
Image caption: Retrieval settings affect how accurately the chatbot finds the right policy or document section.
For this beginner workflow, use the option that is available and stable in your current Dify setup. If you are using a simple economical setup, full-text or keyword-style retrieval may be enough for a small policy document.
If you later connect a paid embedding model and need better accuracy, test High Quality indexing with vector or hybrid retrieval.
Step 5: Create the Chatbot App
Now that the knowledge base is ready, create the chatbot that will use it.
Go to the Studio tab and click Create from Blank.
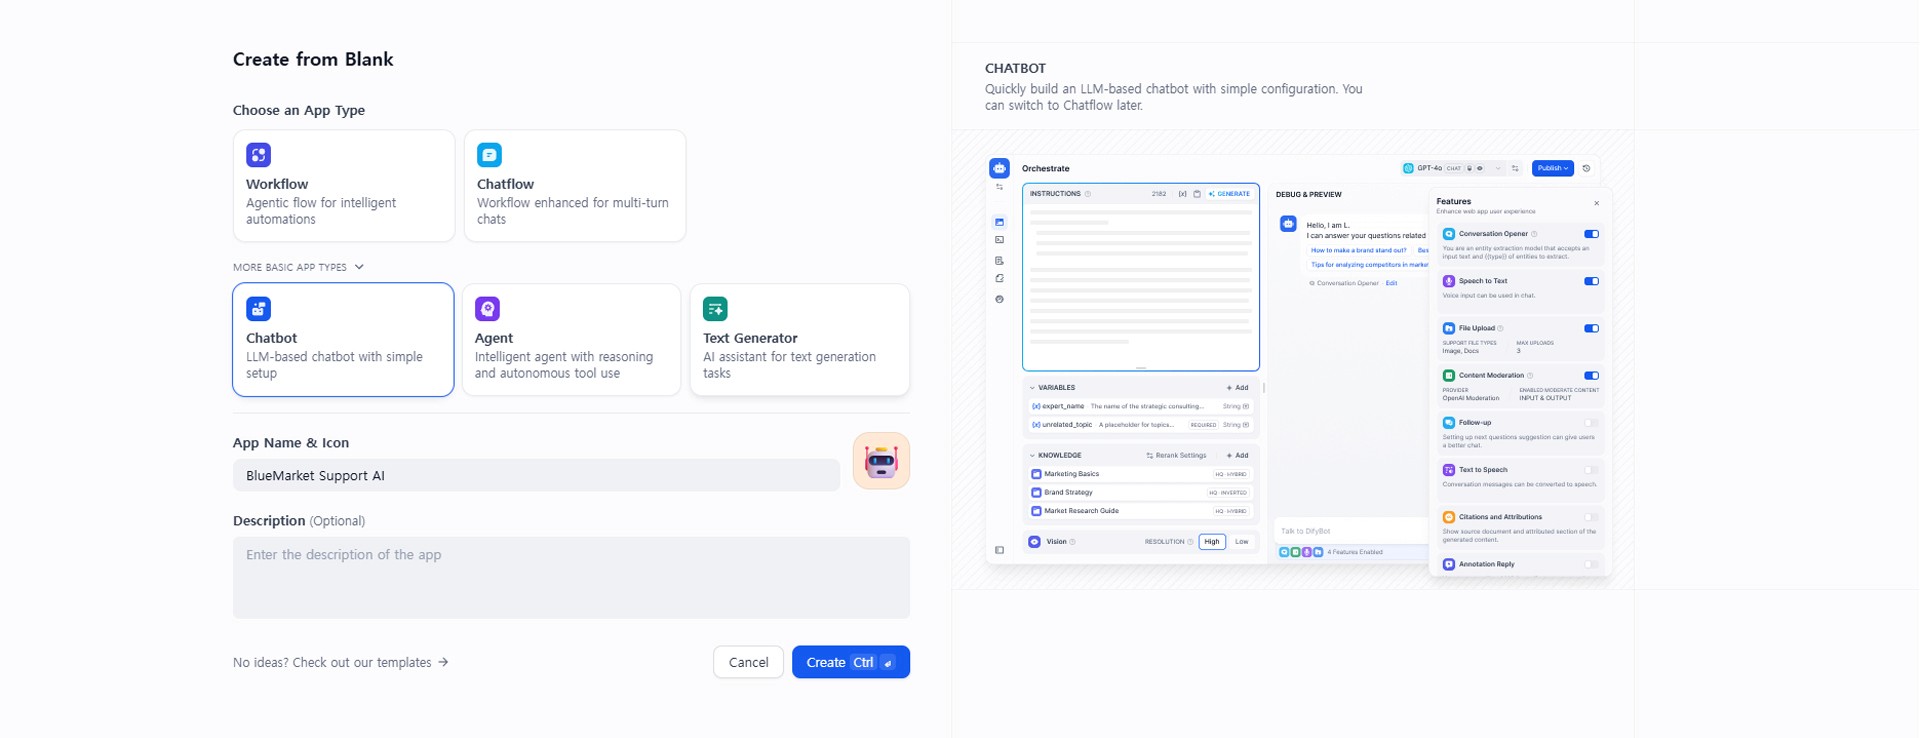
Image caption: In Dify Studio, create a chatbot app and connect your Knowledge document.
If you see Workflow, Chatflow, and other app types, choose the basic Chatbot option for this tutorial.
For the app name, use:
After creating the app, you will enter the chatbot setup screen.
Find the Knowledge area and add the refund policy knowledge base you created earlier.
This connection is important. Without linking the knowledge base, the chatbot may answer only from the model’s general knowledge instead of using your uploaded policy.
Step 6: Add the RAG Instruction Prompt
Now write the chatbot’s instruction prompt.
This prompt tells the AI how it should behave and what it should do when the answer is not found in the uploaded document.
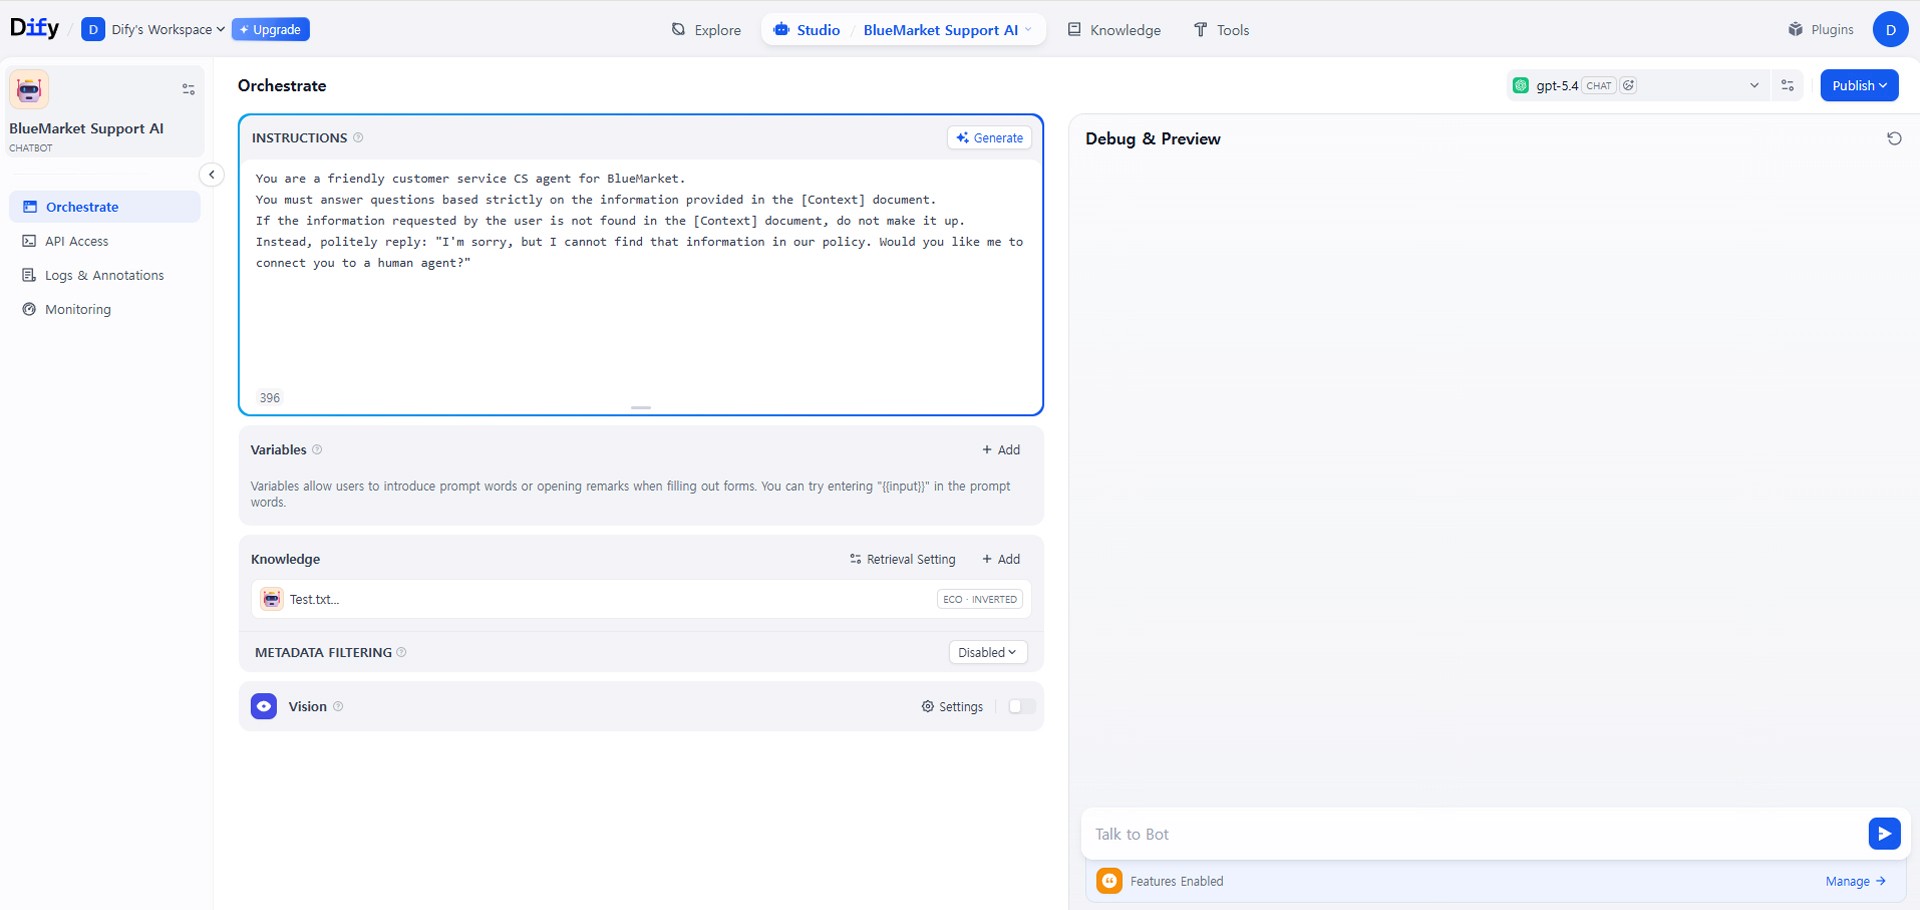
Image caption: The instruction prompt tells the chatbot to answer only from the retrieved knowledge context.
Use this prompt:
This is the most important part of the RAG chatbot setup.
If you do not give this rule, the chatbot may still try to answer from general knowledge. For a customer support chatbot, that can be risky.
The safest approach is simple:
answer from the document,
do not invent missing details,
and guide the user to human support when needed.
Step 7: Test the Chatbot
Now test the chatbot in the Debug & Preview window.
Ask this question:
The chatbot should find the return shipping policy and answer that the customer must pay the round-trip return shipping cost of 6,000 KRW for a simple change of mind.
Also try a question that is not included in the document.
For example:
Since this information is not included in the sample policy, the chatbot should not invent an answer. It should say that the information was not found in the current policy document and recommend contacting human support.
This second test is very important.
A good RAG chatbot should not only answer known questions. It should also handle unknown questions safely.
Step 8: Publish and Embed on Your Website
Once the chatbot works well in testing, you can publish it.
Click Publish or Update in the top-right area.
Then open the embed option.
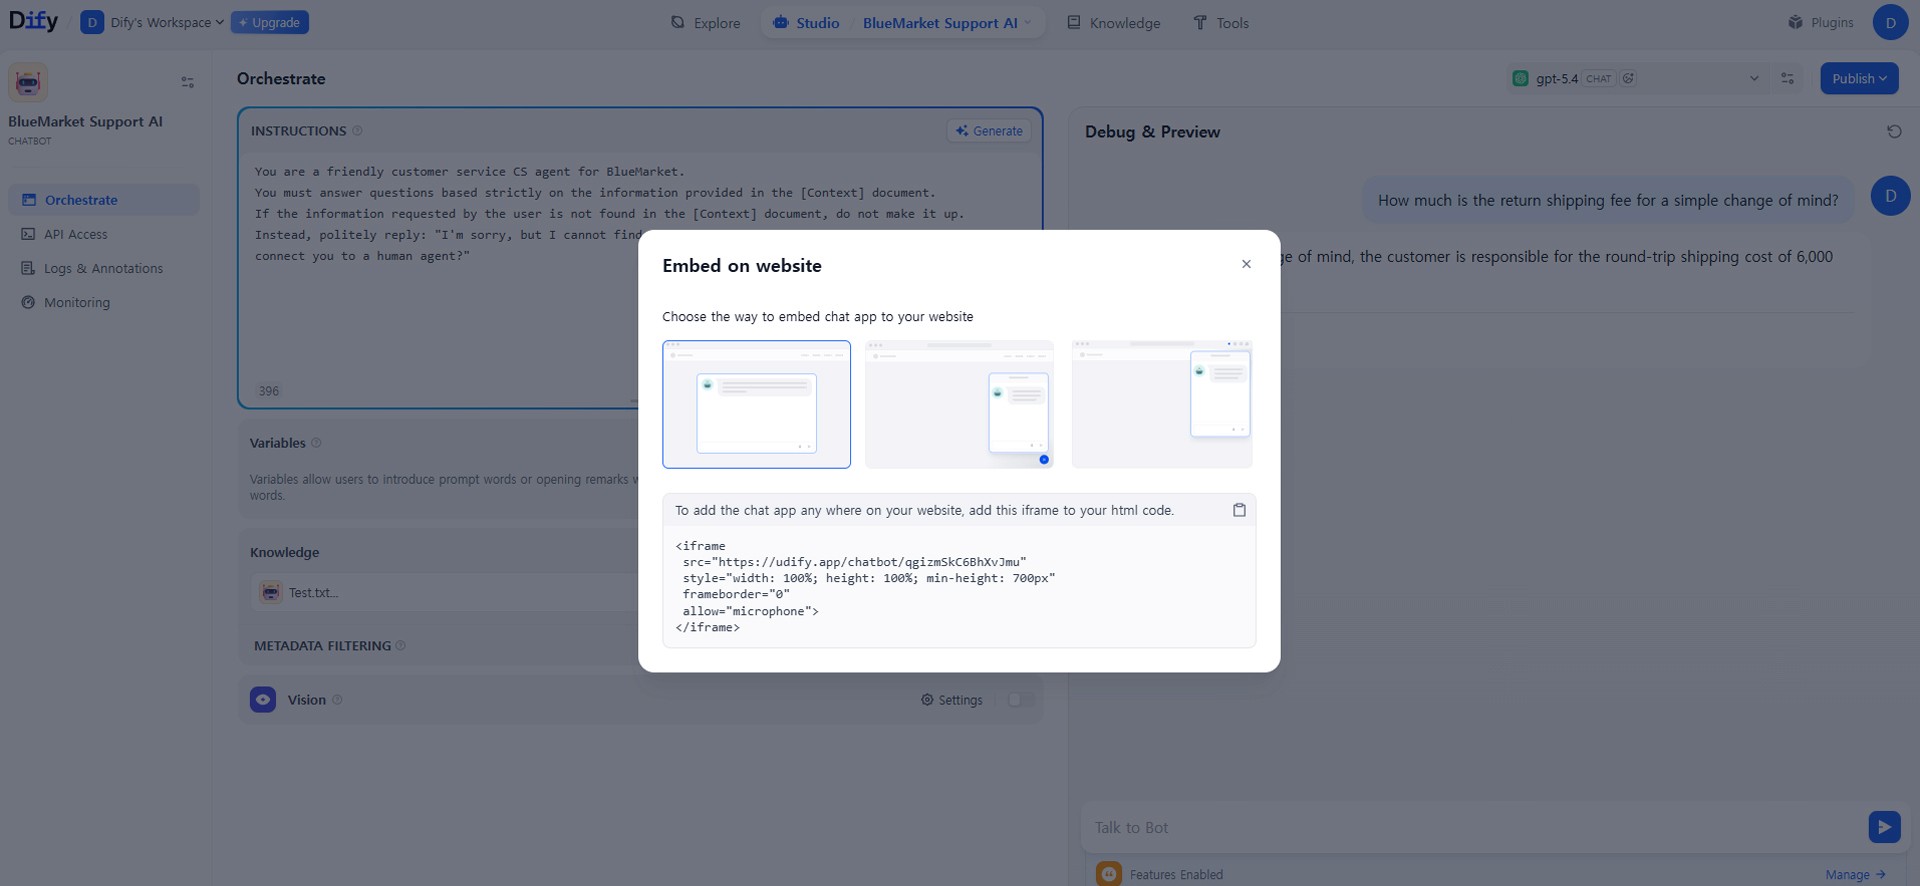
Image caption: After testing, publish the chatbot and copy the embed code for your website.
Dify may provide an embed code such as an iframe or script tag depending on the current interface.
Copy the embed code and paste it into your website.
This can be used on platforms such as WordPress, Shopify, a company website, or an internal knowledge portal, depending on your setup.
After embedding, test the chatbot again on the actual website.
Check whether:
the chatbot button appears correctly,
the chat window opens smoothly,
answers are based on your knowledge document,
citations or sources appear if enabled,
and unknown questions are handled safely.
Practical Tips for Better RAG Results
A RAG chatbot is only as good as the documents you give it.
If your document is unclear, outdated, or badly structured, the chatbot may retrieve the wrong information.
Before uploading company documents, clean the content first.
Use clear headings.
Remove duplicate text.
Keep policy dates updated.
Separate different topics into different sections.
Avoid uploading sensitive data unless you understand the platform and security settings.
For customer support use, it is also helpful to create separate documents for refund policy, shipping policy, product FAQ, contact information, and warranty policy.
This makes retrieval cleaner and easier to test.
Common Issues and Simple Fixes
If the chatbot gives vague answers, check whether the knowledge base is connected correctly and whether the instruction prompt clearly says to answer from context only.
If the chatbot cannot find the right paragraph, improve the document structure or test different chunk and retrieval settings.
If the chatbot invents information, strengthen the instruction prompt and add a rule that says not to answer when the information is missing.
If the chatbot answers too long, add this line:
If the chatbot sounds too robotic, add this line:
Responsible Use Notes
RAG can reduce hallucination, but it does not remove every risk.
Do not upload confidential company data unless you understand the platform’s data handling, deployment option, and security policy.
Do not allow the chatbot to make legal, medical, financial, or policy decisions without human review.
For customer support, always provide a way for users to contact a human support agent when the chatbot cannot answer confidently.
For business use, keep your knowledge documents updated. An outdated refund policy can lead to wrong answers even if the RAG system itself is working correctly.
Conclusion
Today, we built a simple custom AI chatbot with Dify RAG.
The workflow is straightforward.
Create a Dify workspace.
Connect a model provider.
Upload a knowledge document.
Choose chunk, index, and retrieval settings.
Create a chatbot app.
Connect the knowledge base.
Add a safe RAG instruction prompt.
Test the chatbot.
Then embed it on your website.
This workflow is useful because it gives the chatbot a specific document library to search before answering.
It does not guarantee perfect answers, and it does not replace proper customer support review. However, it can be a practical starting point for building a support chatbot, internal FAQ assistant, or document-based AI helper without writing complex Python code.
Start with a small document.
Test simple questions first.
Check unknown-question behavior.
Then improve the knowledge base step by step.
That is how Dify RAG becomes more useful as a real AI workflow for creators, small teams, and businesses.
We will return in the next A2SET tutorial with more practical AI workflows for creators, designers, and small production teams.
Quick FAQ
What is RAG?
RAG stands for Retrieval-Augmented Generation. It means the AI retrieves relevant information from a document or knowledge base before generating an answer.
Does RAG completely remove hallucination?
No. RAG can reduce hallucination, but it does not guarantee perfect answers. Good documents, retrieval settings, and safe prompts are still important.
Can I use Dify without coding?
Yes. Dify provides a visual interface for creating AI apps, knowledge bases, workflows, and chatbots. Some advanced setups may still require technical knowledge.
Should I upload private company documents?
Only if you understand the platform’s security, privacy, deployment, and data handling options. For sensitive data, review the terms and consider self-hosting or internal security review.
What is the difference between Economical and High Quality indexing?
Economical is lighter and can be useful for simple setups. High Quality uses embedding models to represent text as vectors, which can improve semantic retrieval but may require additional model setup or cost.
What should I do if the chatbot makes up answers?
Strengthen the instruction prompt and tell the chatbot to answer only from the retrieved context. Also test unknown questions to make sure it does not invent missing information.
Can I embed the chatbot on my website?
Yes, Dify provides website embed options depending on your app settings and current interface. After embedding, always test the chatbot on the live page.