Build a 360 View of Your Virtual Influencer in ComfyUI

Hello creators, welcome back to A2SET’s AI Tutorial.
Have you ever created a beautiful virtual influencer image, then struggled to generate the same character from the side, back, or a slightly rotated angle?
This is one of the most common problems in AI character design.
A single portrait may look great, but if the face changes every time you ask for another view, it becomes difficult to use that character for branding, motion, 3D reference, social content, or virtual influencer planning.
In the past, building this kind of workflow in ComfyUI could feel intimidating. You had to install ComfyUI, manage model files, connect complex node graphs, and fix missing nodes before getting a usable result.
Now, ComfyUI’s Workflow Templates can make the process more approachable.
In this tutorial, we will use a practical two-step workflow.
First, we will use image_z_image_turbo to generate a clean base portrait of a virtual influencer.
Then, we will use templates-1_click_multiple_character_angles to create multiple angles of the same character from that base image.
Before we begin, let’s be clear about what this workflow creates.
This does not create a true 3D model that you can rotate freely. It creates a 2D multi-angle character sheet based on one strong base image. In other words, you can generate front, side, turned, and back-style views that feel connected to the same character.
For virtual influencer planning, character development, concept art, branding, and pre-production reference work, this can be a very useful workflow.
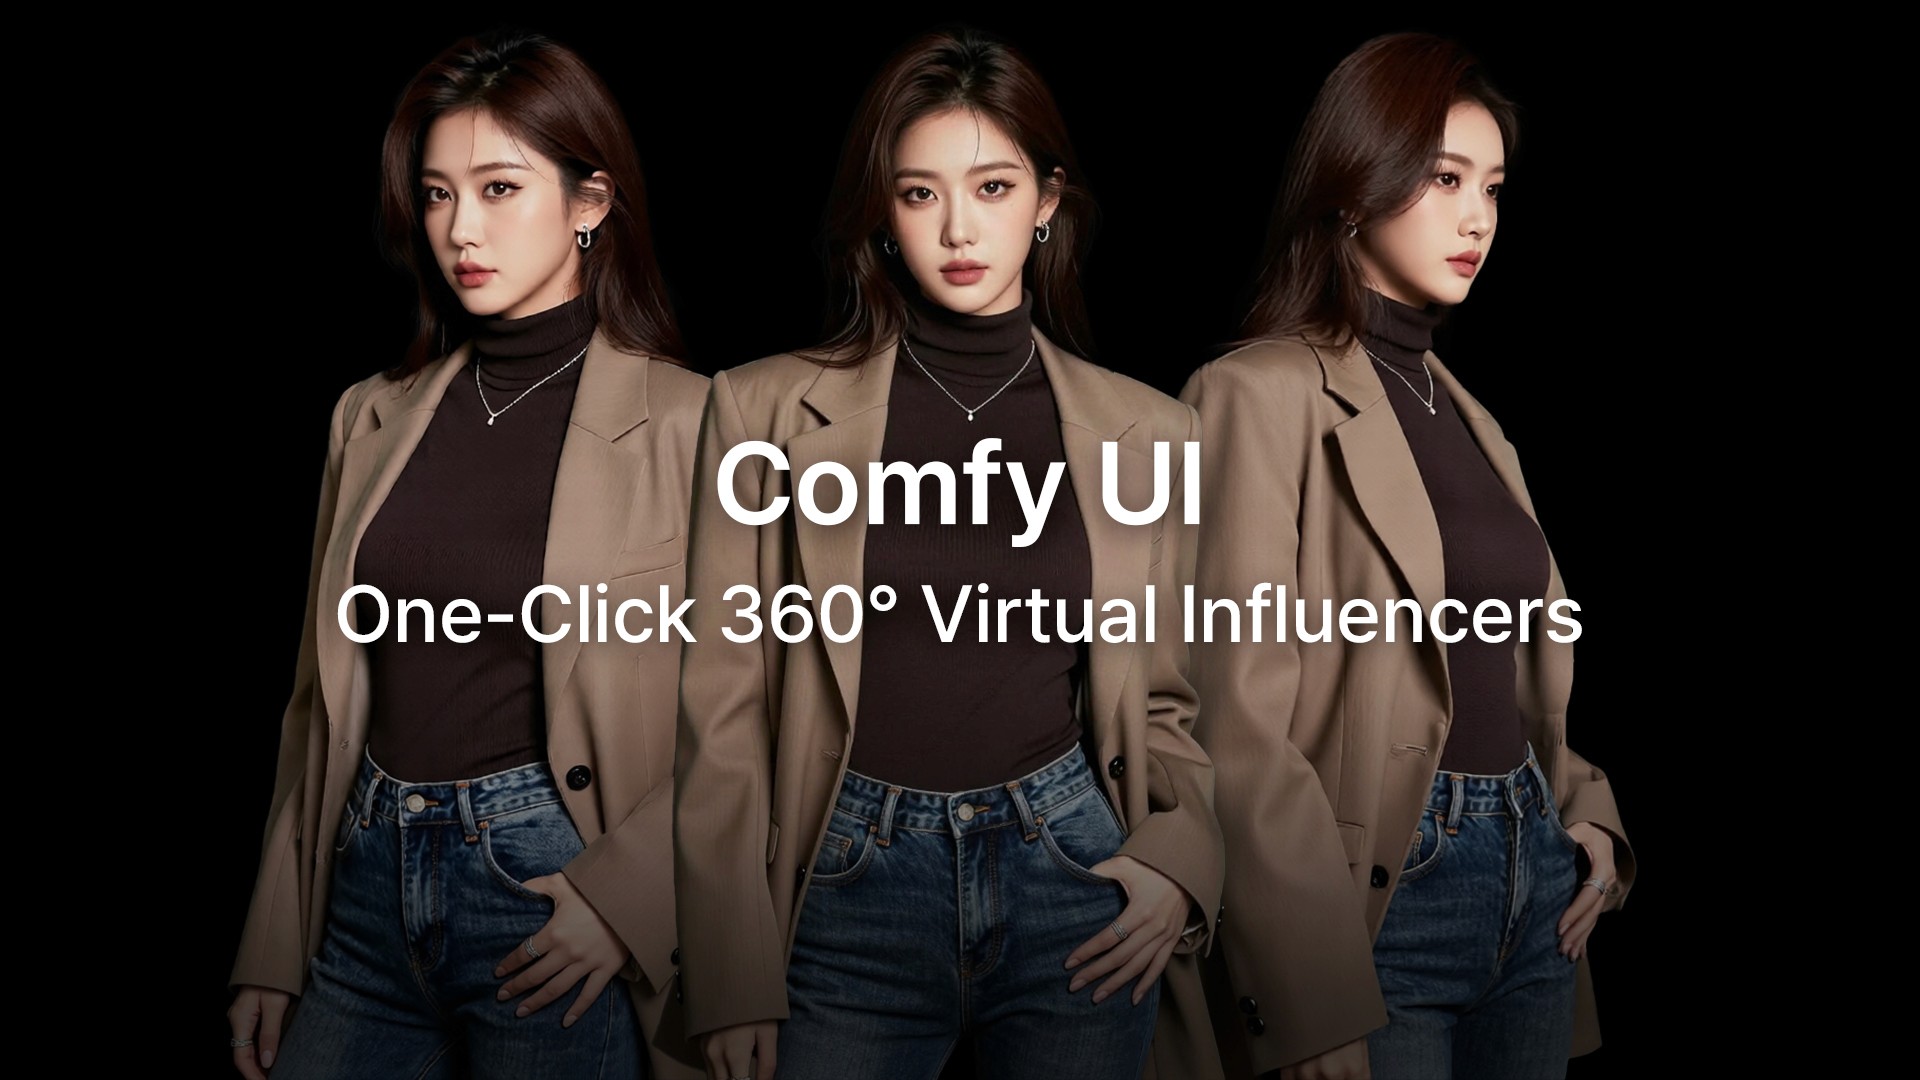
Image caption: This workflow uses ComfyUI templates to create a base virtual influencer portrait and expand it into multiple character angles.
What You Will Create
By the end of this tutorial, you will have a high-quality base image of your virtual influencer, a set of multiple angle views based on that character, and a faster way to create a consistent visual reference for future projects.
This workflow is useful for virtual influencer design, character sheets, concept art pipelines, webtoon or game character planning, social media branding visuals, and pre-production references for 3D or motion work.
Step 1: Set Up Your Base Camp with Stability Matrix
If you are new to ComfyUI, Stability Matrix can make the setup process easier.
Instead of installing ComfyUI manually and dealing with Python environments yourself, Stability Matrix gives you a more beginner-friendly way to install and manage ComfyUI.
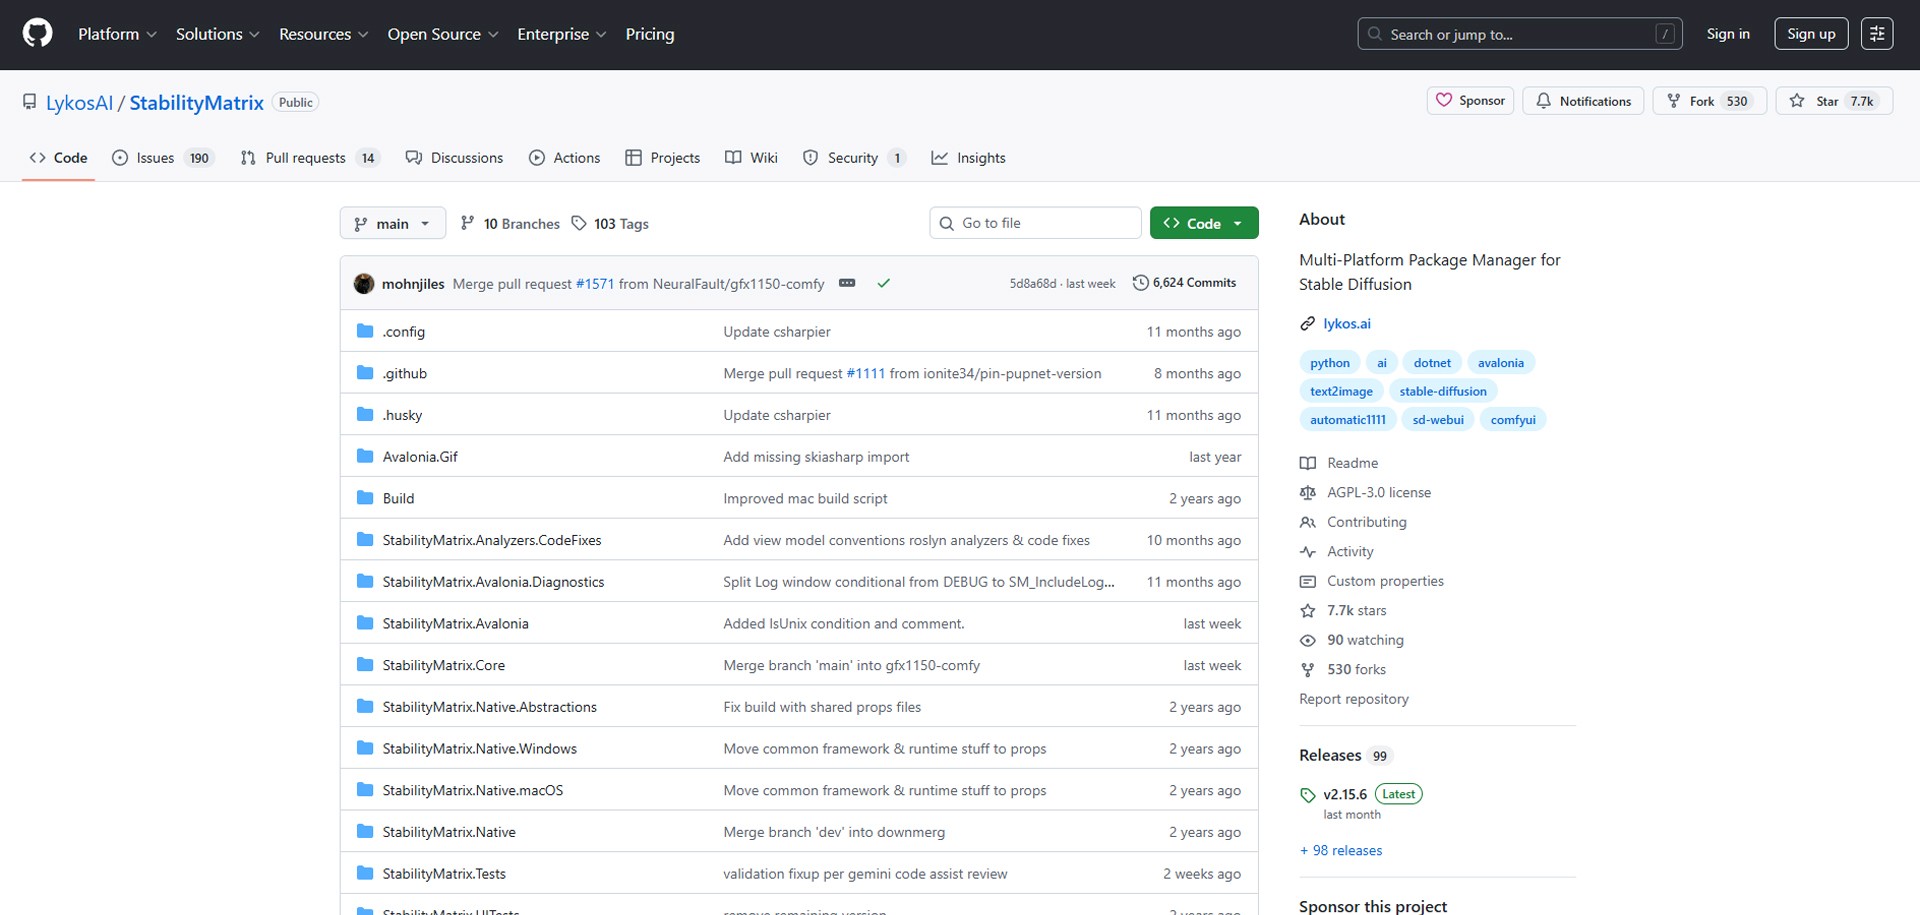
Image caption: Stability Matrix can help beginners install and launch ComfyUI without manually setting up Python environments.
First, download Stability Matrix from the official GitHub page.
Install the version that matches your operating system.
Once the app opens, find ComfyUI in the package list and install it.
After the installation is finished, click Launch.
Your browser should open the ComfyUI interface automatically.
Image caption: After installing ComfyUI through Stability Matrix, launch it and open the browser-based ComfyUI interface.
Depending on your ComfyUI version, the template feature may appear in slightly different places. In many environments, you will see a Templates tab on the left sidebar. In some versions, you may find it under the workflow menu.
As long as you can access the workflow templates, you are ready to continue.
Step 2: Create Your Base Virtual Influencer with image_z_image_turbo
Now it is time to create the base image that everything else will be built from.
This part is important because the quality of your multi-angle results depends heavily on how clear and stable your starting image is.
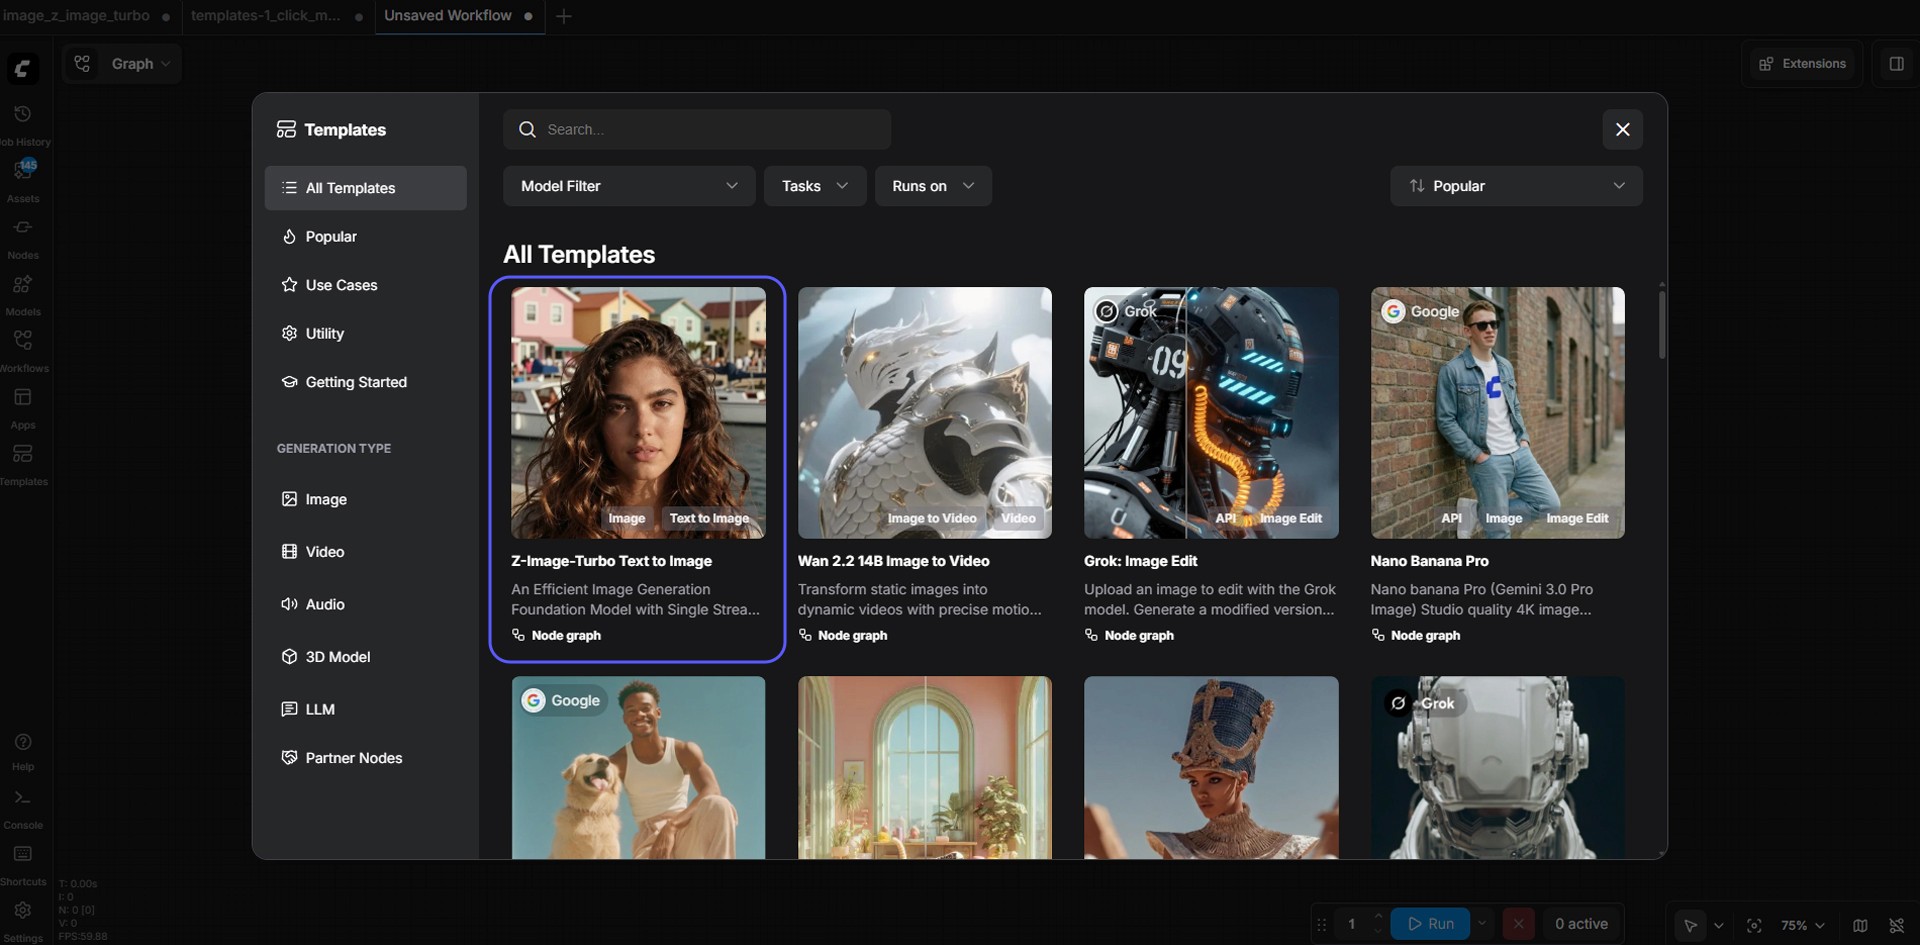
Image caption: Start by loading the image_z_image_turbo template to create the base portrait for your virtual influencer.
Open the Templates tab in ComfyUI.
Search for image_z_image_turbo.
Click the template, and the workflow will load automatically.
At this stage, you do not need to build nodes manually. The goal is simply to load the prepared workflow and focus on the core settings.
Next, download and place the required model files in the correct folders.
For this setup, the key files are:
Diffusion Model: z_image_turbo_bf16.safetensors
Text Encoder: qwen_3_4b.safetensors
VAE: ae.safetensors
Place them in the appropriate ComfyUI model folders:
ComfyUI/models/diffusion_models/
ComfyUI/models/text_encoders/
ComfyUI/models/vae/
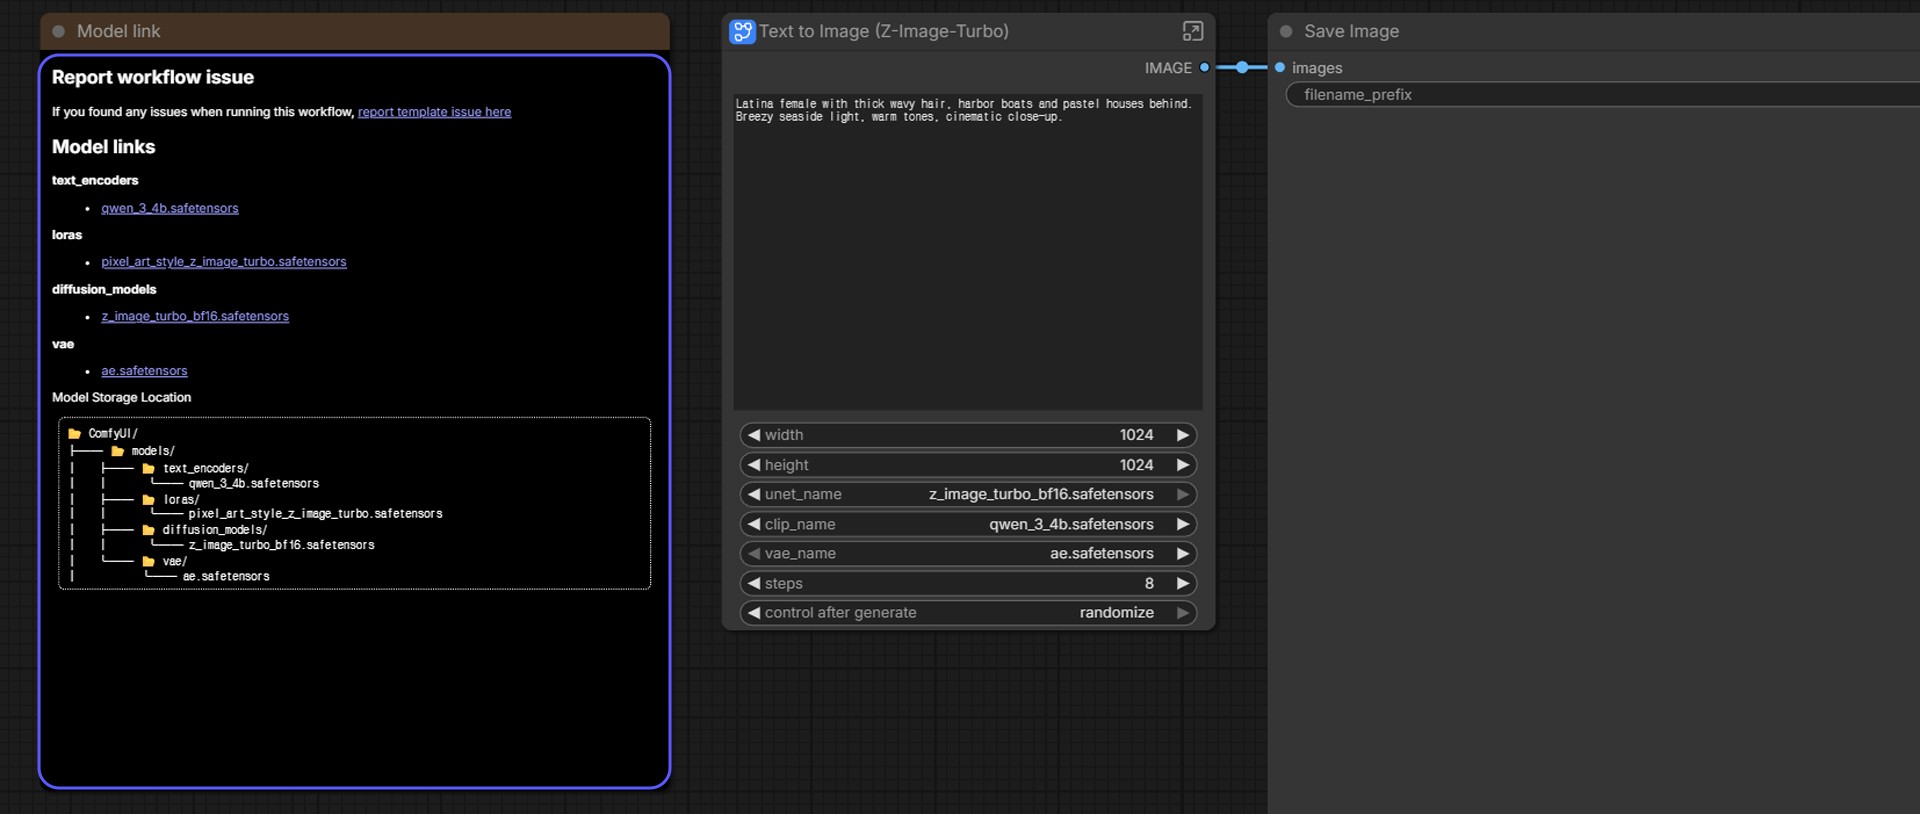
Image caption: Place each model file in the correct ComfyUI model folder so the template can recognize the required components.
If you are using Stability Matrix, the directory structure may look slightly different at first glance. The important thing is that the files end up inside the actual ComfyUI model folders.
Once all files are in place, refresh the browser or restart ComfyUI so the models can be recognized correctly.
After the template is loaded, keep the starting settings simple.
A safe starting setup is:
Image size: 1024 by 1024
Steps: 8
CFG: 1.0
Sampler: res_multistep
Scheduler: simple
Denoise: 1.00
One of the most important details here is the CFG value.
Leave it at 1.0 when following this workflow. Many beginners assume that turning numbers up will automatically improve quality, but in this workflow, starting with the original template values is usually more reliable.
Step 3: Write the Base Character Prompt
Now go to the large prompt box and describe the virtual influencer you want to create.
Here is the example prompt used for this tutorial:
Prompt: hyper photorealistic, portrait of beautiful Korean lady with blonde hair, black eyes, makeup, detailed skin, party dress outfit, posing like a model in modern luxury hotel lobby
This prompt works well because it clearly defines the subject, hair color, eye color, outfit, pose, and environment.
For this stage, clarity is more important than long poetic wording.
The cleaner and more readable your base character design is, the better your angle expansion results will usually be later.
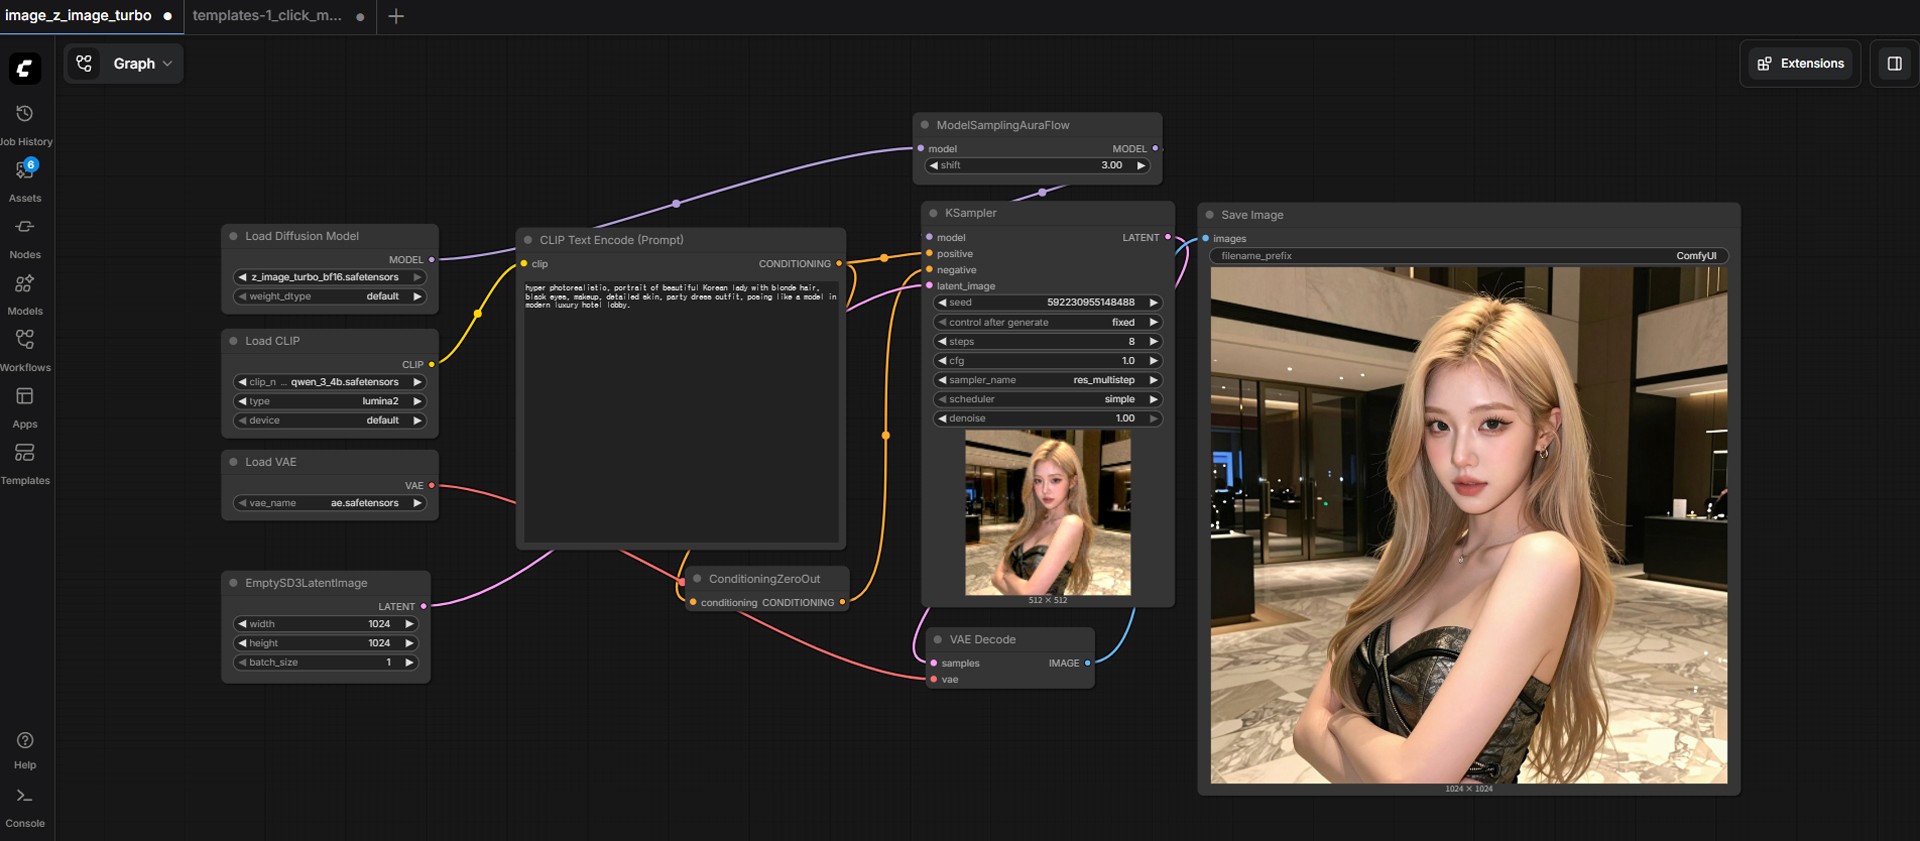
Image caption: A clear base prompt helps create a stronger virtual influencer portrait for the later multi-angle workflow.
Click Queue Prompt and let ComfyUI generate the image.
When the image appears, do not pick the first one only because it looks pretty.
At this stage, your priority is not simply beauty. Your priority is to create a stable and usable reference image.
A good base image should have a clearly visible face, hair that does not cover too much of the face, minimal obstruction from hands or props, a clean silhouette, an outfit that is not overly complicated, and a background that is not too chaotic.
If needed, generate several versions until you get a clean front-facing or near-front-facing portrait that feels strong enough to use as a character anchor.
Once you find the right one, save it.
Step 4: Generate Multiple Character Angles
Now we will use the base image to generate multiple angle variations of the same character.
This can include front, side, turned, over-the-shoulder, and other useful reference views.
For this step, we will use templates-1_click_multiple_character_angles.
This workflow is designed to take a single character image and expand it into a set of different angles while keeping the identity as consistent as possible.
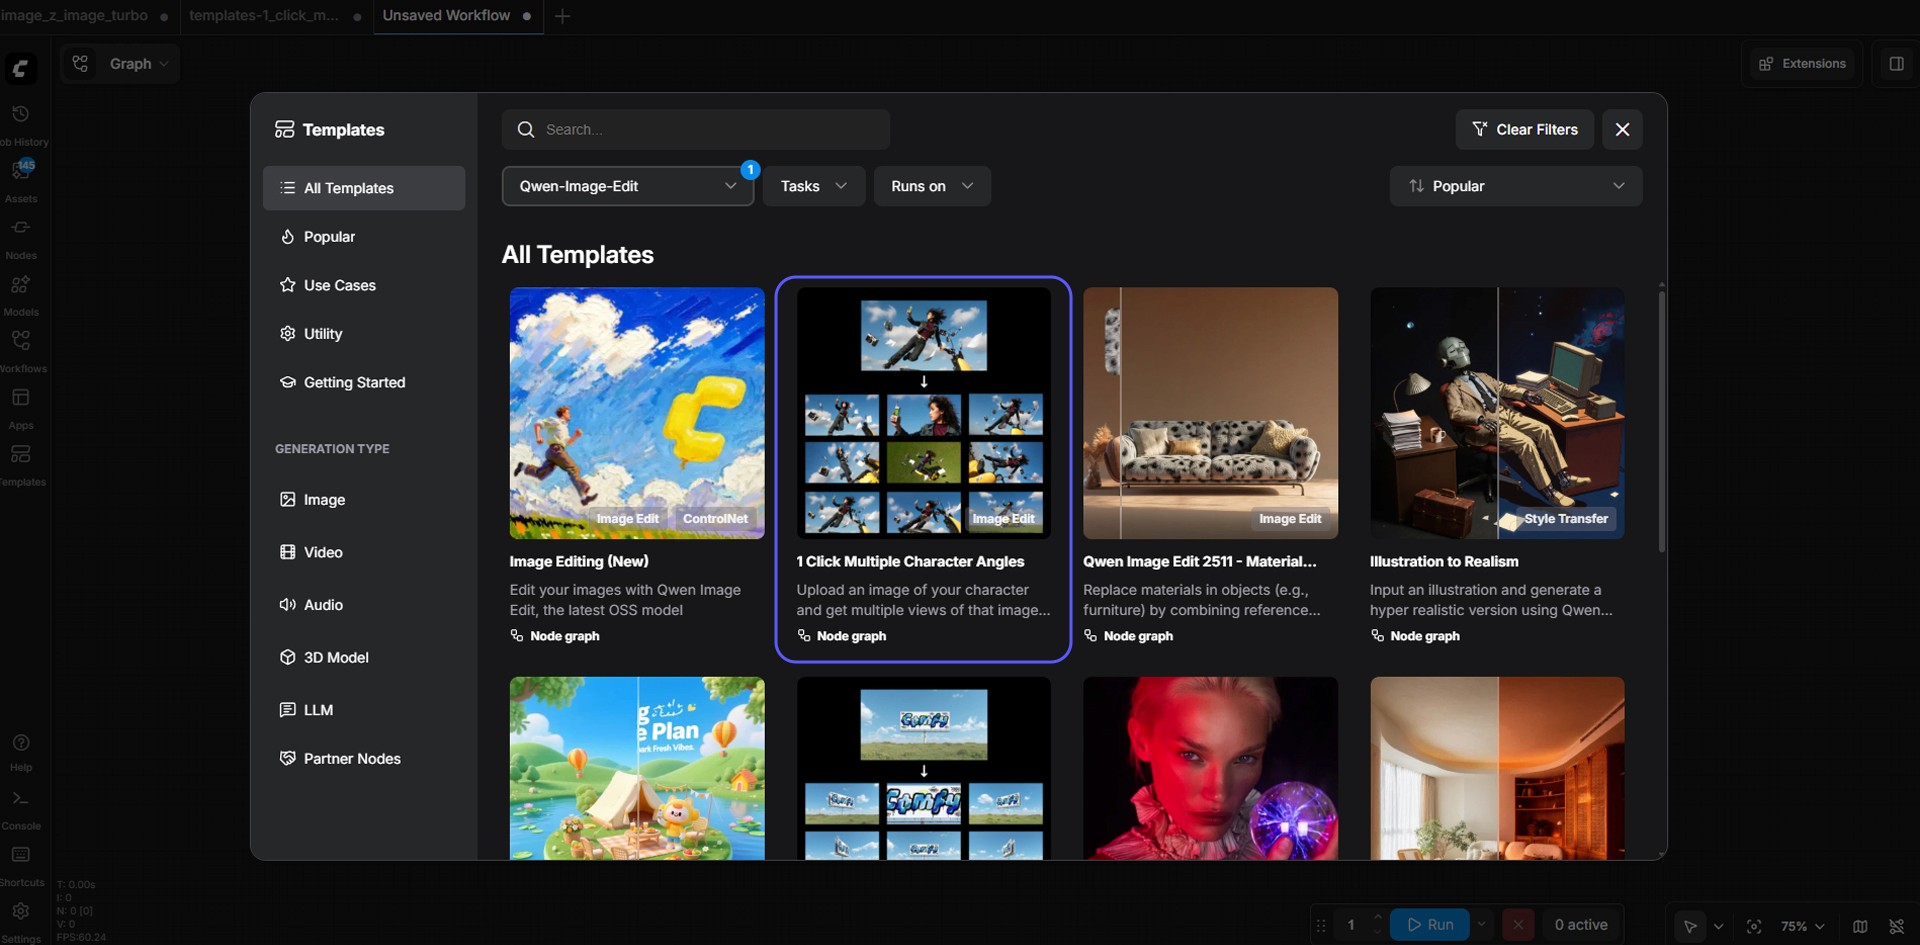
Image caption: The multiple character angles template uses the base image to generate several views of the same virtual influencer.
Go back to the Templates tab.
Search for templates-1_click_multiple_character_angles.
Depending on the version, you may also see something like v1.0 in the name.
Click it, and the workflow will load.
The structure is straightforward. On one side, you provide your base image. On the other side, the workflow outputs multiple angle variations.
Step 5: Install the Required Models for the Angle Workflow
This second workflow uses the Qwen Image Edit family, so you need a different set of model files.
The key files are:
Text Encoder: qwen_2.5_vl_7b_fp8_scaled.safetensors
Diffusion Model: qwen_image_edit_2511_bf16.safetensors
VAE: qwen_image_vae.safetensors
Multiple Angles LoRA: qwen-image-edit-2511-multiple-angles-lora.safetensors
Place them into the proper ComfyUI folders:
ComfyUI/models/text_encoders/
ComfyUI/models/diffusion_models/
ComfyUI/models/vae/
ComfyUI/models/loras/
After placing the files, refresh the browser or restart ComfyUI.
This step is important because many setup problems come from file names being slightly different or models being placed in the wrong folder.
Step 6: Load Your Base Character Image
Now take the image you saved from the base portrait step and load it into the image input node.
This is the heart of the workflow.
At this stage, the model is not trying to invent a brand-new person from scratch. Instead, it uses your existing image as the character foundation and expands it into multiple views.
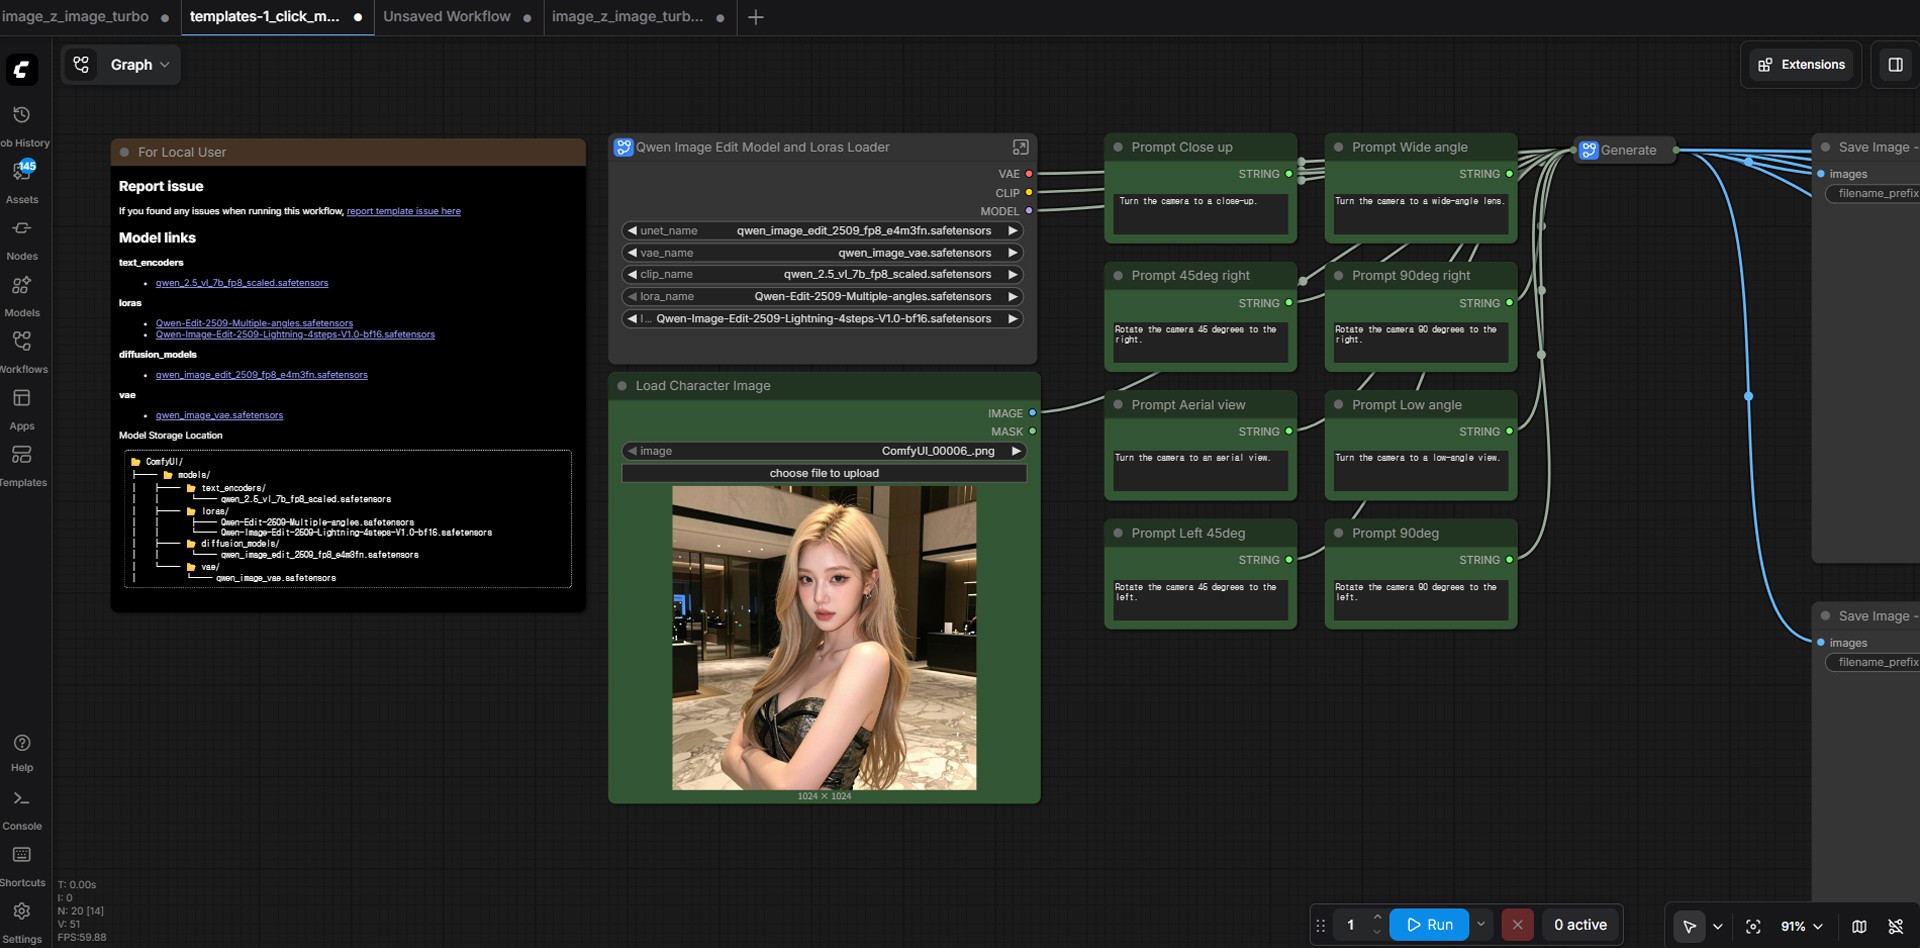
Image caption: Load the saved base portrait into the image input node so the workflow can generate multiple angle views from the same character.
The quality of your result depends heavily on how clean and readable your base image is.
If your starting image has a clear face, strong hairstyle silhouette, visible outfit shape, and simple composition, the final multi-angle sheet will usually be easier to use.
Step 7: Generate the Multi-Angle Character Sheet
Once everything is ready, click Queue Prompt.
After the generation finishes, you should see a series of outputs showing the same character from several perspectives.
These may include a front-facing portrait, a wider or more full-body composition, a side profile, a turned shoulder view, a slightly elevated view, a slightly lower angle view, a soft three-quarter angle, or a back-turned style composition.
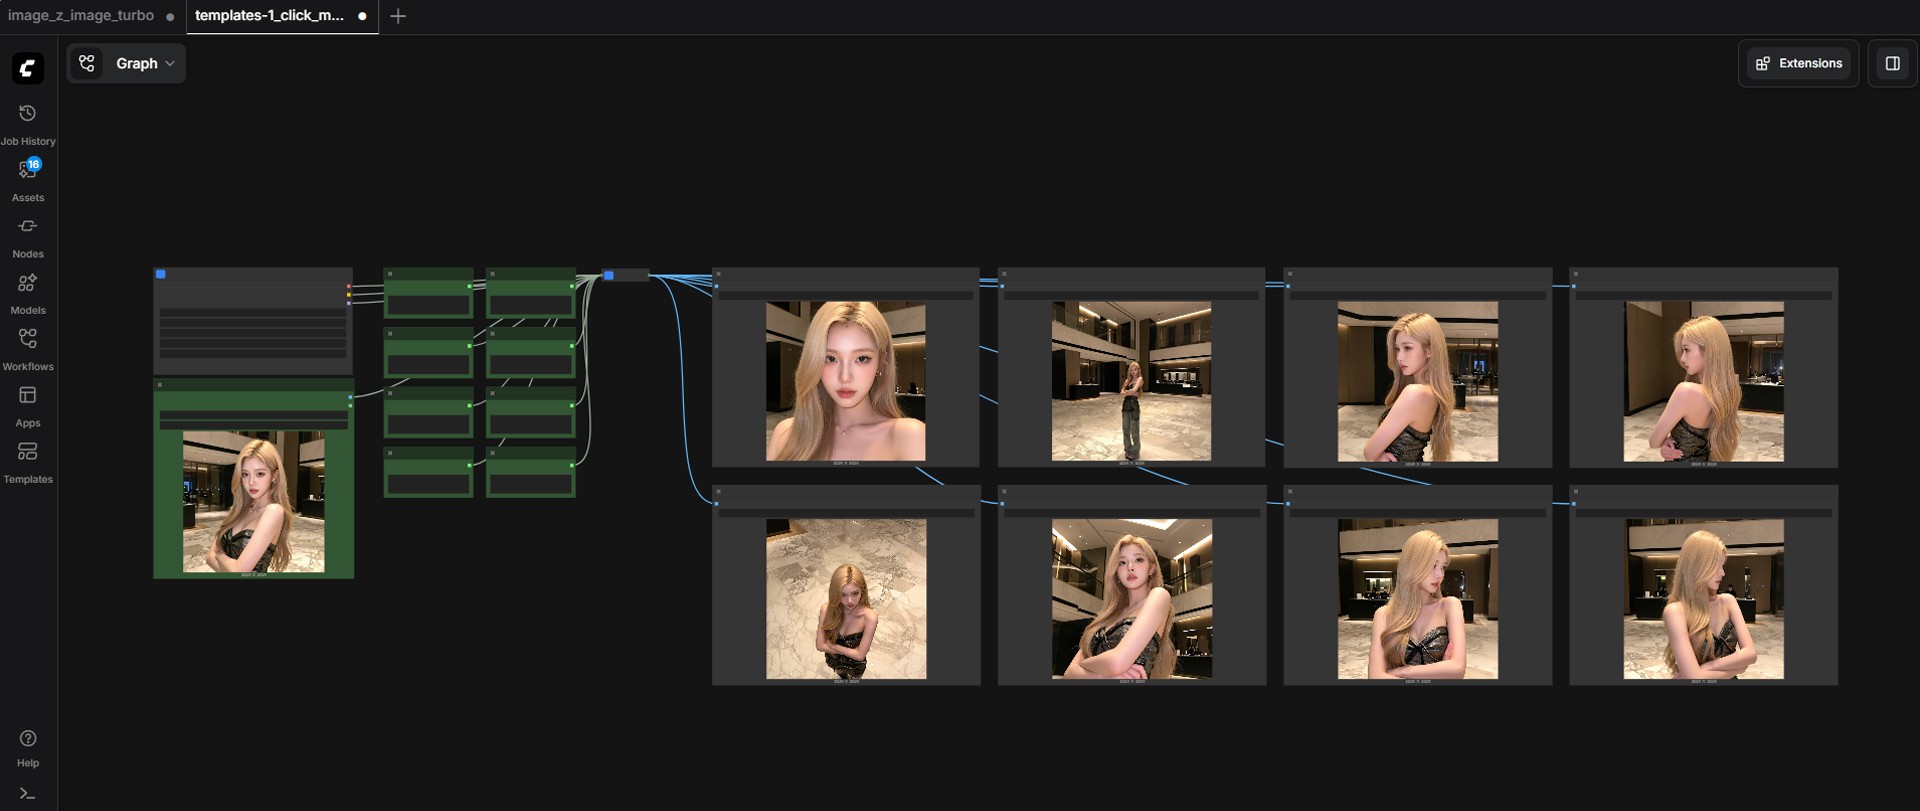
Image caption: The generated output can include several useful character reference views based on the original virtual influencer portrait.
The most important thing is not that every single image is mathematically identical.
The real value is that the overall identity stays recognizable across multiple views.
That means the face, hair, outfit mood, and general visual impression should feel connected enough to look like the same person.
This is what makes the workflow useful for virtual influencer design.
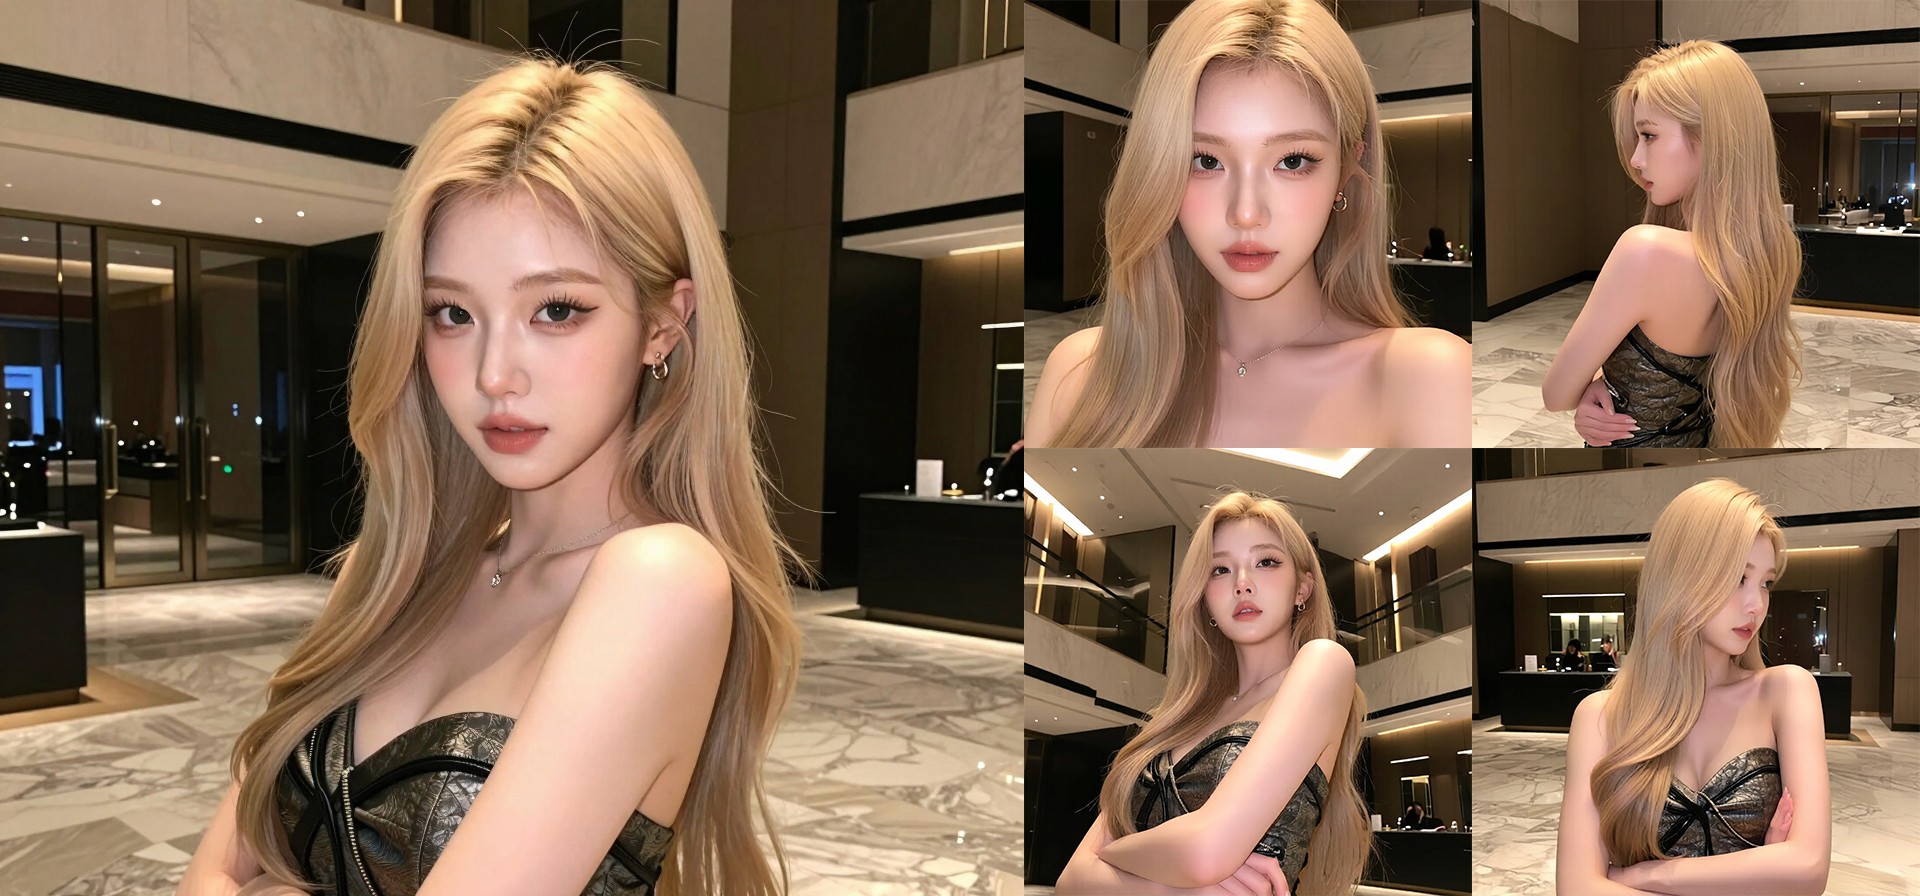
Image caption: A multi-angle character sheet can help creators develop a more flexible visual identity for a virtual influencer.
Common Issues and Simple Fixes
If the face changes too much, go back and create a cleaner base image with a more front-facing portrait and fewer obstructions.
If the hairstyle changes between angles, choose a base image where the hairstyle silhouette is clear and not hidden by shadows or props.
If the outfit becomes inconsistent, use a simpler outfit in the base prompt.
If the workflow cannot find a model file, check the file name and folder location carefully, then restart ComfyUI.
If the result looks too random, keep the template settings close to the original values before changing advanced parameters.
Why This Workflow Is Useful
This workflow is useful because it gives creators a faster way to develop a character beyond a single portrait.
A virtual influencer usually needs more than one good image.
You may need a front view for profile images, side views for motion planning, back views for clothing or hair reference, and three-quarter views for campaign images.
By combining image_z_image_turbo and the multiple character angles template, you can create a more complete visual reference set without building the entire ComfyUI workflow from scratch.
This is especially helpful for creators working on virtual influencer planning, brand visuals, pre-production references, concept art, webtoon character sheets, and future 3D or video workflows.
Responsible Use Notes
When creating a virtual influencer, avoid copying the likeness of a real person without permission.
Do not intentionally recreate celebrities, private individuals, influencers, or someone else’s character design.
If you use the result for branding or commercial content, make sure the character is original enough and does not create confusion with a real person or existing IP.
Also, keep a simple production record.
Save the base prompt, generated base image, template names, model files used, selected outputs, and final usage notes.
This makes the workflow easier to manage if you later use the character for a brand, campaign, or client project.
Conclusion
In this tutorial, we created a multi-angle virtual influencer reference workflow in ComfyUI.
We started by setting up ComfyUI through Stability Matrix.
Then we used image_z_image_turbo to create a clean base virtual influencer portrait.
After that, we loaded templates-1_click_multiple_character_angles and used the base image to generate several views of the same character.
This workflow does not create a true 3D model, and it does not guarantee perfect identity consistency in every output.
However, it can help you move beyond a single front-facing portrait and create a more useful character reference sheet.
The core process is simple.
Create one strong base character image.
Use that image as the foundation.
Expand it into multiple angles.
Select the best outputs.
Build your digital persona from there.
You do not need perfection on the first try.
You just need one solid starting image and a careful review process.
Once you have that, your virtual influencer begins to feel less like a single image and more like a flexible visual identity.
We will return in the next A2SET tutorial with more practical AI workflows for creators, designers, and small production teams.
Quick FAQ
Does this workflow create a real 3D model?
No. It creates a 2D multi-angle character sheet, not a true 3D model that can be freely rotated.
Why do I need a clean base image?
The multiple angles workflow depends heavily on the base image. A clear face, clean silhouette, and simple composition usually create more usable results.
Can I use this workflow for male characters or stylized characters?
Yes. You can change the base prompt and reference direction depending on the character you want to create.
What if the model files are not recognized?
Check whether the files are in the correct ComfyUI model folders, confirm that file names match, then refresh or restart ComfyUI.
Can I use the result for virtual influencer branding?
Yes, but make sure the character is original and does not copy a real person, celebrity, or existing IP.
Why does the face still change sometimes?
AI-generated angle expansion is not mathematically exact. The goal is recognizable identity consistency, not perfect 3D-level precision.
Is this useful for 3D or animation work?
Yes. The generated angle sheet can be used as pre-production reference for 3D modeling, motion planning, character design, or visual development.