Build a Continuous Voice Chat App with Cursor AI and Netlify

Hello creators, welcome back to A2SET’s AI Tutorial.
Have you ever wanted to build your own voice chat app, but felt that app development was too difficult?
Usually, even a simple voice app can require many technical steps. You need a microphone input, speech recognition, AI response generation, text-to-speech output, mobile browser testing, hosting, and sometimes a backend server.
For beginners, that can feel overwhelming.
In this tutorial, we will use Cursor AI to create a simple continuous voice chat web app as a personal prototype. Then we will deploy it with Netlify Drop and test it on a smartphone.
The app idea is simple.
Press the microphone button once.
Speak to the AI.
The app converts your speech into text.
The AI responds.
The browser reads the answer out loud.
When the answer ends, the microphone starts listening again.
This creates a basic continuous voice conversation loop.
This tutorial is for learning and personal testing. It is not a production-ready security architecture. If you want to publish a real service for users, you should use a backend or serverless function to protect your API key.
Before You Start: Prepare Your OpenAI API Key
Before building the app, you need an OpenAI API key.
Go to the OpenAI API platform, log in, and check your billing or credit settings. API usage is separate from a normal ChatGPT subscription, so make sure your API account is ready before testing.
After that, create a new secret key from the API keys page.
Copy the key and save it temporarily in a safe place.
Important note: do not publish your API key inside public code. In this beginner prototype, the app asks for your API key during testing, but this approach should only be used for your own personal demo. For a real public app, route API requests through your own backend or serverless function.
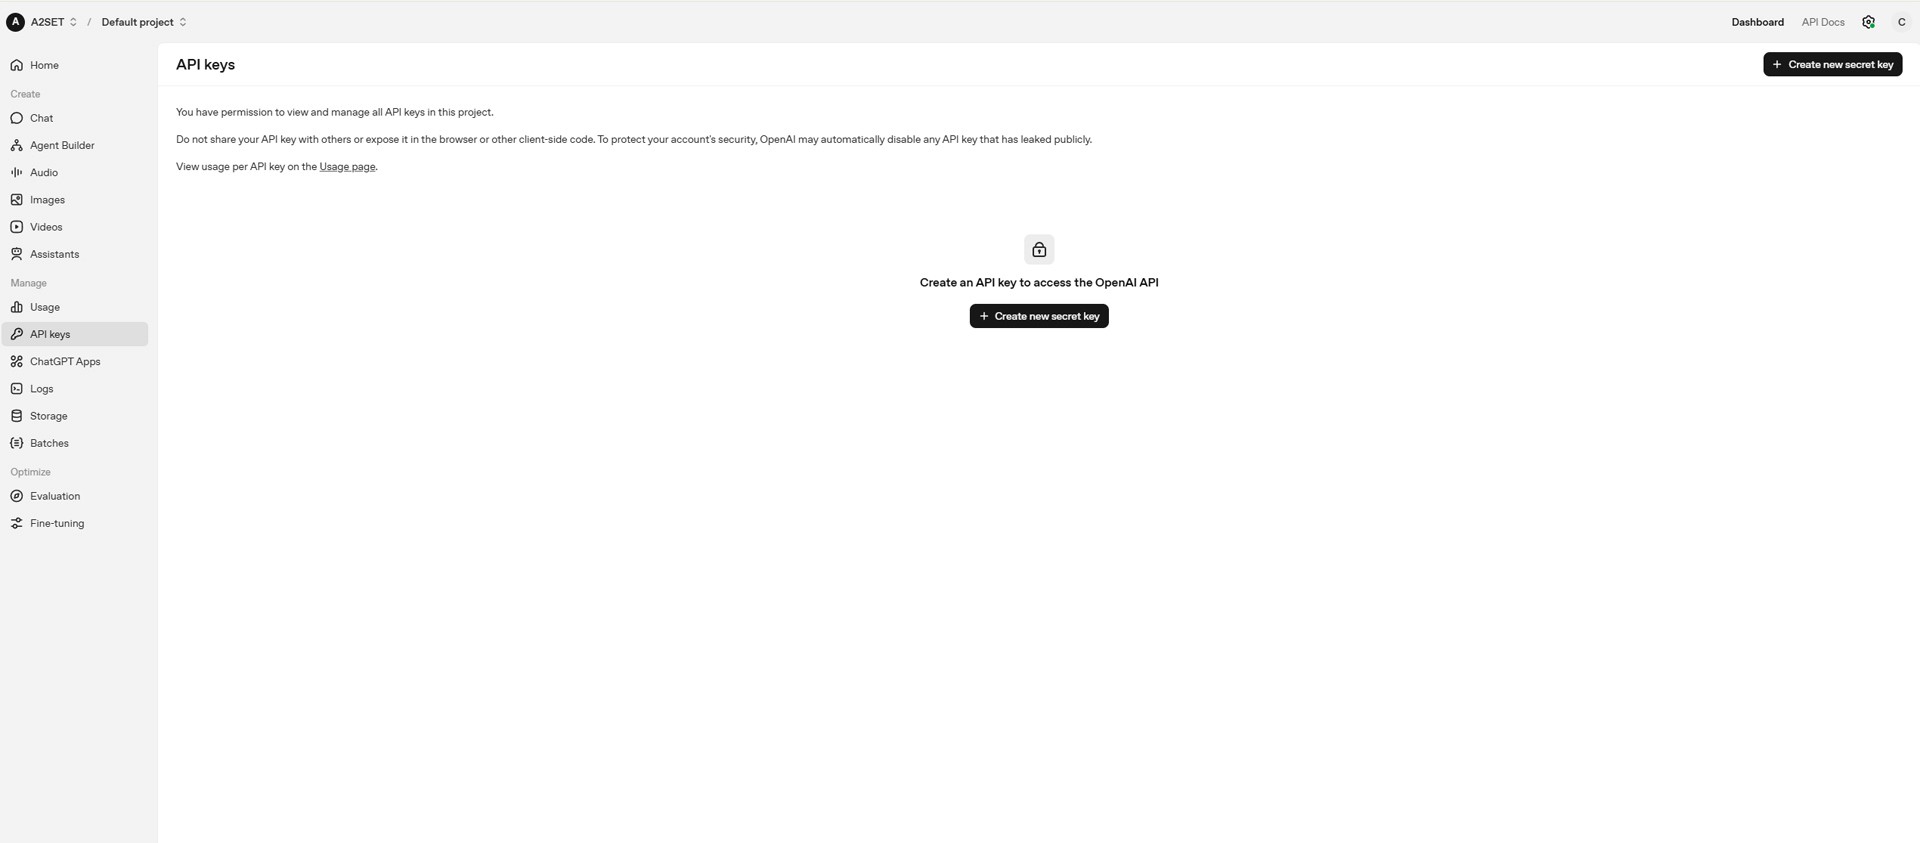
Image caption: Prepare an OpenAI API key for personal testing, but do not hard-code it into public client-side code.
Phase 1: Generate the App with Cursor AI
Now we will create the app files with Cursor AI.
Cursor is an AI-powered code editor that can help generate and edit code from natural language prompts. In this workflow, we will ask Cursor to create a single HTML file that includes the interface and the basic voice chat logic.
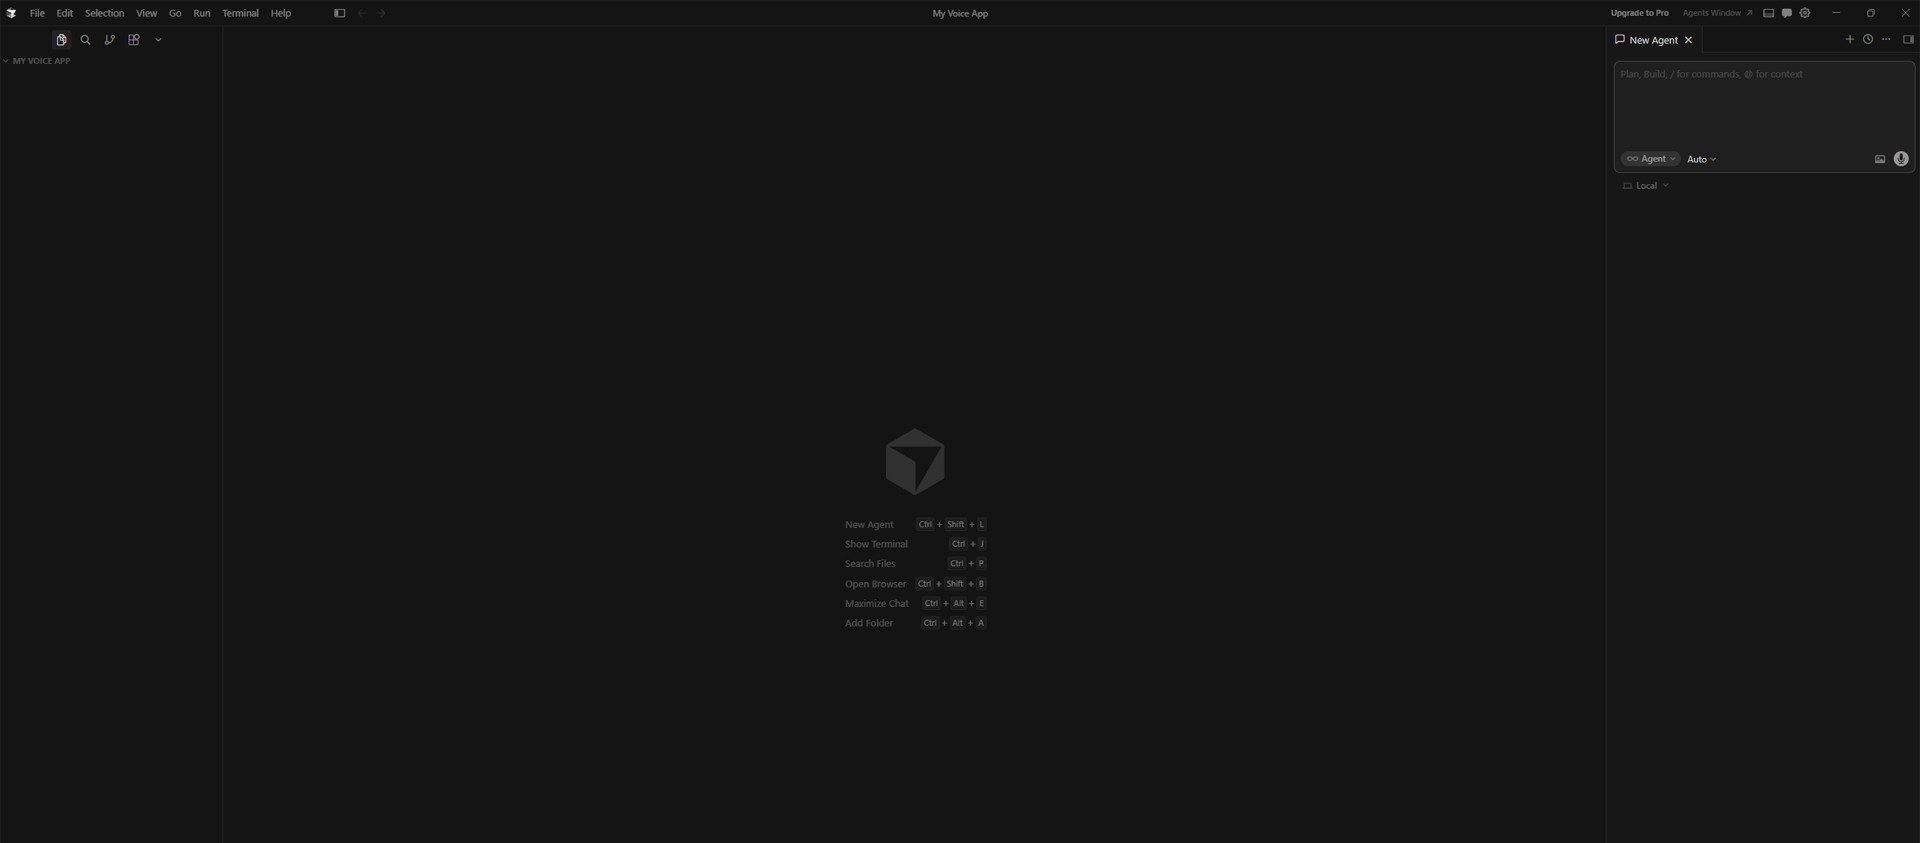
Image caption: Cursor AI can help create a simple prototype app from a structured prompt.
Step 1: Download Cursor and Open a Project Folder
First, download and install Cursor from the official website.
Create an empty folder on your desktop and name it:
Open Cursor.
From the top menu, choose File → Open Folder, then select the My_Voice_App folder.
This folder will store your app files.
Step 2: Open the Cursor Composer
Inside Cursor, click the empty workspace area.
Then open the AI Composer or chat-style coding panel. Depending on your version of Cursor, the shortcut or interface may be slightly different, so use the current Cursor UI if the shortcut has changed.
The goal is simple.
We want to give Cursor one clear instruction and ask it to create a single index.html file.
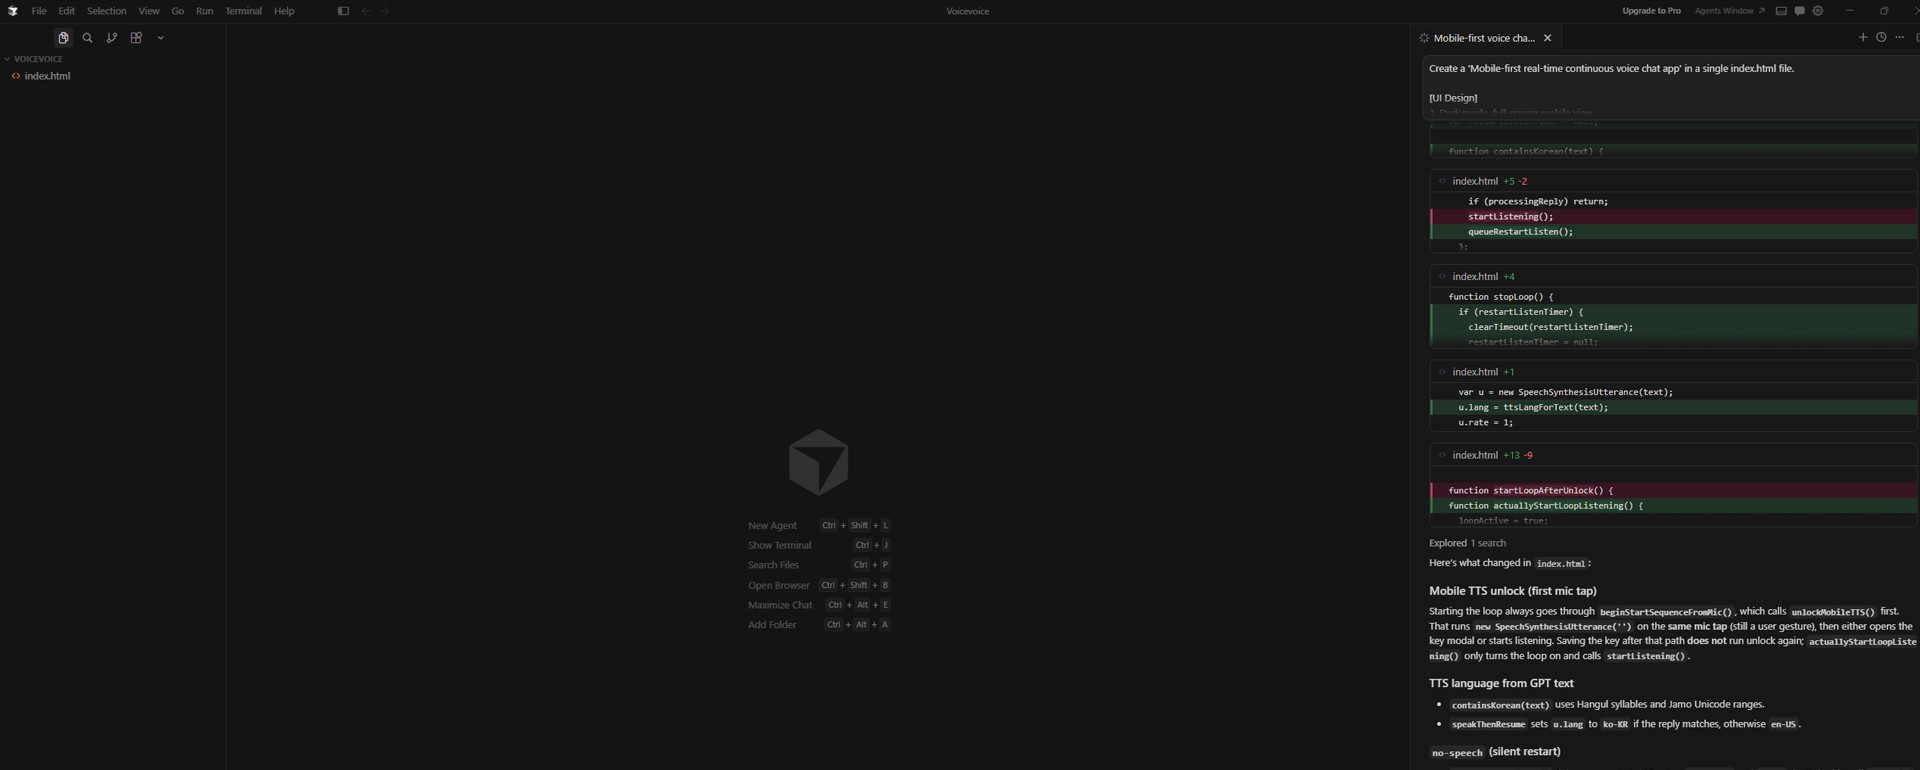
Image caption: Use Cursor’s AI Composer to generate the first version of the voice chat app.
Step 3: Paste the App Generation Prompt
Copy and paste the prompt below into Cursor.
This prompt keeps the original article’s idea: a mobile-first continuous voice chat app with a neon mic button, speech recognition, OpenAI response, text-to-speech, and a loop that restarts listening after the AI finishes speaking.
After pasting the prompt, let Cursor generate the file.
When Cursor finishes, check the file list on the left. You should see an index.html file.
Click Accept or Accept All if Cursor asks you to confirm the generated code.
Image caption: After Cursor generates the code, accept the changes and make sure index.html appears inside your project folder.
Do not worry if you do not understand every line of code yet. For this tutorial, the main goal is to create a working prototype and understand the overall workflow.
Phase 2: Deploy with Netlify Drop
Now we will put the app online so it can be tested on a smartphone.
For this tutorial, we will use Netlify Drop. It lets you deploy a simple web project by dragging and dropping your project folder into the browser.
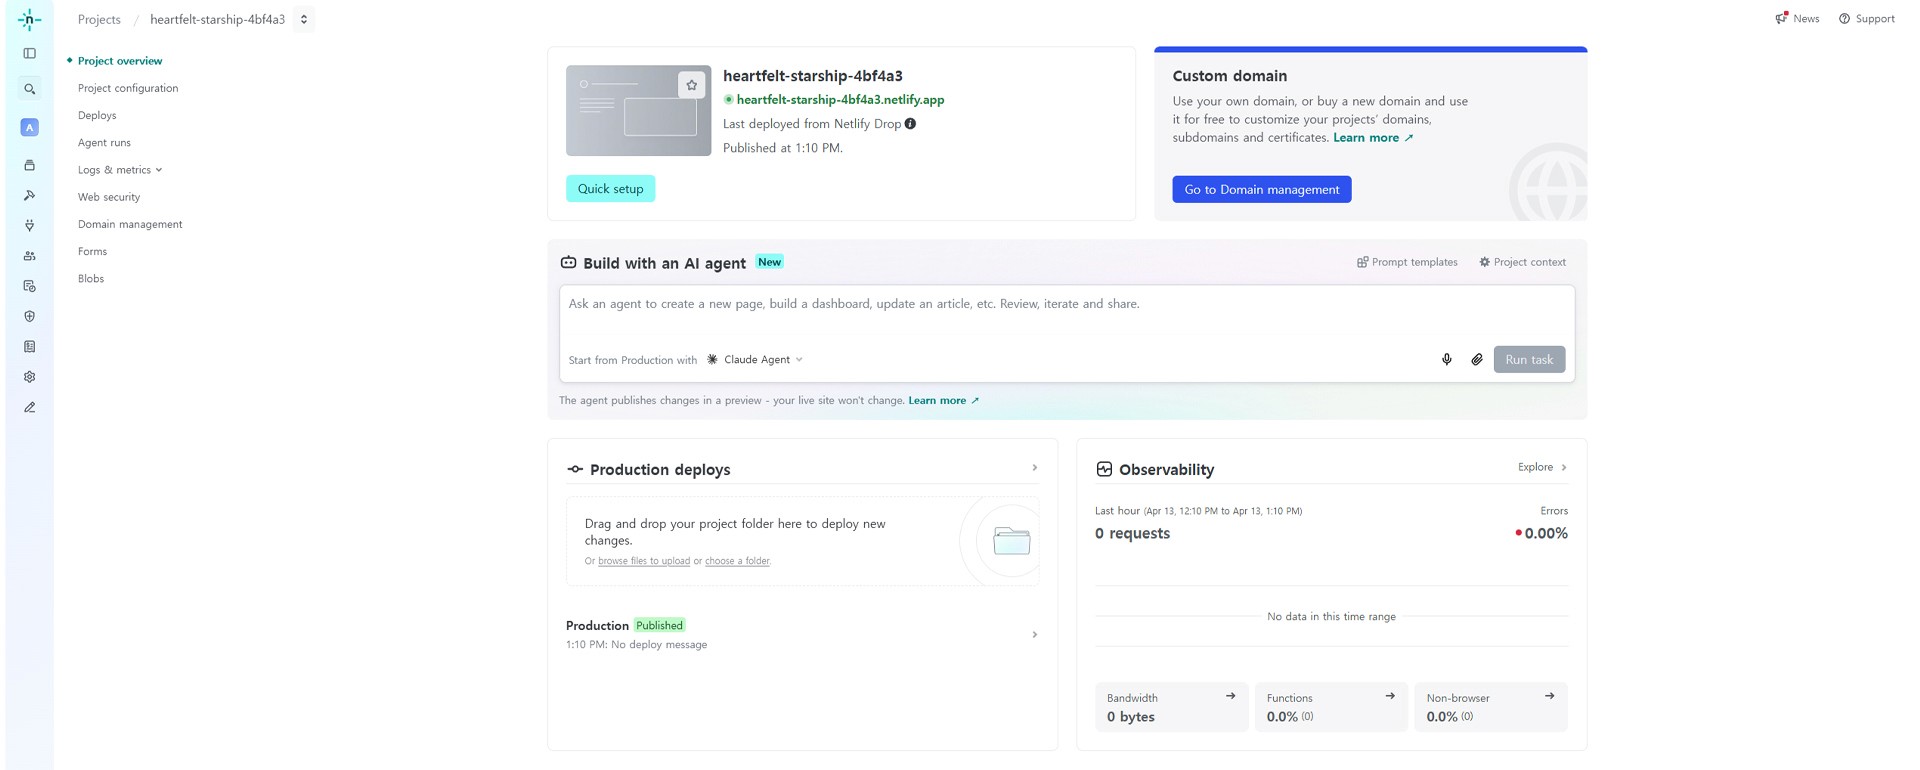
Image caption: Netlify Drop lets you publish a simple web project by uploading your local folder.
Step 4: Deploy the Folder to Netlify
Open your browser and go to Netlify Drop.
Log in or create an account if needed. You can also test the drag-and-drop flow first, but signing in makes it easier to manage or delete the site later.
Drag the My_Voice_App folder into the Netlify Drop area.
Wait for Netlify to upload and deploy the files.
When the deployment is complete, Netlify will give you a URL ending in:
Open the URL in your browser to check whether the app loads.
Step 5: Test on Your Smartphone
Now open the deployed URL on your smartphone.
For the best chance of microphone compatibility, test with Chrome on Android or a modern mobile browser that supports the required speech features. Browser support can vary, so if the app does not work on one browser, test another.
When the app opens, paste your OpenAI API key into the key input area.

Image caption: API Key Input area.
Then tap the microphone button once.
Allow microphone permission when your browser asks.
Try a simple question:
The app should listen to your voice, send the text to the AI, read the answer out loud, and then start listening again after the response ends.
If the app does not work immediately, check the following:
Is the API key entered correctly?
Did the browser allow microphone permission?
Does the browser support speech recognition?
Is your OpenAI API billing or credit setting active?
Is the Netlify URL loading the latest index.html file?
Optional: Add the App to Your Home Screen
If the app works well, you can add it to your smartphone home screen.
On Chrome, open the browser menu and select Add to Home Screen if the option is available.
This creates an icon on your home screen so you can open the web app more easily.
It will still be a web app, not a native App Store or Play Store app, but it can feel more app-like for personal testing.
Image caption: Adding the web app to your home screen can make the prototype easier to test like a simple mobile app.
Bonus: How to Delete the Netlify Site
After testing, you may want to remove the deployed site.
Go back to your Netlify dashboard.
Open the site you deployed.
Find Site configuration or Site settings.
Scroll down to the Danger Zone area.
Click Delete site and follow the confirmation steps.
If you deployed without properly claiming or managing the site, check Netlify’s current dashboard instructions. Interface details may change over time.
Important Security Note
This tutorial creates a simple prototype for personal testing.
It is not the safest architecture for a public app.
A browser-only app cannot fully protect an API key if the key is used directly from the client side. Even if the key is not hard-coded, client-side API usage can still expose sensitive credentials or create misuse risk.
For a real public service, use a backend server or a serverless function.
A safer production architecture would look like this:
This keeps the OpenAI API key on the server side instead of exposing it in the browser.
For a future advanced tutorial, this app could be upgraded with Netlify Functions, Supabase Edge Functions, Firebase Functions, or another backend service.
Common Issues and Simple Fixes
If the microphone does not start, check browser permission settings and test another browser.
If speech recognition is not supported, add this message to the app:
If the AI does not answer, check your API key, billing status, and browser console errors.
If the app keeps listening at the wrong time, ask Cursor to improve the start and stop state management.
Use this prompt:
If the voice output overlaps with the microphone, ask Cursor to add a delay.
If the mobile layout feels awkward, ask Cursor to improve the UI.
Why This Workflow Is Useful
This workflow is useful because it shows how quickly a creator can move from an idea to a working prototype.
You do not need to start with a full app framework.
You do not need to publish to the App Store.
You do not need to build a complex backend for the first test.
Instead, you can use Cursor AI to create a simple HTML prototype, deploy it with Netlify Drop, and test the core experience on a phone.
This is useful for early experiments such as:
voice chatbot demos,
AI assistant prototypes,
language practice tools,
voice-based FAQ bots,
personal productivity apps,
and simple interactive AI concepts.
Once the idea works, you can decide whether it is worth building a more secure and scalable version.
Responsible Use Notes
Voice apps can feel personal, so they should be handled carefully.
Do not collect or store user voice data without clear notice and permission.
Do not publish an app that asks users for API keys unless you clearly explain the risk.
Do not expose your own API key in public code.
Do not present a prototype as a secure production app.
Do not use the app for sensitive medical, legal, financial, or emergency advice.
If you plan to make this public, rebuild it with a backend and a proper privacy policy.
For professional projects, also keep a simple record of the tools used, API settings, deployment URL, testing notes, and known limitations.
Conclusion
Today, we created a simple continuous voice chat web app using Cursor AI, OpenAI API, browser speech features, and Netlify Drop.
The workflow is simple.
Prepare an OpenAI API key.
Create a project folder.
Use Cursor to generate a single index.html file.
Deploy the folder with Netlify Drop.
Open the URL on your smartphone.
Test the microphone, AI response, and text-to-speech loop.
This is not a production-ready app, but it is a useful prototype for learning how voice-based AI interactions work.
The most important lesson is that AI coding tools can help creators test ideas much faster than before. But faster prototyping does not remove the need for security, testing, and responsible deployment.
Start with a small demo.
Test it personally.
Check browser compatibility.
Protect your API key.
Then upgrade the architecture if you want to publish it for real users.
That is how AI app prototyping becomes more practical and safer as a real creative workflow.
We will return in the next A2SET tutorial with more practical AI workflows for creators, designers, and small production teams.
Quick FAQ
Can I build this without coding knowledge?
You can create a basic prototype with Cursor AI and a clear prompt, but you should still review, test, and understand the limitations before using it publicly.
Is this a real mobile app?
No. It is a web app deployed online. You can add it to your home screen, but it is not a native App Store or Play Store app.
Is it safe to put my OpenAI API key in the browser?
For public apps, no. This tutorial is for personal testing only. A production app should use a backend or serverless function to keep the API key secure.
Why does speech recognition not work on my phone?
Browser support varies. Some browsers may not fully support SpeechRecognition. Try a supported browser and check microphone permissions.
Can I share the Netlify URL with other people?
For this prototype, it is better not to share it widely. If other people need to use it, build a backend-based version first.
Can I use this for a real customer service chatbot?
Only after improving the architecture, security, privacy policy, logging, error handling, and backend API protection.
What should I improve next?
The next step is to move the OpenAI API call into a backend or serverless function, then add better authentication, rate limits, and usage controls.