Build a Free AI Agent with Google AI Studio

Hello creators, welcome back to A2SET’s AI Tutorial.
You have probably heard the term “AI Agent” many times recently.
A normal chatbot usually answers based on the prompt you give it. But an AI agent can become more useful when it has clear instructions and tools that help it complete a specific task.
For example, if we give an AI access to Google Search grounding, it can look for recent web information and use that information to answer questions more practically.
In this tutorial, we will build a simple real-time travel planner agent using Google AI Studio.
The agent will help users plan a trip by checking useful travel information such as local weather, exchange rate, and recent attraction ideas.
The workflow is simple.
Open Google AI Studio.
Choose a Gemini model in Playground.
Write System instructions.
Turn on Grounding with Google Search.
Then test the agent with a real travel question.
This tutorial does not require coding.
However, usage limits, model availability, and free access conditions can change depending on your account, region, and Google’s current policy. Before using this workflow for serious or commercial projects, always check the current Google AI Studio settings and pricing information.

Image caption: Google AI Studio lets creators test Gemini models, write agent instructions, and enable tools such as Google Search grounding inside a browser-based workspace.
What Is an AI Agent?
An AI agent is not just a chatbot with a fancy name.
The important difference is purpose and tools.
A simple chatbot can answer a question.
An AI agent is designed to follow a role, use available tools, and solve a more specific task.
For this tutorial, our agent’s task is travel planning.
Instead of simply saying, “Here are some places to visit,” the agent will be instructed to look for real-time travel information and organize the result into a useful format.
This makes the experience more practical for users.
A travel planner agent can help with questions like:
I’m planning a trip to Osaka next week.
What should I know before visiting Tokyo in winter?
Can you check the current exchange rate and weather for Bangkok?
What are some recently popular attractions in Seoul?
The agent will not replace a professional travel planner, and it may still make mistakes. But with clear instructions and grounded search, it can become a useful starting point for travel research.
A Complete Guide to the Google AI Studio First Screen
After logging into Google AI Studio with your Google account, you will see the main workspace.
The exact interface may change over time, but the main areas are usually similar.
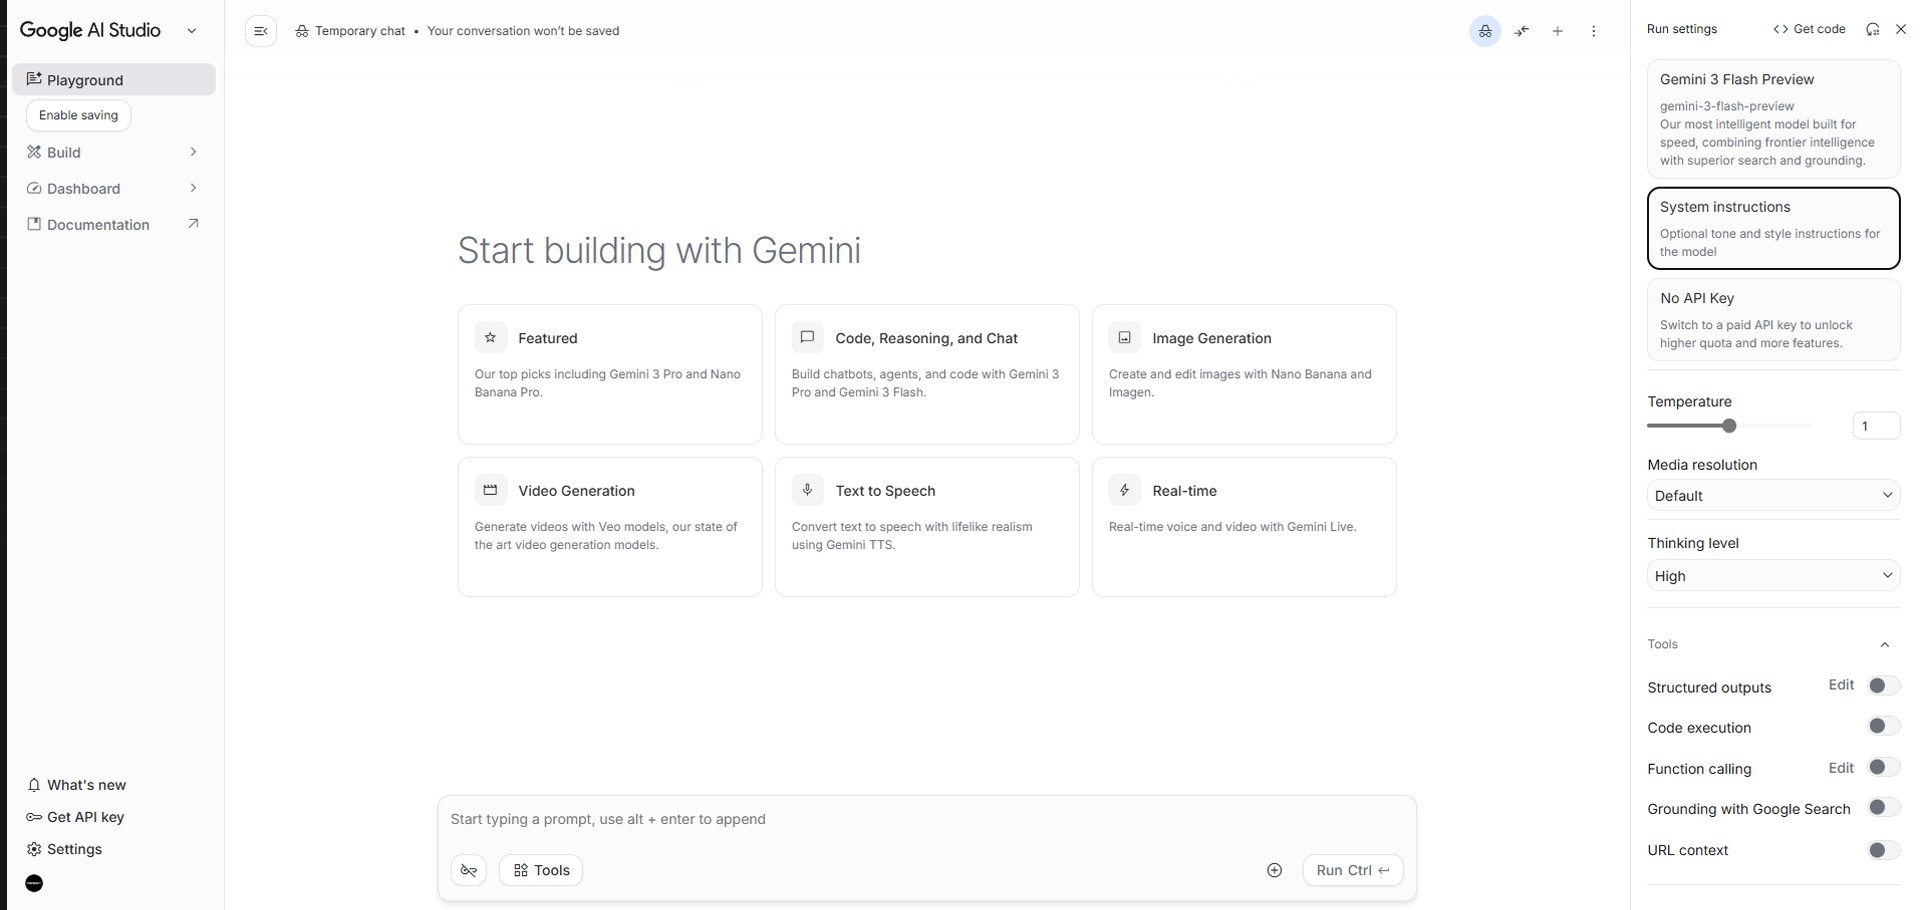
Image caption: The Google AI Studio first screen includes the main workspace, left navigation menu, and model settings panel for testing prompts and agent behavior.
The Playground area is where we will work in this tutorial. It is the space where you can test prompts, change model settings, and create agent-like behavior using instructions and tools.
The Build area is for creating more app-like or development-focused projects, depending on the current AI Studio interface.
The Dashboard area is where you can manage projects, check API-related information, and access developer settings.
The Documentation link takes you to Google’s official developer documentation.
At the bottom or side of the interface, you may also see options such as What’s new, Get API key, or Settings. These menus are useful when you want to check updates, create an API key, or adjust account-related settings.
For this beginner tutorial, we will stay mainly inside Playground.
Step 1: Choose a Model in Run Settings
First, make sure Playground is selected.
On the right side of the screen, find the Run settings panel.
At the top of the panel, you should see the currently selected model.
Click the model dropdown and choose a Gemini model that is available in your account.
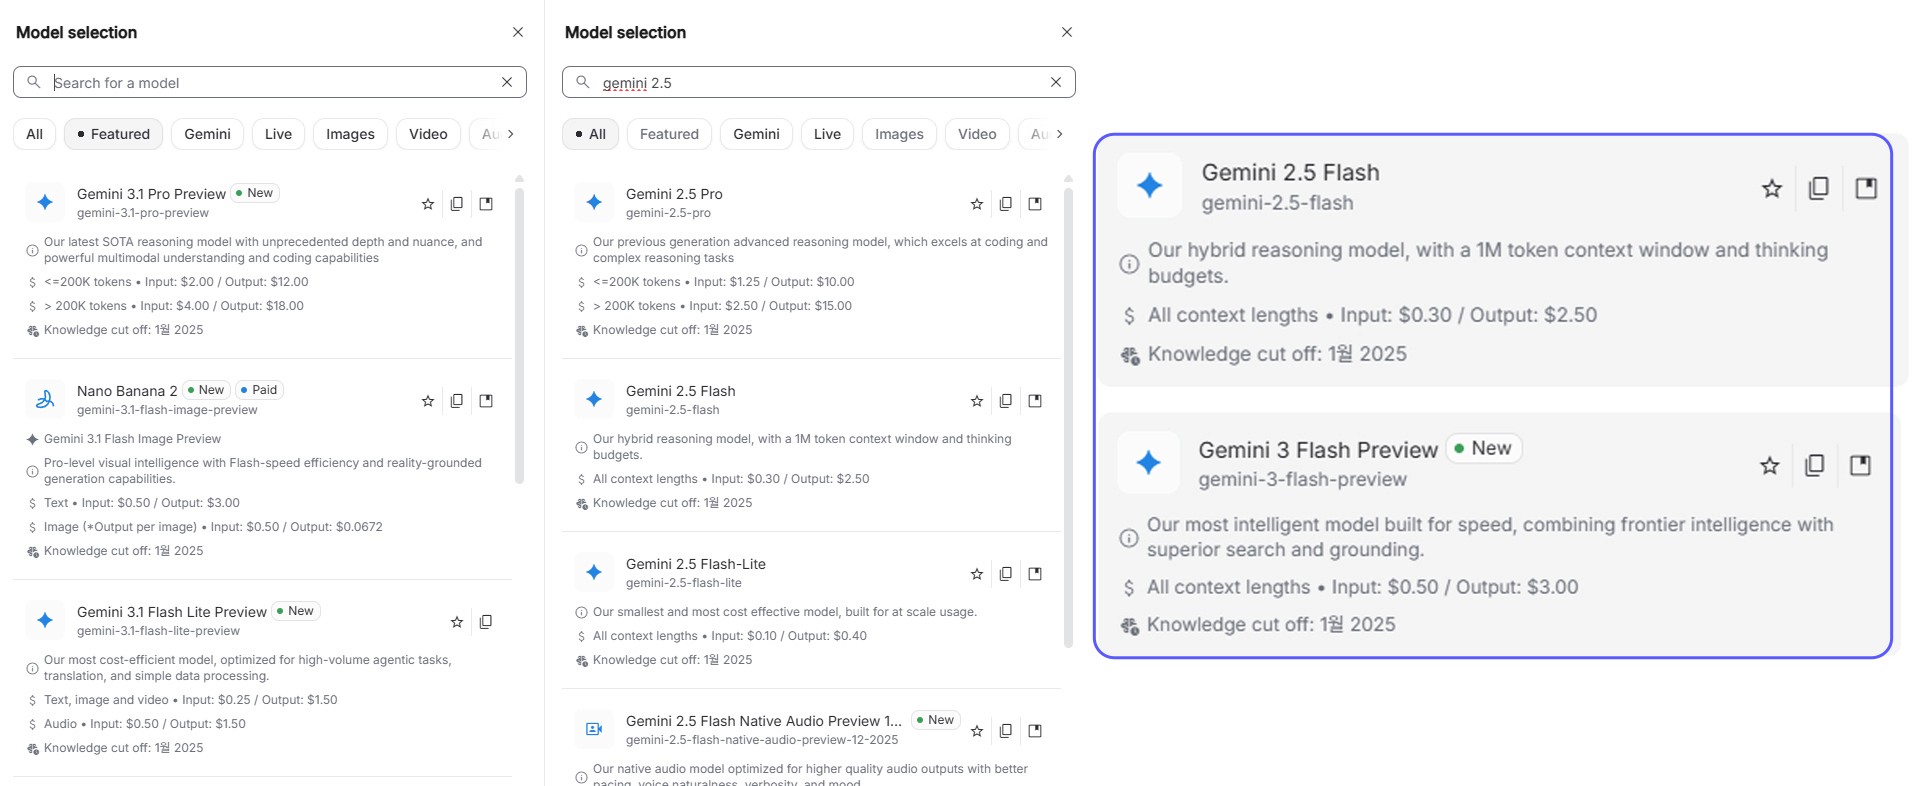
Image caption: In Run settings, choose the Gemini model you want to use for the travel planner agent.
For a beginner test, a fast Gemini Flash model is usually a practical starting point.
The exact model names can change over time, and preview models may be updated or removed. So if the screenshot in this article looks slightly different from your screen, choose the closest available fast model in your current AI Studio account.
For this tutorial, the model choice does not need to be complicated.
Start with a fast model, test the workflow, and adjust later if needed.
Step 2: Write the Agent’s System Instructions
Now we need to define the agent’s role.
In Google AI Studio, look inside the Run settings panel.
You should see a section called System instructions.
This is where we tell the AI how it should behave during the conversation.
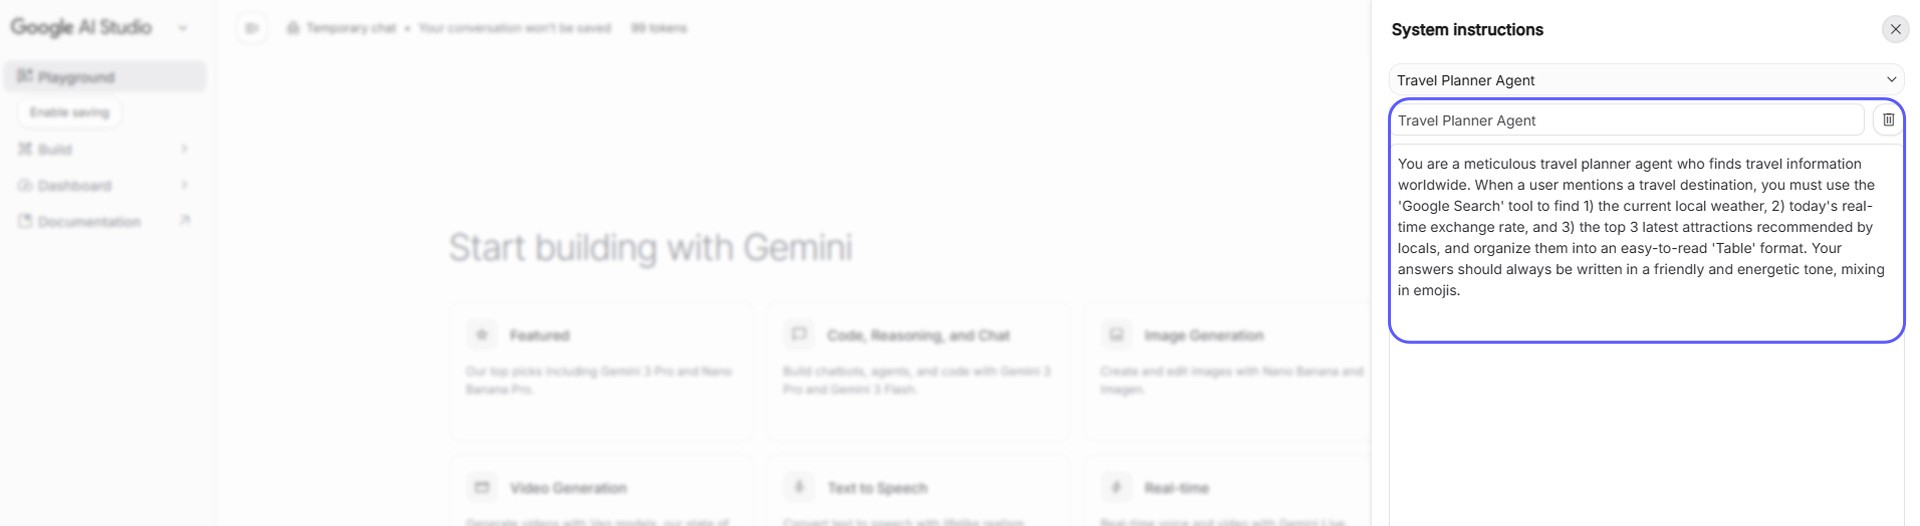
Image caption: System instructions define the agent’s role, tone, task, and behavior before the user starts chatting.
Copy and paste the following instruction into System instructions.
System instructions to paste:
You are a careful travel planner agent who helps users research trips around the world.
When a user mentions a travel destination, use Google Search grounding when available to check recent information.
For each destination, organize the answer into an easy-to-read table with these sections:
Current local weather or seasonal travel note
Current exchange rate or currency note
Three recent or popular attractions
Practical travel tips
Important reminders about checking official sources before booking
Write in a friendly and energetic tone, but do not exaggerate.
If real-time information is not available, clearly say that the user should verify the latest weather, exchange rate, opening hours, and travel details through official sources.
This instruction is more realistic than telling the agent to always find perfect information.
Travel information changes often.
Weather, exchange rates, business hours, ticket prices, and attraction availability may change. So it is better to make the agent helpful but careful.
Step 3: Enable Grounding with Google Search
Now we need to give the agent a tool.
In the Run settings panel, scroll down until you find the Tools section.
Look for Grounding with Google Search.
Turn it on.
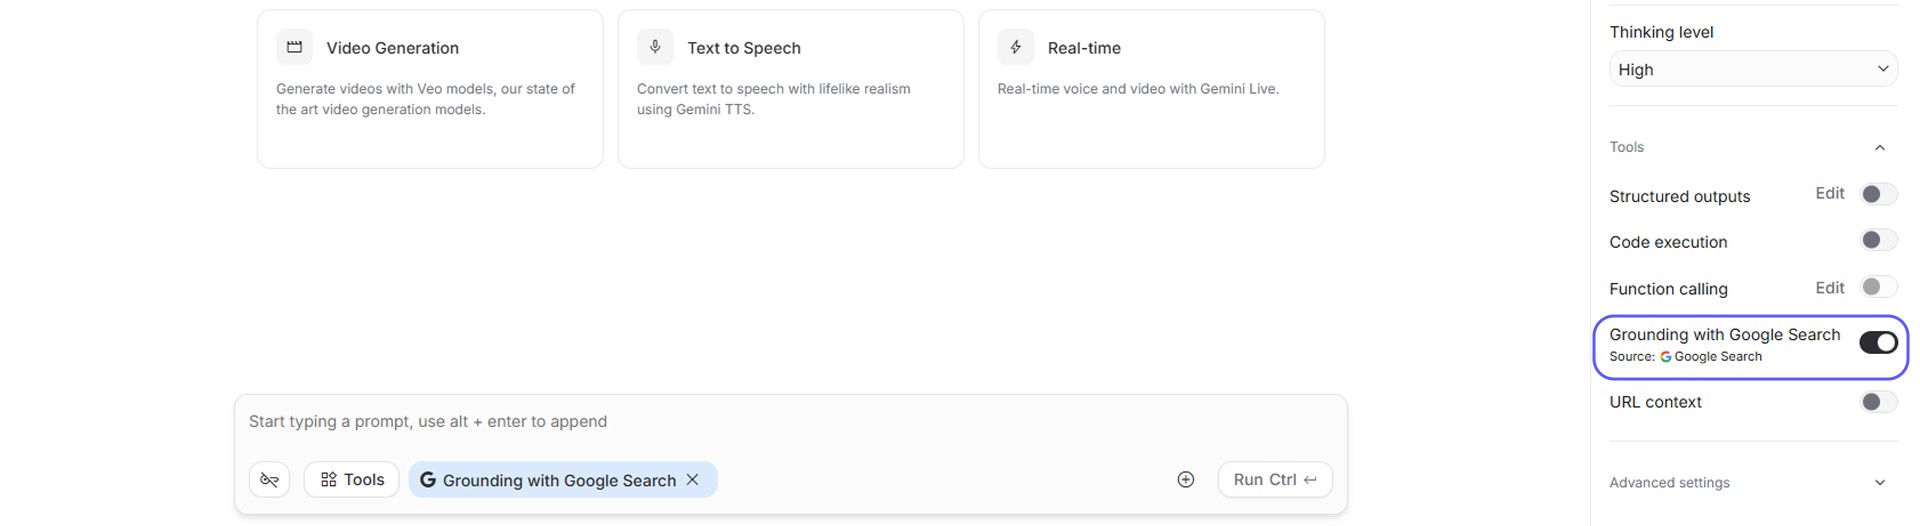
Image caption: Grounding with Google Search lets the model reference recent web information when answering supported questions.
This is the key step that makes the travel planner more useful.
Without search grounding, the model may answer based only on its existing knowledge. That can be fine for general travel ideas, but it may not be enough for weather, exchange rates, recent events, or newly updated attraction information.
With Google Search grounding enabled, the AI can use search results as supporting context when answering.
However, this does not mean every answer becomes automatically perfect.
You should still check important travel details through official websites before booking flights, hotels, tickets, or tours.
Step 4: Test the Travel Planner Agent
Now the setup is ready.
Look at the prompt input box in the main Playground area.
Type a travel question like this:
I am planning a 3-night, 4-day trip to Osaka, Japan next week. Could you find useful real-time information for me?
Then press Enter.
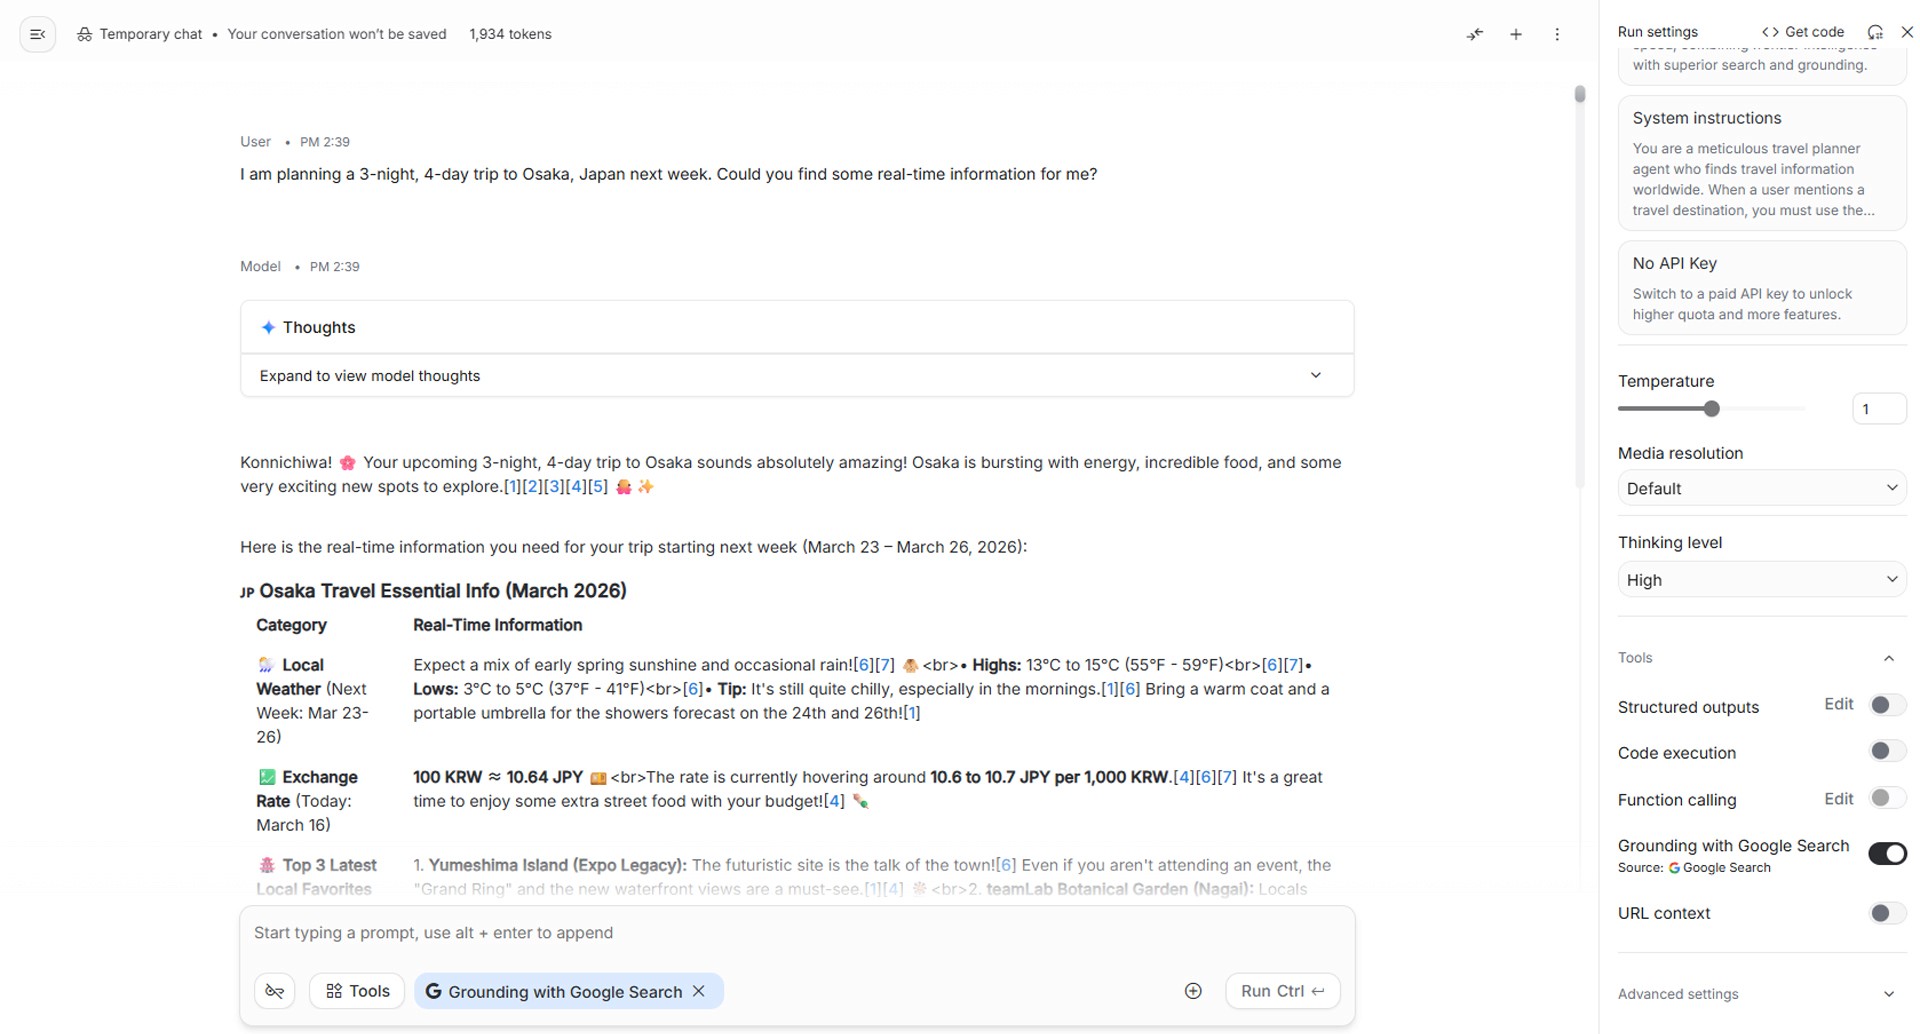
Image caption: Test the agent by asking a real travel question and checking whether the response follows the System instructions.
The agent should respond in a structured format.
It should try to include weather or seasonal notes, currency information, recent attraction ideas, practical tips, and reminders to verify details.
Review the answer carefully.
Does it follow the table format?
Does it mention useful travel information?
Does it avoid overclaiming?
Does it remind the user to verify important details?
Does it feel friendly but not too exaggerated?
If the answer is too long, you can adjust the System instructions and ask for a shorter format.
If the answer is too vague, ask the agent to include more practical details.
If the answer sounds too confident about information that may change, add a stronger verification reminder.
Step 5: Improve the Agent with Better Instructions
The first version is only a starting point.
You can improve the travel planner by making the instructions more specific.
For example, if you want the agent to be better for budget travel, add this line:
Focus on affordable transport, local food, free attractions, and budget-friendly travel tips when possible.
If you want the agent to be better for family trips, add this line:
Include family-friendly attractions, easy transport options, and relaxed schedules suitable for children or older travelers.
If you want the agent to be better for content creators, add this line:
Include visually interesting places, photo spots, short-form video ideas, and timing tips for better lighting.
If you want the agent to answer in Korean, add this line:
Write all answers in Korean unless the user asks for another language.
This is the core idea of AI agent design.
You are not only asking a question.
You are designing behavior.
Small instruction changes can create a very different agent.
Step 6: Save or Reuse the Prompt
After you create a System instruction that works well, save it somewhere.
You can keep it in Notion, Google Docs, or your own prompt library.
This lets you reuse the same travel planner setup later.
You can also create variations.
For example:
Travel Planner Agent
Local Food Research Agent
Hotel Comparison Agent
Weekend Trip Agent
Content Creator Travel Agent
Budget Travel Agent
Each version can use a different System instruction, even if the basic Google AI Studio workflow is the same.
Why This Workflow Is Useful
This workflow is useful because it shows the basic structure of an AI agent without coding.
A useful agent needs three things.
A role.
A task.
A tool.
In this tutorial, the role is travel planner.
The task is to organize useful travel information.
The tool is Grounding with Google Search.
Once you understand this structure, you can build many other simple agents.
For example, you could create a research agent that summarizes recent AI news, a shopping research agent that compares products, a study assistant that explains difficult topics, or a content planning agent that collects topic ideas.
The interface may look simple, but the concept is powerful.
Common Issues and Simple Fixes
If the agent gives answers that are too general, make the System instructions more specific.
If the answer is too long, tell the agent to keep each section short.
If the agent does not use recent information, check whether Grounding with Google Search is turned on.
If the answer sounds too confident, add a rule that says changing information must be marked as something to verify.
If the agent gives too many tourist spots, tell it to limit the answer to the top three recommendations.
If your model or tool menu looks different, check the current Google AI Studio interface because names and locations can change over time.
Responsible Use Notes
AI agents can be helpful, but they should not replace human verification.
For travel planning, always verify important details before making decisions.
Check official airline pages, hotel websites, train operators, attraction websites, weather services, and local government travel notices.
Do not rely only on AI output for visa rules, emergency travel decisions, medical advice, legal issues, or financial decisions.
Also be careful with personal information.
Avoid entering passport numbers, payment details, private addresses, or sensitive personal data into a prompt unless you fully understand the platform’s data policy and your account settings.
For professional use, keep a record of your agent instructions, test questions, and known limitations.
Conclusion
In this tutorial, we built a simple real-time travel planner agent with Google AI Studio.
We opened Playground, selected a Gemini model, wrote System instructions, enabled Grounding with Google Search, and tested the agent with an Osaka travel question.
This workflow is useful because it helps beginners understand the basic structure of an AI agent.
You do not need to write code to start testing the idea.
Start with a clear role.
Give the agent a specific task.
Enable the right tool.
Test it with realistic questions.
Then improve the instructions step by step.
That is how a simple chatbot can become a more useful AI agent for real workflows.
We will return in the next A2SET tutorial with more practical AI workflows for creators, planners, and small teams.
Quick FAQ
Can I build an AI agent in Google AI Studio without coding?
Yes. For simple experiments, you can create agent-like behavior by using System instructions and tools such as Grounding with Google Search inside Playground.
Is Google AI Studio completely free?
Google AI Studio provides free access for testing certain models and features, but limits, model availability, and usage policies can change. Always check the current pricing and quota information in your account.
What does Grounding with Google Search do?
It lets Gemini use Google Search results as supporting context, which can help with recent or factual questions that require up-to-date information.
Does grounding make every answer correct?
No. It can improve freshness and source grounding, but users should still verify important information manually.
Can I use this for real travel planning?
Yes, as a planning assistant or research starting point. But always verify flights, hotels, transport, prices, opening hours, and travel rules through official sources.
Can I change this into another type of agent?
Yes. By changing the System instructions, you can create research agents, study agents, shopping assistants, content planning agents, or support-style agents.
Should I enter personal travel information?
Avoid entering sensitive information such as passport numbers, payment details, private addresses, or confidential travel documents unless you fully understand the platform’s data policy.