Build Your Own 2D Anime Music Video with AI

Hello creators, welcome back to A2SET’s AI Tutorial.
Have you ever listened to a song and immediately imagined a colorful 2D anime-style opening in your head?
Maybe you imagined a main character running through the city, dramatic wind, glowing lights, emotional close-ups, and fast cuts that match the beat of the music.
In the past, creating this kind of animated music video required a full production team. You needed music production, character design, background art, animation, compositing, editing, and sound mixing.
Today, AI tools make it possible to test this kind of idea much faster.
In this tutorial, we will walk through a practical workflow for creating a short 2D anime-style music video using several AI tools together.
We will use Suno AI to create the song, Google Flow and Nano Banana to create the visual style, Kling AI to animate the images, and CapCut or Premiere Pro to edit everything into a final video.
This does not mean AI will replace a professional animation studio. It will not. A polished animation still needs human direction, strong visual taste, editing sense, and careful review.
However, for concept testing, short-form content, YouTube channel intros, virtual influencer videos, and creative experiments, this workflow can be a powerful starting point.
Image caption: This workflow combines AI music, 2D anime-style image generation, image-to-video animation, and final editing into one creator-friendly pipeline.
Phase 1: Create the Music with Suno AI
Before creating any visuals, you need the music.
A music video is built around rhythm, emotion, and pacing. If the song is slow, the video direction should feel different from a fast J-pop opening. If the chorus is energetic, the edit should become more dynamic at that moment.
For this tutorial, we will use Suno AI to create an anime opening-inspired track.
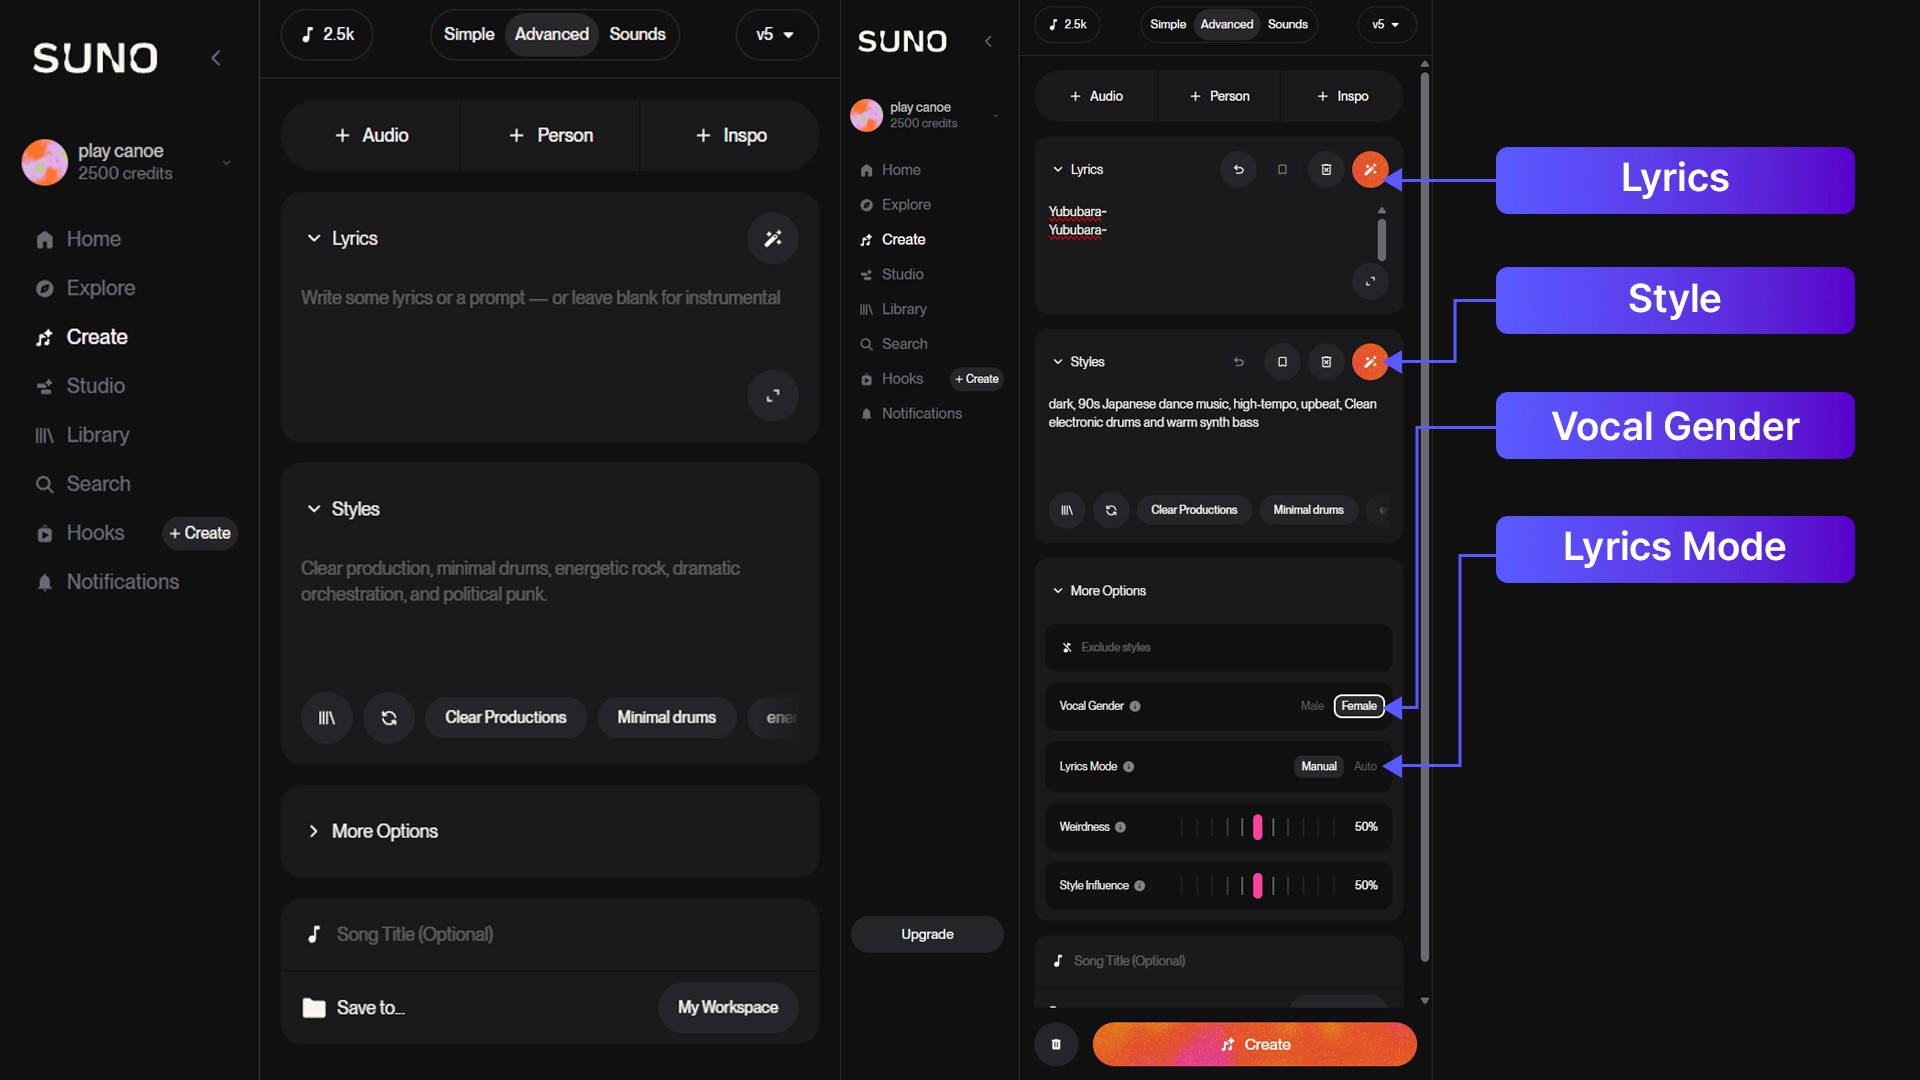
Image caption: Suno AI can help create a vocal track or theme song that becomes the rhythm foundation for the entire music video.
Open Suno and go to Create.
Use Advanced Mode if it is available in your account.
Advanced Mode is useful because it gives you more control over the lyrics, style, title, vocals, and other creative settings.
Start with the lyrics area.
You can write your own original lyrics, or use Suno’s lyric generation feature if you want a starting point. If you write your own lyrics, use structure tags such as [Verse], [Pre-Chorus], and [Chorus] so the song has a clearer shape.
For an anime-style music video, the chorus is especially important. It should feel catchy, emotional, and easy to edit around.
For the Style box, avoid writing only “anime music.”
Instead, describe the energy, genre, tempo, and instruments.
Style prompt example:
High-energy J-Pop, fast tempo, driving bassline, melodic rock guitar, emotional chorus, bright anime opening mood.
This gives the music model a clearer direction.
If your Suno interface includes advanced controls such as vocal gender, style influence, or weirdness, use them carefully. These settings can help guide the performance, but extreme values may also make the result less predictable.
After setting the lyrics, style, and title, click Create and listen to the generated versions.

Image caption: Use Advanced Mode to guide the lyrics, structure, genre, tempo, and vocal direction of the anime-style track.
When listening, check these points.
Does the chorus feel strong enough?
Does the intro start quickly?
Does the song fit the visual mood you want?
Can the rhythm support fast cuts and emotional close-ups?
Is the vocal energy suitable for a 2D anime opening?
If the first version is not right, adjust the style prompt and generate again.
For public or commercial use, always check your Suno plan and usage rights. Music generated on free or paid plans may have different commercial rights depending on Suno’s current policy, so do not assume every generated song is automatically cleared for commercial projects.
Phase 2: Create the Visual Style with Google Flow and Nano Banana
Once the music direction is ready, create the visual foundation.
For a 2D anime-style music video, the key is visual consistency.
If every shot looks like a different character or a different world, the final video will feel disconnected.
In this workflow, we use Google Flow and Nano Banana to create anime-inspired still images that can later be animated.
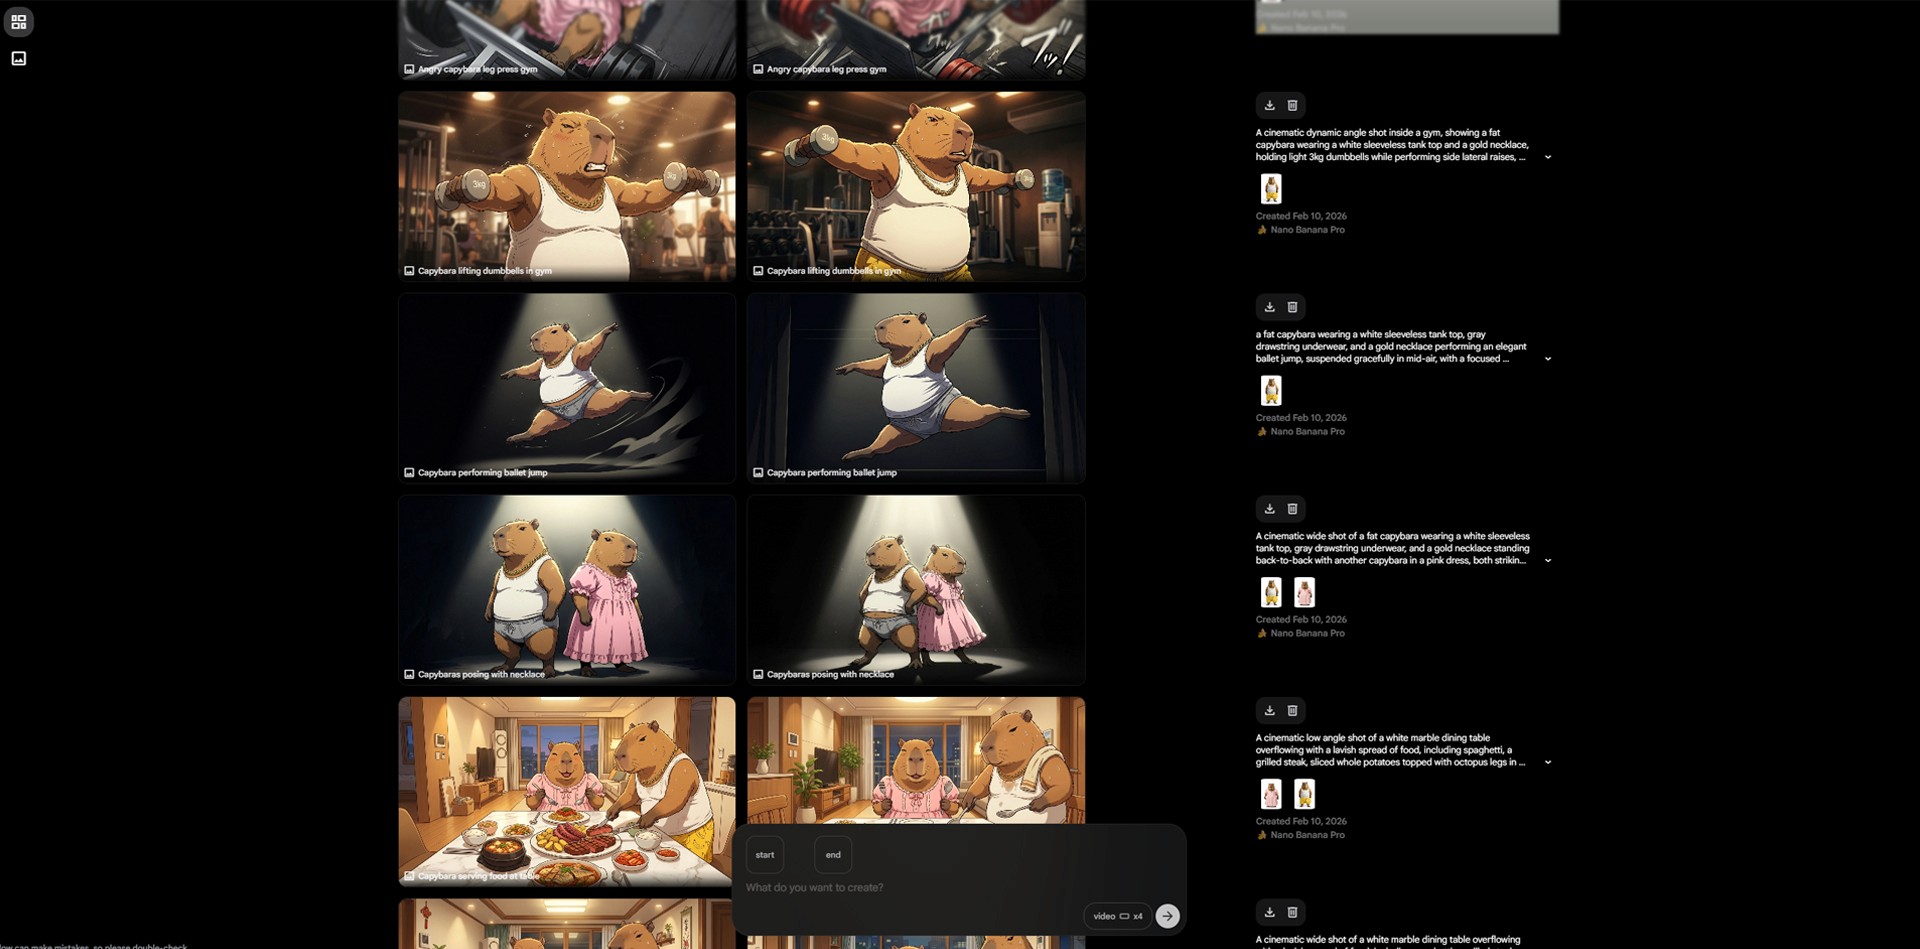
Image caption: Google Flow and Nano Banana can help create 2D anime-style key visuals that define the character, mood, and world of the music video.
Start by defining the main character and visual style.
Instead of writing a vague prompt like “anime girl,” describe the look more clearly.
Prompt example:
A hand-drawn 2D anime-style heroine standing on a rooftop at sunset, wind blowing through her hair, clean linework, cel-shaded rendering, vibrant colors, emotional expression, cinematic composition, glowing city skyline in the background.
This prompt is useful because it describes the subject, location, lighting, style, expression, and composition.
The goal is not to imitate a specific anime series or studio. The goal is to create an original 2D animation-inspired visual direction.
For better consistency, keep repeating the core character description across prompts.
For example, if your main character has short silver hair, a navy school jacket, and a red ribbon, keep those details in every image prompt.
This helps the generated images feel more connected.
You can create several types of shots.
Start with a hero shot of the main character.
Then create a close-up shot for emotional moments.
Create a wide background shot for atmosphere.
Create an action pose for the chorus.
Create a final ending shot for the last beat.
Do not create too many images at once.
Start with 4 to 6 strong visuals that match the music.
Once you have the best images, download them and organize them by scene.
For example:
Intro rooftop shot
Verse close-up
Chorus running shot
Bridge emotional sky shot
Final hero pose
This makes the next animation step easier.
Phase 3: Animate the Images with Kling AI
Now that we have the song and still images, we can turn the images into short animated clips.
In the original workflow, Kling 2.5 Turbo is used for Image-to-Video generation.
Kling can animate uploaded images based on text instructions. It can also support start and end frame workflows depending on the interface and available model.
Image caption: Kling AI can animate still anime-style images into short video clips using image-to-video prompts.
Upload one of your still images into Kling’s Image-to-Video workflow.
Then write a short motion prompt that describes the camera movement, character motion, and atmosphere.
Prompt example:
Cinematic slow pan right, dramatic wind blowing the character’s hair, glowing particles rising in the background, emotional anime opening atmosphere, smooth 2D animation feeling.
This prompt is intentionally focused.
It does not ask for too many actions at once. It describes one camera move, one character motion detail, one background effect, and one mood.
This usually works better than a long prompt filled with unrelated movements.
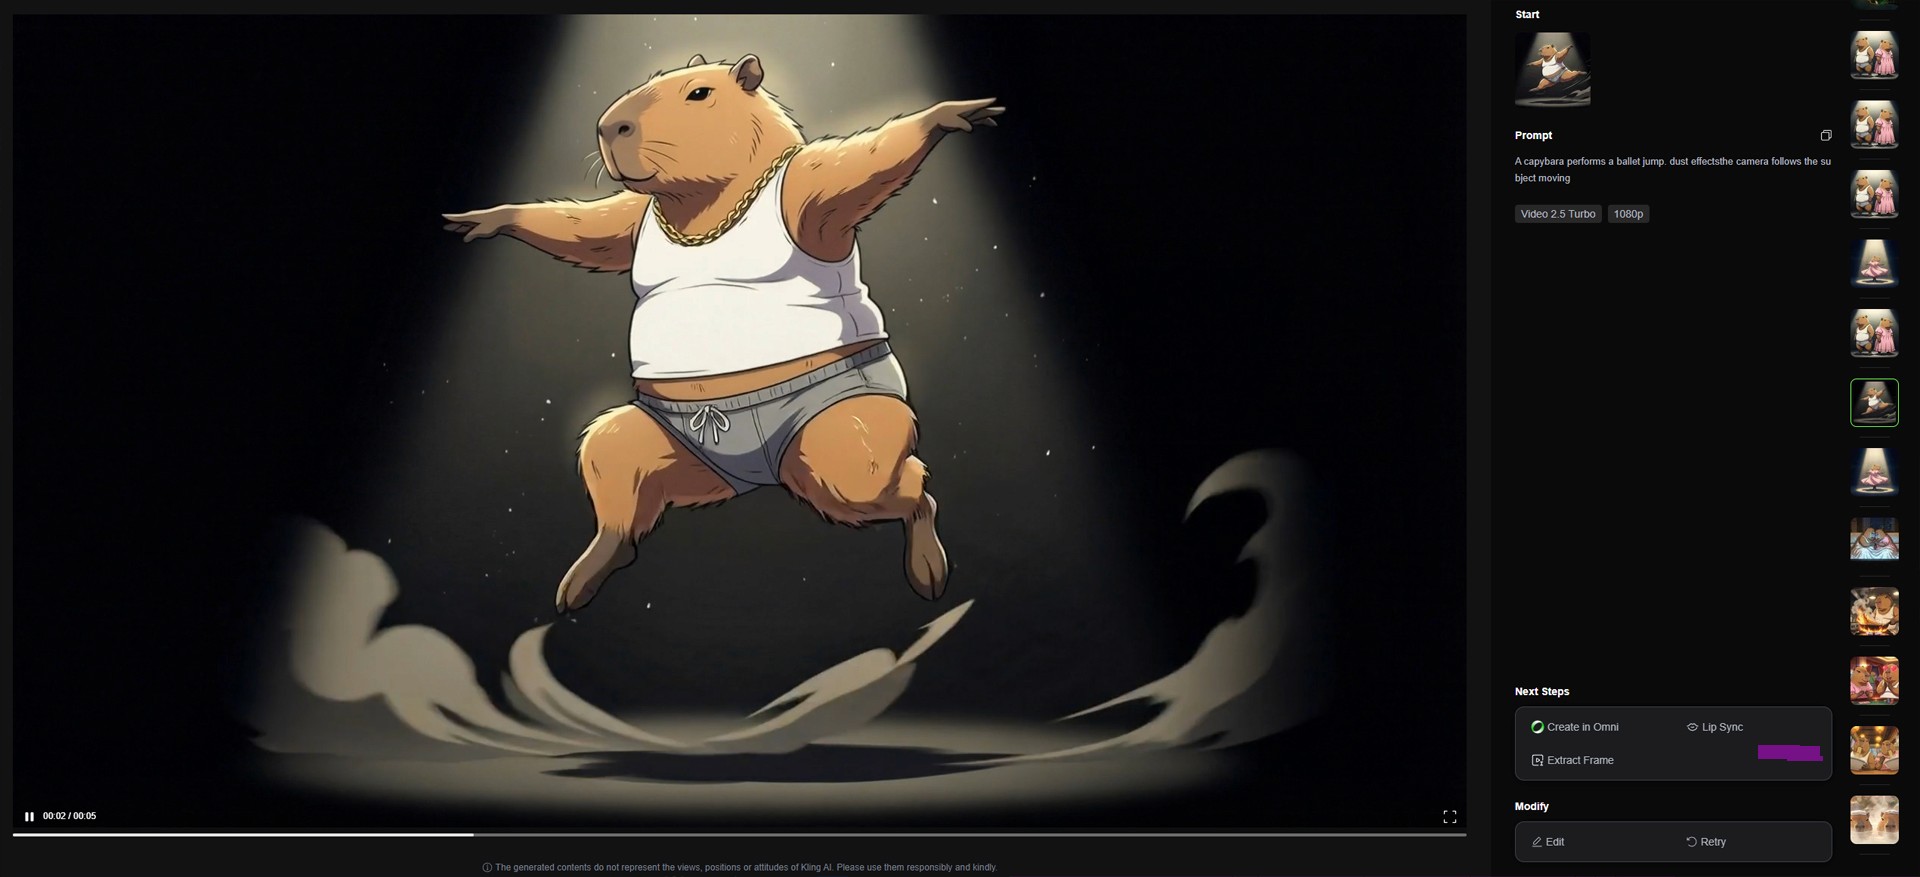
Image caption: A focused animation prompt helps control camera movement, character motion, and background atmosphere without overloading the scene.
For chorus or action scenes, you can write a more dynamic prompt.
Prompt example:
Fast anime opening shot, the character runs forward with determined expression, camera tracks from the side, hair and jacket moving in the wind, bright energy particles streaking behind her.
For emotional scenes, keep the motion slower.
Prompt example:
Close-up of the character looking up at the sky, soft wind moving her hair, slow camera push-in, warm sunset light, emotional and quiet atmosphere.
The key is to match motion intensity to the music.
Verse sections can be slower.
Chorus sections can be faster.
Bridge sections can feel more emotional.
Final shots can be more heroic or dramatic.
If your workflow supports Start and End Frame, you can use it when you want a more specific transition between two still images. For example, the first image can be a close-up, and the end frame can be a wide shot or action pose.
However, do not expect every transition to be perfect. Always review the result carefully and regenerate if the motion feels unnatural.
Phase 4: Edit the Final Music Video in CapCut or Premiere Pro
After generating several animated clips, move into editing.
This is where the music video actually comes together.
Use CapCut if you want a fast and beginner-friendly workflow.
Use Premiere Pro if you want more control over timing, effects, color, and audio.
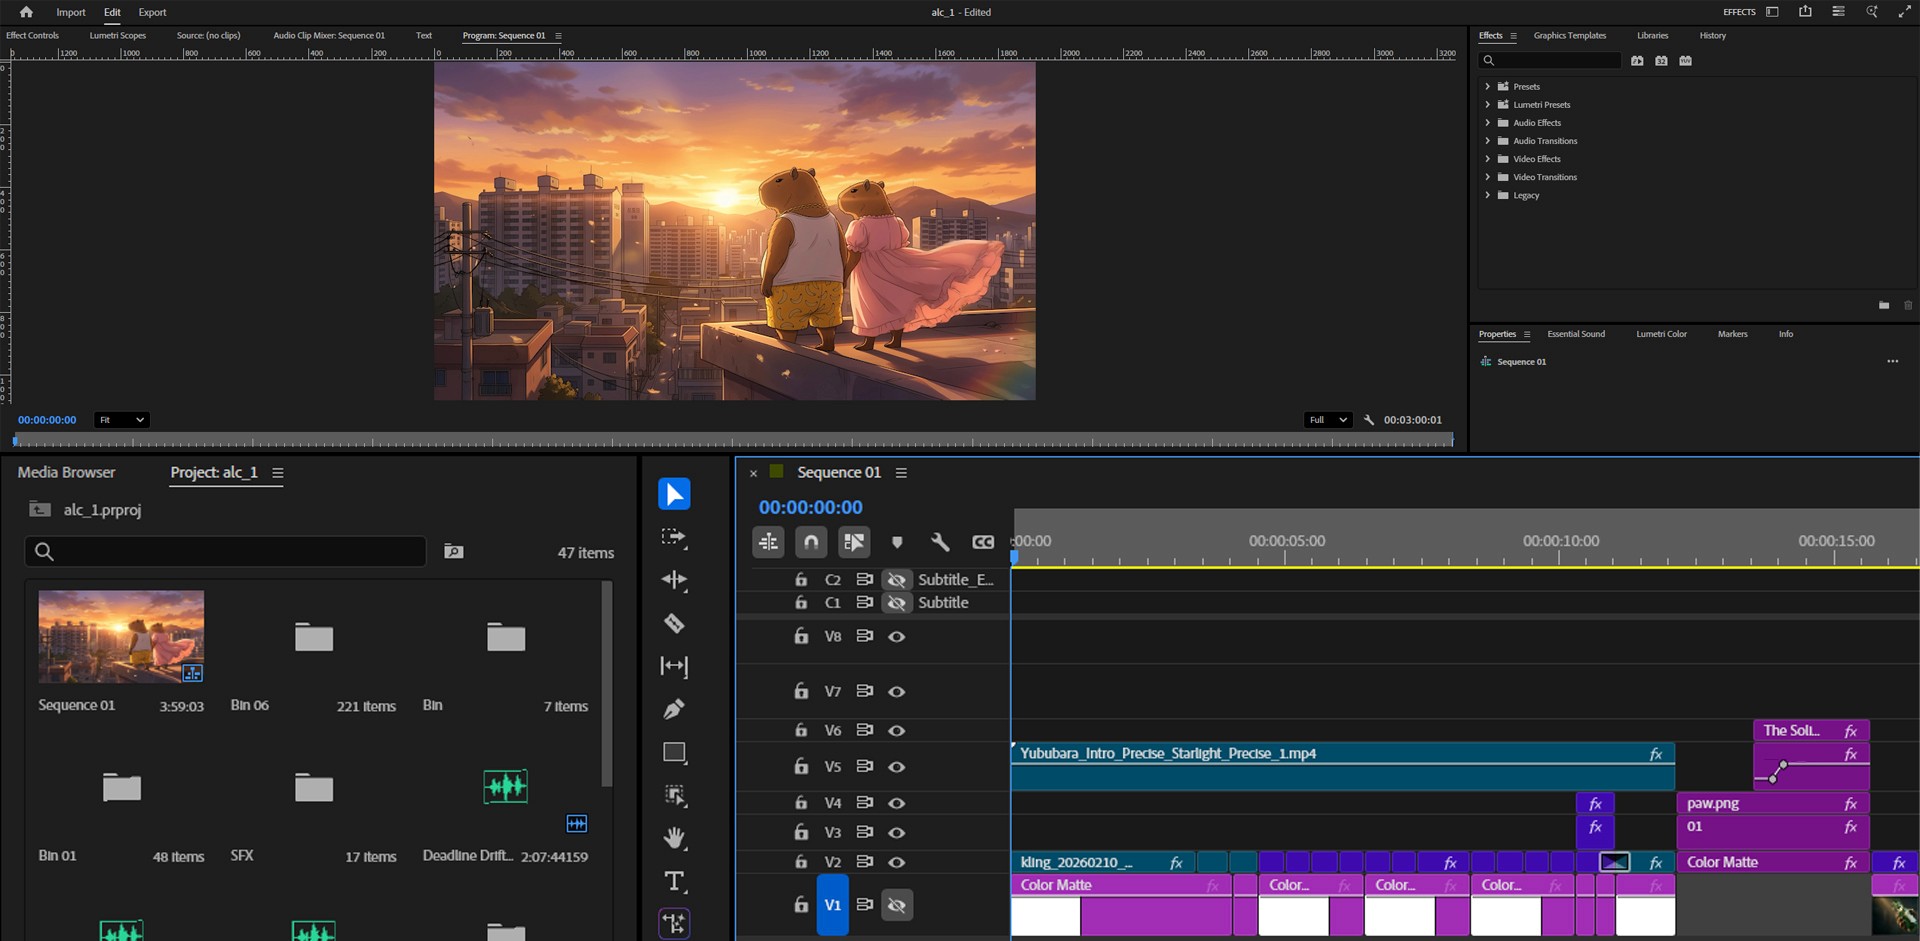
Image caption: The final editing stage combines the Suno track, animated clips, transitions, effects, and optional lyrics into one complete music video.
Start by placing the Suno track on the timeline.
Then listen to the song and mark the important moments.
The intro, first beat, verse, chorus, bridge, and final hit should guide your editing rhythm.
Place slower animated shots during the intro or verse.
Use faster cuts during the chorus.
Use emotional close-ups during quieter sections.
Use your strongest hero shot near the final beat.
This is how the video starts to feel like a real anime opening instead of a collection of random AI clips.
You can also add optional effects.
For an anime-style music video, subtle film grain, light leaks, lens flares, glow, chromatic aberration, or speed ramping can help create a more polished look.
Use effects carefully.
Too many effects can make the video look messy.
If you want lyrics on screen, use CapCut’s Auto-Captions or Premiere’s caption tools. Then adjust the font, timing, and motion so the text supports the video instead of distracting from it.
For a karaoke-style edit, highlight the lyrics in sync with the vocal timing.
Final Output Review
Before publishing, watch the full video from beginning to end.
Do not only check whether individual clips look good.
Check whether the whole video feels connected.
Does the music match the visuals?
Does the character stay recognizable?
Do the cuts match the rhythm?
Does the chorus feel stronger than the verse?
Are the captions readable?
Do the effects support the mood?
Does the final shot feel satisfying?
If something feels off, fix the edit first before regenerating everything.
Sometimes the problem is not the AI clip. It is the timing.
A simple trim, cut, or transition adjustment can make the video feel much better.
Image caption: Review the final output as one complete music video, not only as separate AI-generated clips.
Why This Workflow Is Useful
This workflow is useful because it divides a complex music video production into smaller creative steps.
Suno handles the music direction.
Google Flow and Nano Banana handle the key visuals.
Kling handles short animated clips.
CapCut or Premiere Pro handles rhythm, pacing, captions, and final assembly.
This makes the workflow easier to manage.
Instead of trying to create a full music video in one AI prompt, you build it scene by scene.
That gives you more control over the final result.
This workflow can be useful for anime-style channel intros, virtual influencer music videos, character teasers, fan-style original projects, short-form content, and concept tests for longer videos.
Responsible Use Notes
When creating AI-generated music videos, make sure your content is original enough to use safely.
Do not copy an existing anime series, copyrighted character, real artist, music video, or protected visual style too closely.
Do not use copyrighted lyrics without permission.
Do not ask AI tools to imitate a specific living artist’s voice, performance, or signature style.
If you use generated music or visuals commercially, check the usage terms of each tool you used, including Suno, Google Flow, Kling, and your editing software.
Also keep a simple production record.
Save your lyrics, prompts, generated images, generated videos, final edit project, and usage notes.
This makes the workflow easier to manage if you later use the video for a brand, channel, client, or public release.
Conclusion
In this tutorial, we built a 2D anime-style music video workflow using AI.
We started by creating a song with Suno AI.
Then we created anime-inspired visuals with Google Flow and Nano Banana.
After that, we animated the images with Kling AI.
Finally, we edited everything together in CapCut or Premiere Pro.
The result is not guaranteed to be perfect on the first attempt.
AI-generated music videos still require direction, taste, review, and editing.
But this workflow gives creators a practical way to test ideas that once required a much larger production process.
Start with the song.
Build the visual world.
Animate short clips.
Edit to the rhythm.
Then refine the final cut.
That is how AI tools can help turn a simple music idea into a complete 2D anime-style video concept.
We will return in the next A2SET tutorial with more practical AI workflows for creators, designers, and small production teams.
Quick FAQ
Can I create a 2D anime-style music video with AI?
Yes. You can combine AI music generation, image generation, image-to-video animation, and editing tools to create a short anime-style music video concept.
Do I need to draw the images myself?
Not necessarily. You can generate visual keyframes with tools like Google Flow and Nano Banana, then animate them with an image-to-video tool.
Can I use Suno music commercially?
Commercial usage depends on your current Suno plan and the terms that apply when the song is created. Always check the latest Suno usage policy before publishing or monetizing.
Does Kling animation always look smooth?
No. Results can vary depending on the input image, motion prompt, scene complexity, and model settings. Review each clip carefully before using it in the final edit.
Should I use CapCut or Premiere Pro?
CapCut is easier for fast edits and social media videos. Premiere Pro gives more control for advanced editing, timing, effects, and color work.
Can I use a famous anime character?
No. Avoid using copyrighted characters or copying existing anime IP without permission. Create original characters and visual worlds instead.
What is the best length for a first test?
A short 15 to 30 second version is a good starting point. It is easier to control than a full-length music video.