Create a 360° Summer Soda Short-Form Ad with Google Flow Equipment

Hello creators, welcome back to A2SET’s AI Tutorial.
Google Flow is starting to feel less like a simple AI video generator and more like a full AI visual production studio.
In the past, you might have needed one tool for image generation, another tool for video generation, another tool for editing, and another tool for effects. Now, Flow brings many of those creative steps into one connected workspace.
You can create images, generate videos, refine results with natural language, build characters, organize scenes, create 360-degree environments, and apply visual effects in the same creative flow.
Google describes Flow as an AI filmmaking tool for creating cinematic clips and scenes, and its current Flow experience includes tools and model-based workflows such as Gemini Omni, Nano Banana, Veo, custom tools, and creative refinement features.
One of the most interesting parts of this updated Flow experience is Equipment.
Equipment is not just a small side feature. It works more like a creative toolbox for different parts of visual production. You can turn a rough sketch into a polished mascot, develop a character’s personality, expand a single image into a 360-degree world, and apply finishing effects to a generated video.
Of course, this does not mean every result will be perfect on the first try. AI tools still need review, correction, and human direction. But for quickly building the first version of an ad, a product concept, or a short-form campaign, Flow now feels like one of the most complete AI visual workflows available.
In this tutorial, we will not just look around the interface.
We will create one complete result.
The goal is to create a bright summer soda mascot and a 360-degree style short-form ad using Google Flow Equipment.
Our fictional brand is Sun Pop Soda.
The product is Mango Lime Splash, a mango-lime flavored summer soda.
The final output will be a bright, colorful, refreshing 9:16 short-form ad.
For this workflow, we will use one representative tool from each Equipment category.
For image, we will use Simple Sketch to create a mascot.
For Prompting, we will use Character X-Ray to develop the mascot’s personality and role.
For experimental, we will use Scout360 to create a 360-degree summer environment.
For video, we will use Shader Effects to finish the visual mood of the final video.
The goal is not to click random tools.
The goal is to connect these tools into one clear creative workflow.
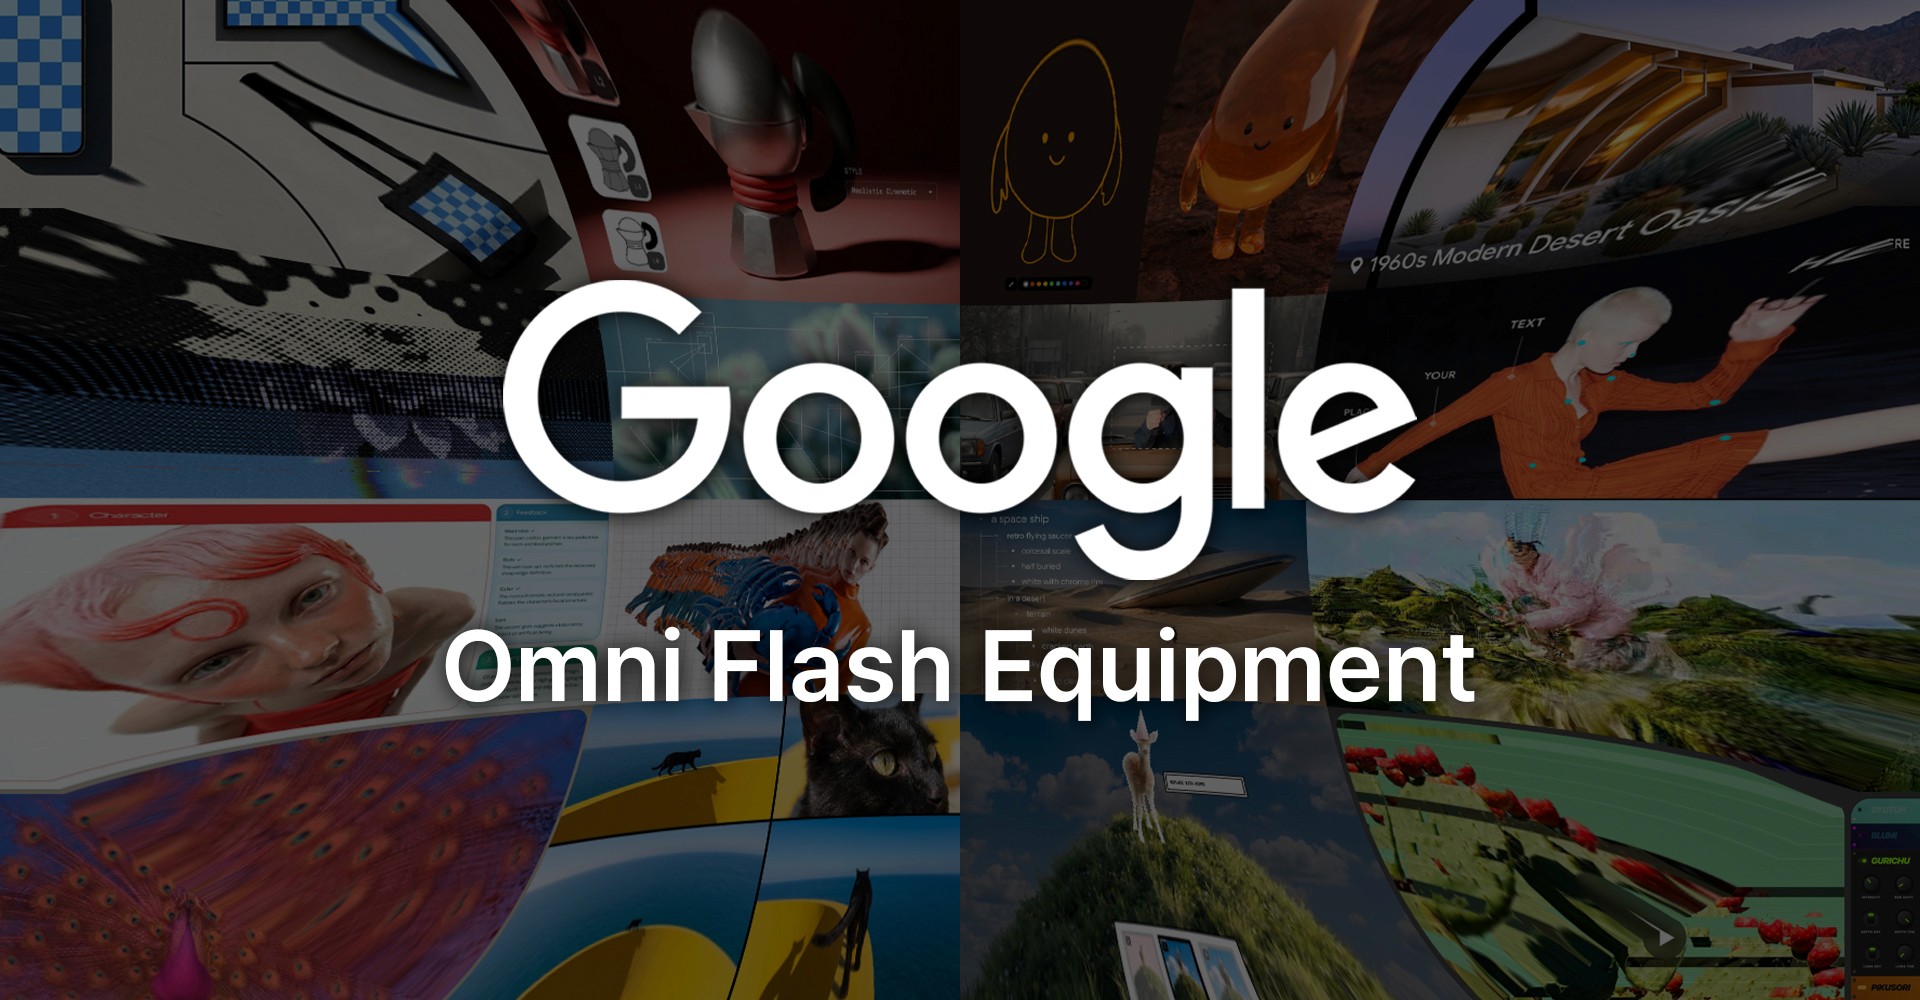
Image caption: Google Flow has evolved into a broader AI visual studio where creators can connect image creation, character development, 360-degree environments, video generation, and visual effects in one workflow.
Step 1: Understand What Equipment Is
Google Flow Equipment is not one single feature.
It is a collection of creative helper tools.
At first, it can feel overwhelming because there are many tools inside the Equipment area. The easiest way to understand it is to divide it into four groups.
image tools help you create or improve still visuals.
These tools can help turn a sketch into a polished image, place an image into a different environment, or edit a visual asset before using it in a video. For product ads, this is useful when you need stronger references before video generation.
video tools help you apply visual effects or finishing treatments to existing media.
For example, Shader Effects is used to apply customizable visual filters to images or videos. In a product ad workflow, this is useful for adjusting the final mood, texture, or color feeling of a generated video.
Prompting tools help develop characters, story logic, creative concepts, or visual direction.
For this tutorial, we will use Character X-Ray. It helps turn a mascot from a simple image into a more usable brand character with personality, movement, and story direction.
experimental tools are for more unusual visual workflows.
This area can include 360-degree environments, depth-based effects, tracking tools, glitch-like visuals, and other experimental methods. In this tutorial, we will use Scout360 because it connects well with product advertising.
The four tools we will use are:
Simple Sketch
Character X-Ray
Scout360
Shader Effects
Used in the right order, these tools can turn a simple soda idea into a more complete short-form ad workflow.
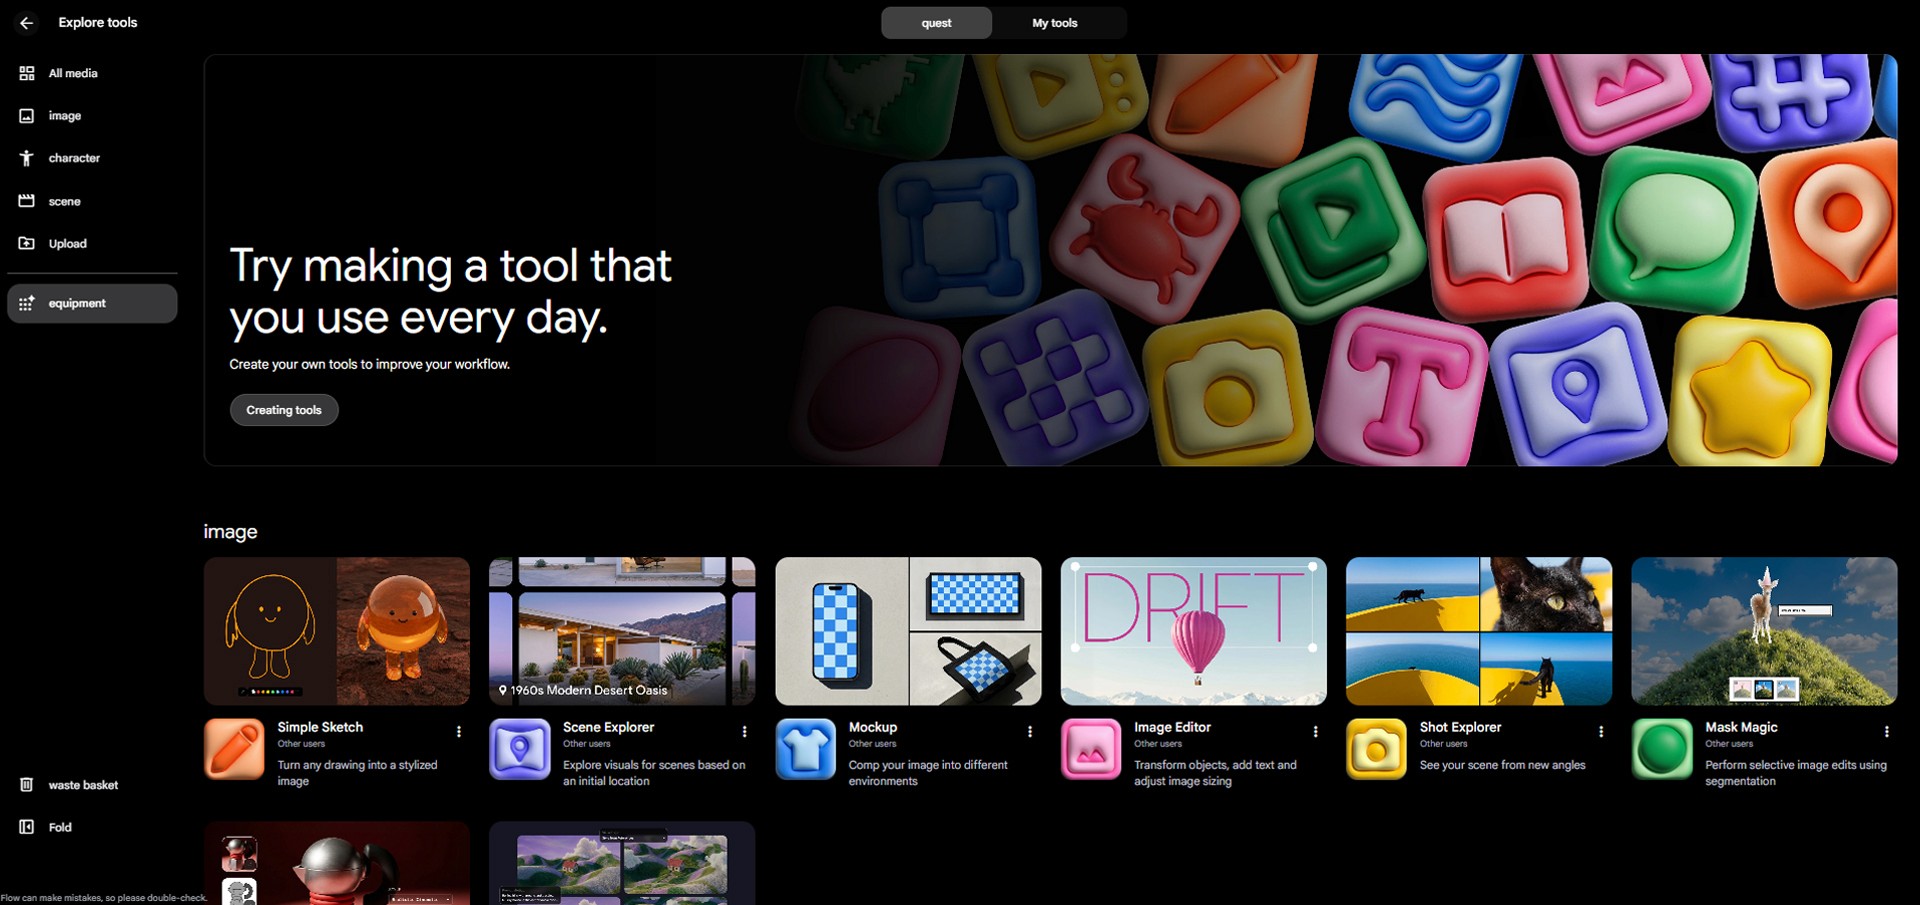
Image caption: Equipment becomes easier to understand when it is divided into image, video, Prompting, and experimental categories.
Step 2: Define the Final Ad Concept
Before using any tool, define the result clearly.
For this tutorial, the final concept is:
Create a bright 9:16 short-form ad for Sun Pop Soda’s Mango Lime Splash.
The ad should feature a cute mango-lime mascot.
The product and mascot should appear inside a 360-degree summer pop-up world.
The mood should be bright, crisp, playful, refreshing, and colorful.
The main colors are mango yellow, lime green, and turquoise blue.
This should not feel like a dark experimental video.
It should still feel clean enough to work as a product advertisement.
The full workflow will go like this:
First, create a mascot with Simple Sketch.
Then, develop the mascot’s personality with Character X-Ray.
Next, create one combined key visual that includes both the product and the mascot.
Then, upload that single key visual into Scout360 Generate 360°.
After that, use the Scout360 environment as the main reference for Gemini Omni Flash video generation.
Finally, use Shader Effects to add a subtle summer finish to the video.
Step 3: Create a Mascot with Simple Sketch
Start with Simple Sketch from the image category.
Simple Sketch is useful when you want to turn a rough drawing into a more polished visual asset.
For this project, we will create a small mascot for Mango Lime Splash.
The mascot should feel half mango and half lime.
It should be cute, simple, friendly, and easy to recognize.
You do not need a perfect drawing.
A rough round face, small arms, small legs, and a smiling expression are enough.
The important thing is the idea of the shape.
After drawing the rough mascot, use this prompt in the description area.
Prompt to use:
If the result feels too childish, you can refine it with this follow-up request.
Prompt to use:
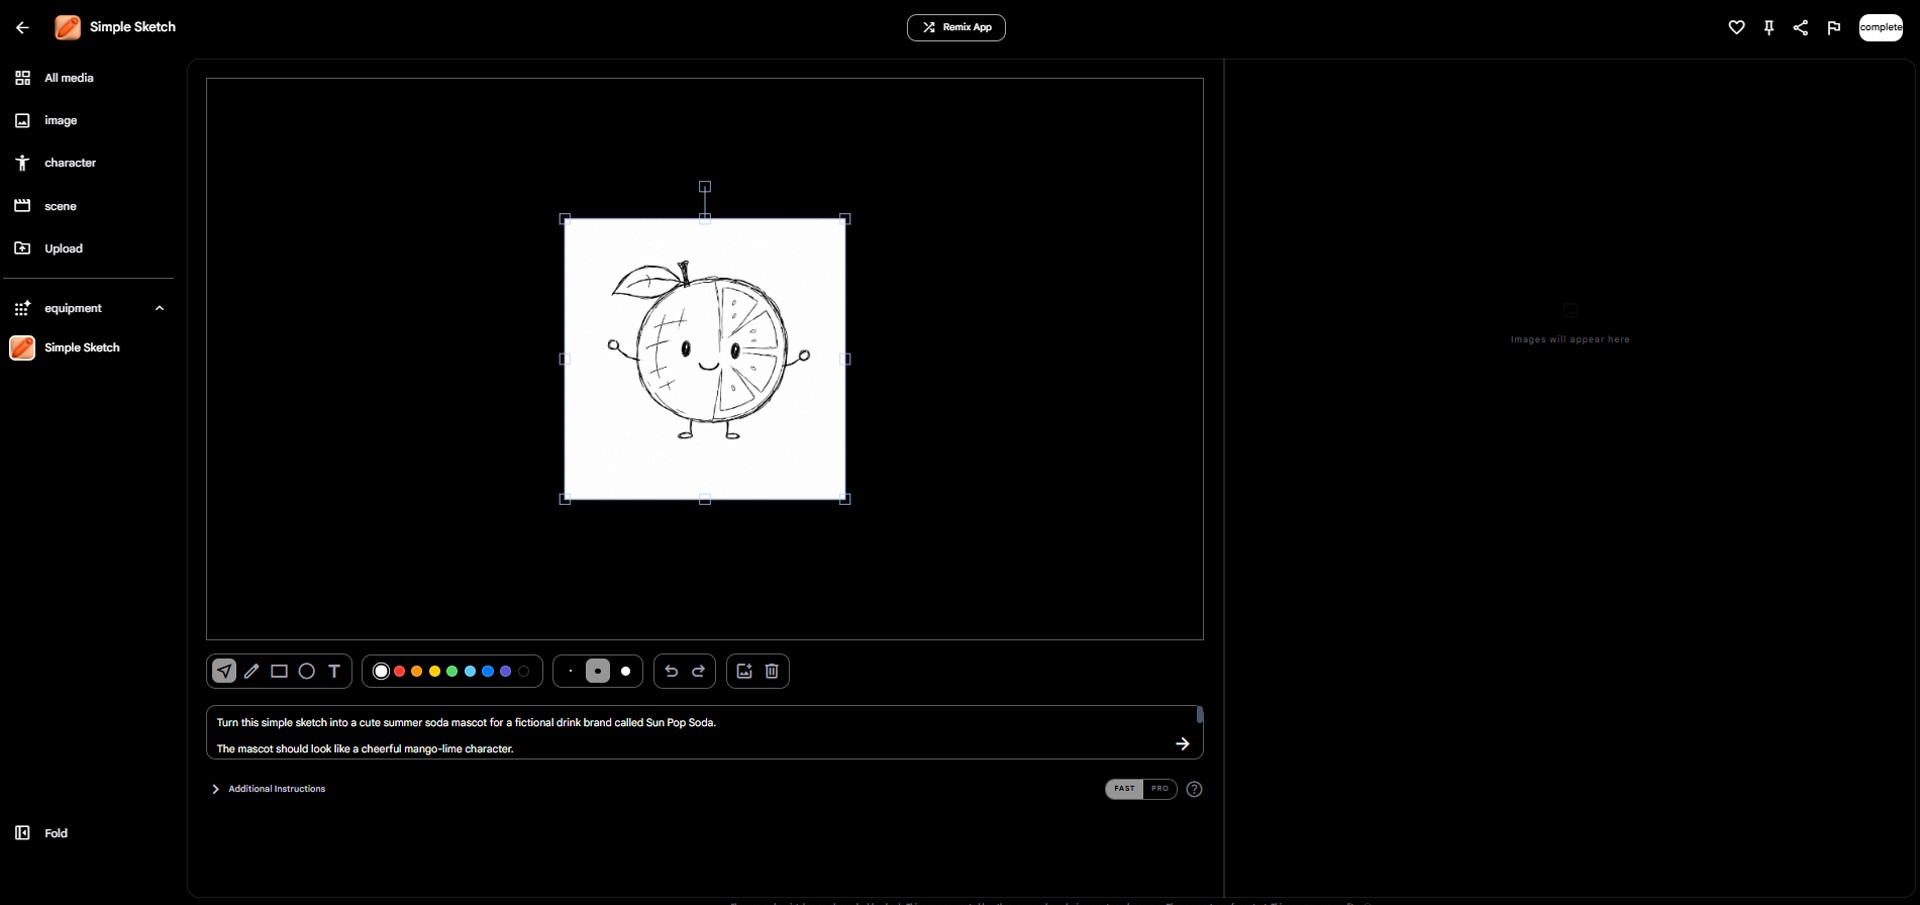
Image caption: Uploading rough sketch on Simple Sketch.
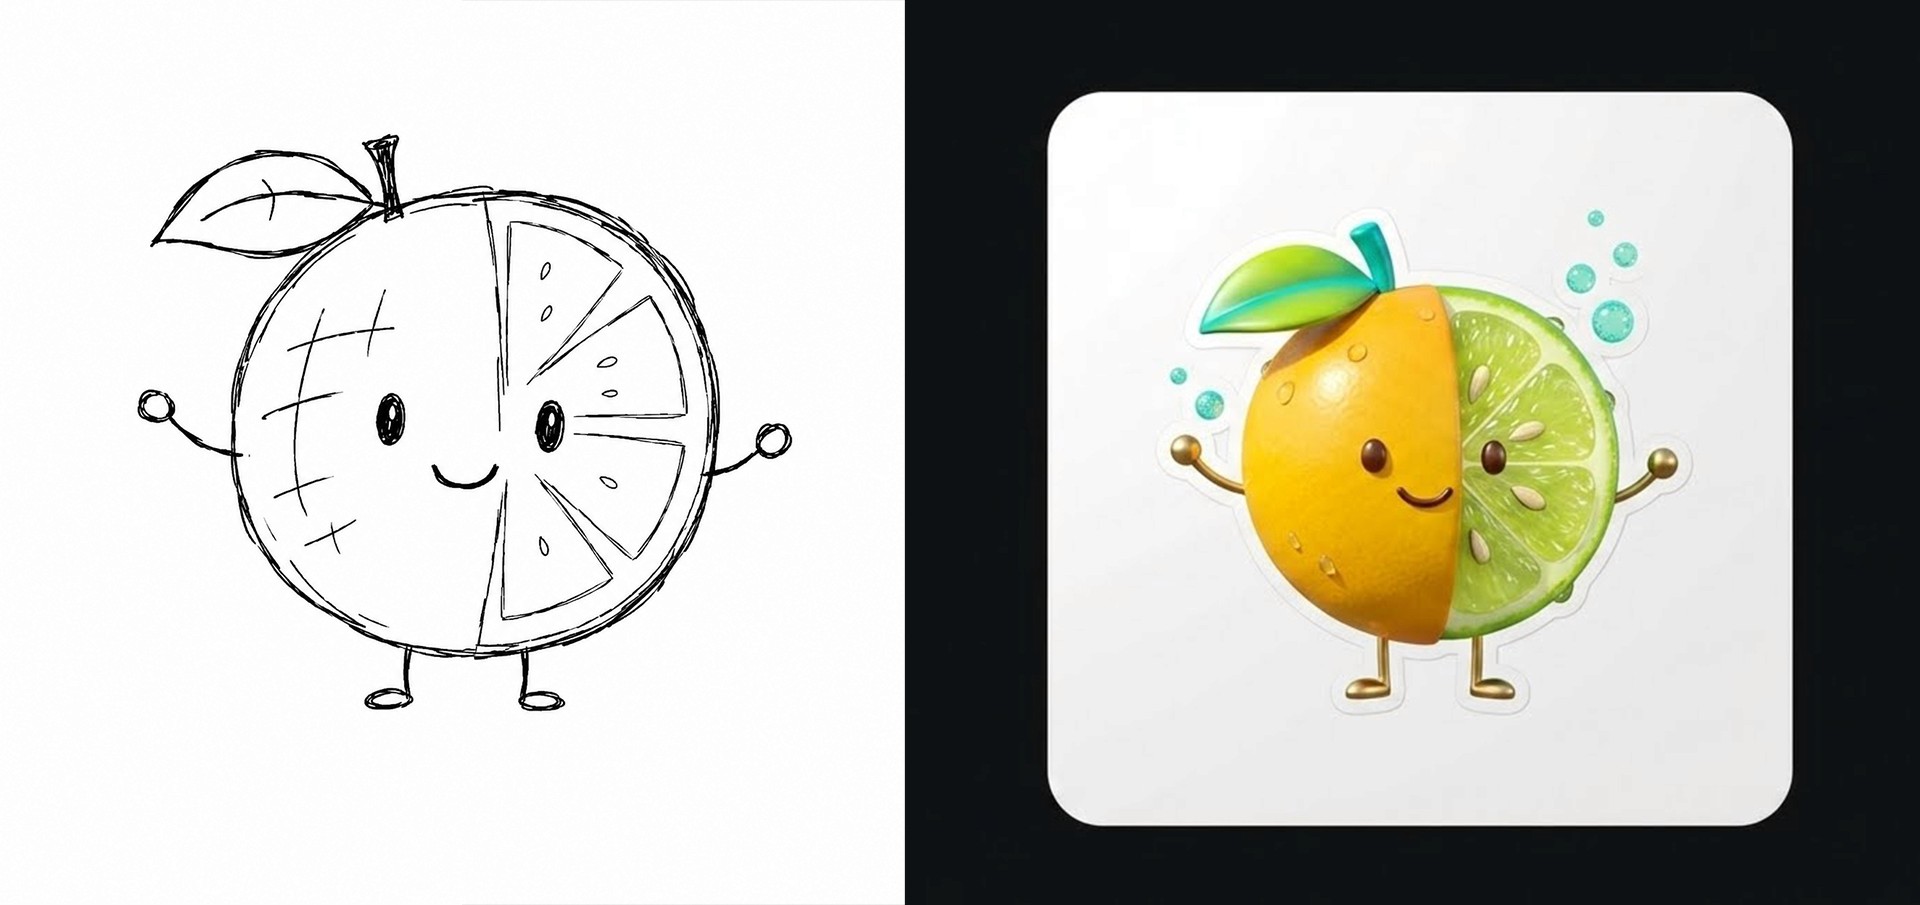
Image caption: Simple Sketch is useful for turning a rough mascot drawing into a polished visual asset for a brand campaign.
Step 4: Develop the Mascot with Character X-Ray
Once the mascot image is ready, move to Character X-Ray from the Prompting category.
The mascot should not only be a cute object.
It should have a role inside the ad.
For this campaign, the mango-lime mascot represents the fresh and playful feeling of Sun Pop Soda.
Use Character X-Ray to develop the mascot’s personality, movement, reactions, and campaign use.
Prompt to use:
Develop this mascot character for a fictional summer soda brand called Sun Pop Soda.
The product is Mango Lime Splash.
The mascot is a cheerful mango-lime character who represents freshness, summer fun, and playful refreshment.
Please create:
Character personality
Visual identity notes
How the mascot moves
How the mascot reacts to the soda
Short backstory
Three ad scene ideas using this mascot
Three short catchphrases
Keep the tone bright, playful, brand-safe, and suitable for a short-form product ad.
Avoid health or energy claims.
This step helps turn the mascot into a usable brand character.
Instead of just saying “cute fruit character,” you now have a more specific direction for how it moves, reacts, and appears in the ad.
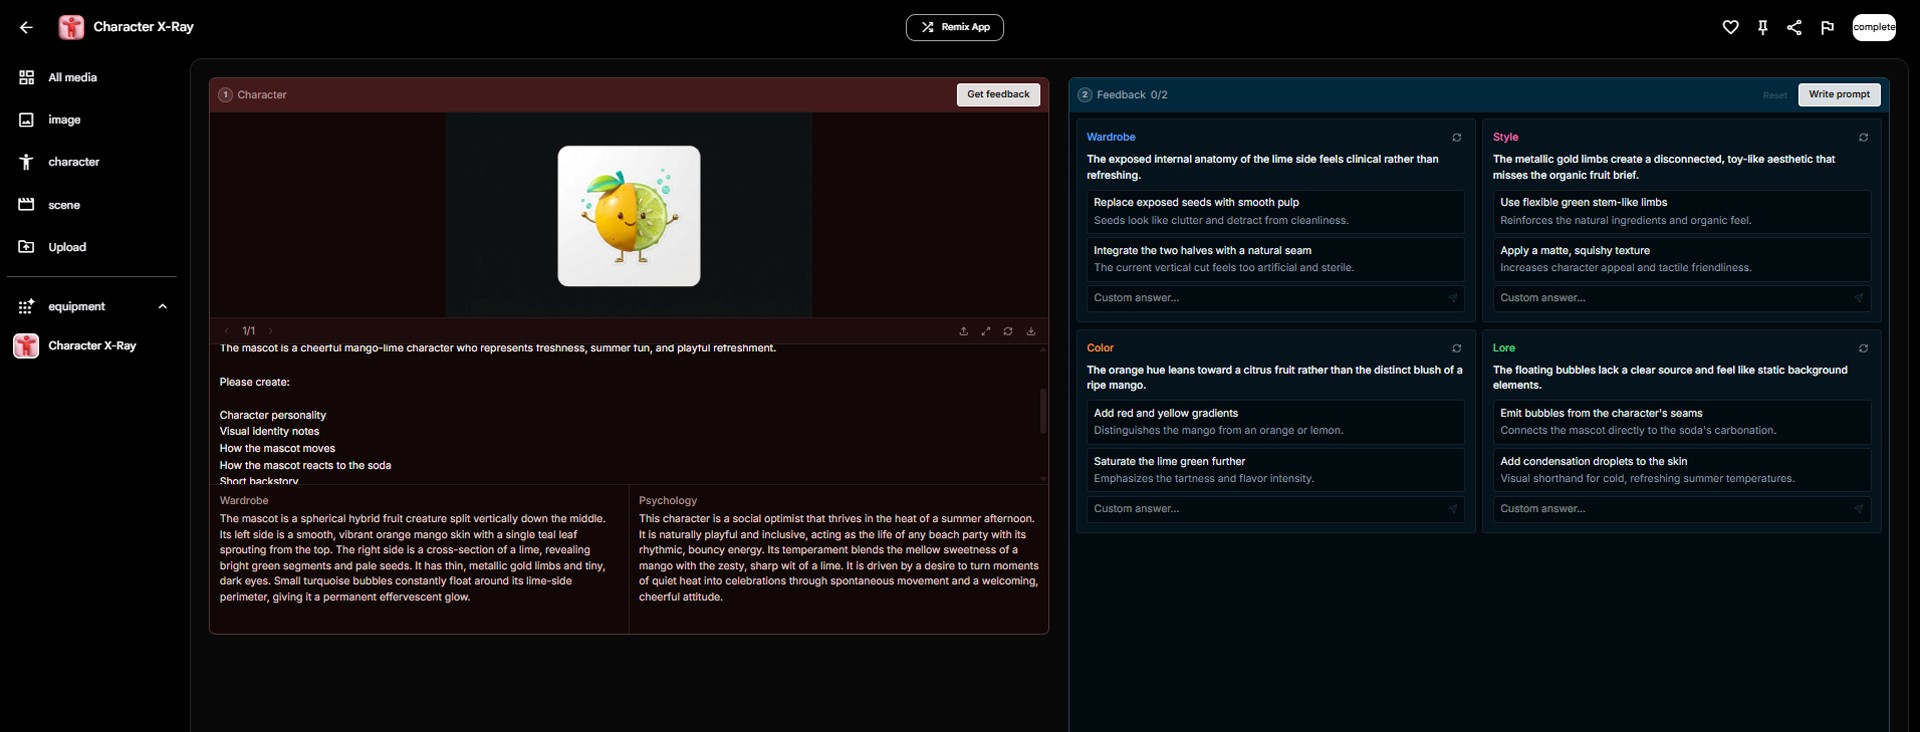
Image caption: Character X-Ray helps turn a mascot image into a usable brand character with personality, movement, and campaign direction.
Step 5: Create One Key Visual with the Product and Mascot
Now we need a reference image for Scout360.
This part is important.
In the current Scout360 Generate 360° interface, you can upload only one reference image.
So you should not prepare the product image and mascot image separately for Scout360.
Instead, create one combined key visual that includes both the soda can and the mascot in the same image.
For this tutorial, the key visual should show the Mango Lime Splash can in the center, with the mango-lime mascot standing nearby.
This image will become the main reference for Scout360.
Prompt to use:
The goal is to create one clean reference image.
The product should be clear.
The mascot should be visible.
The overall mood should feel like a bright summer soda ad.
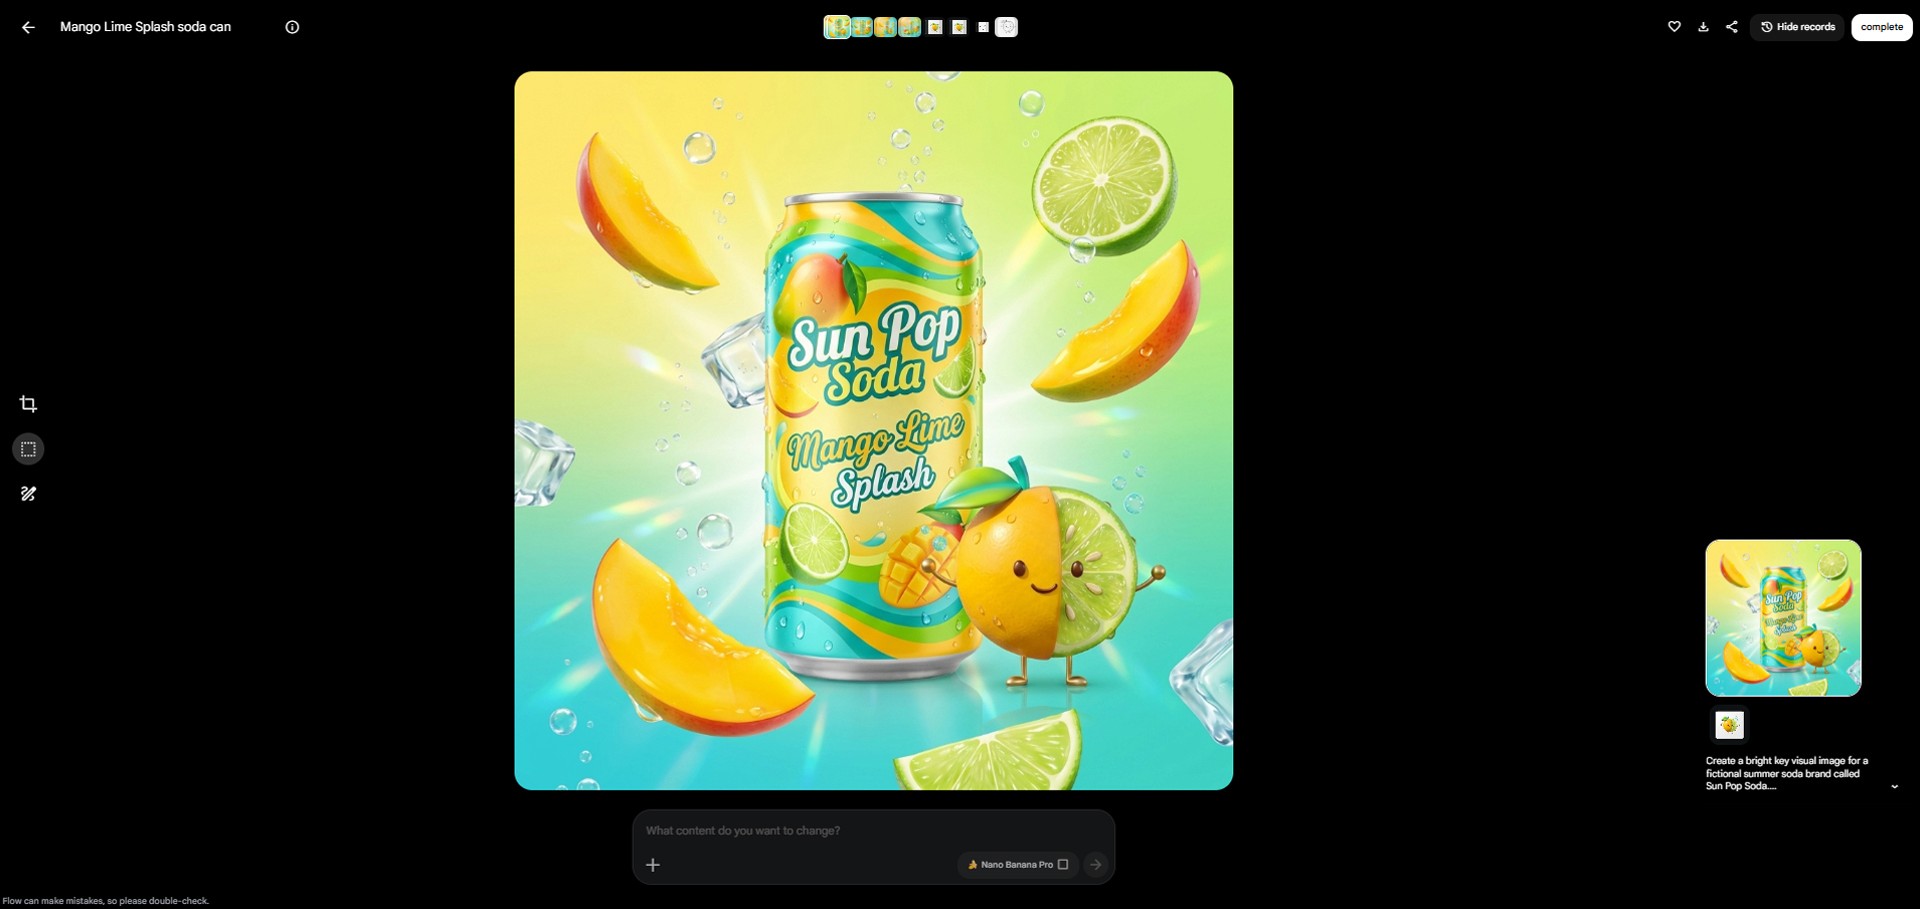
Image caption: Before using Scout360, create one combined reference image that includes both the soda can and the mascot.
Step 6: Use Generate 360° in Scout360
Now open Scout360 from the experimental category.
Scout360 offers two main workflows.
The first is Upload Existing Panorama.
This is for uploading an existing 360-degree panorama image. In this case, the interface asks for an equirectangular image, and the preferred aspect ratio is shown as 2:1.
The second is Generate 360°.
This is the one we will use.
Generate 360° lets you upload one reference image and describe the 360-degree environment you want to create.
Upload the combined key visual from Step 5.
Then use this prompt.
Prompt to use:
This creates the wider 360-degree product world.
The important point is the order:
one combined key visual
then Scout360 Generate 360°
then video generation
Step 7: Review the Scout360 Result
After Scout360 generates the 360-degree environment, do not move to video immediately.
First, review the result.
For a product ad, the product and mascot must stay clear.
Check these points:
Is the soda can still visible as the main hero object?
Did the mascot disappear or change too much?
Do the product and mascot feel like they belong in the same brand world?
Do the mango, lime, ice, and bubble elements feel fresh?
Is the environment too crowded?
Can this 360-degree scene still work as an ad reference?
If the product looks too small, use this request.
Prompt to use:
If the mascot changed too much, use this.
Prompt to use:
If the scene is too busy, use this.
Prompt to use:
Once the result is clean enough, use it as the main reference for the next video step.
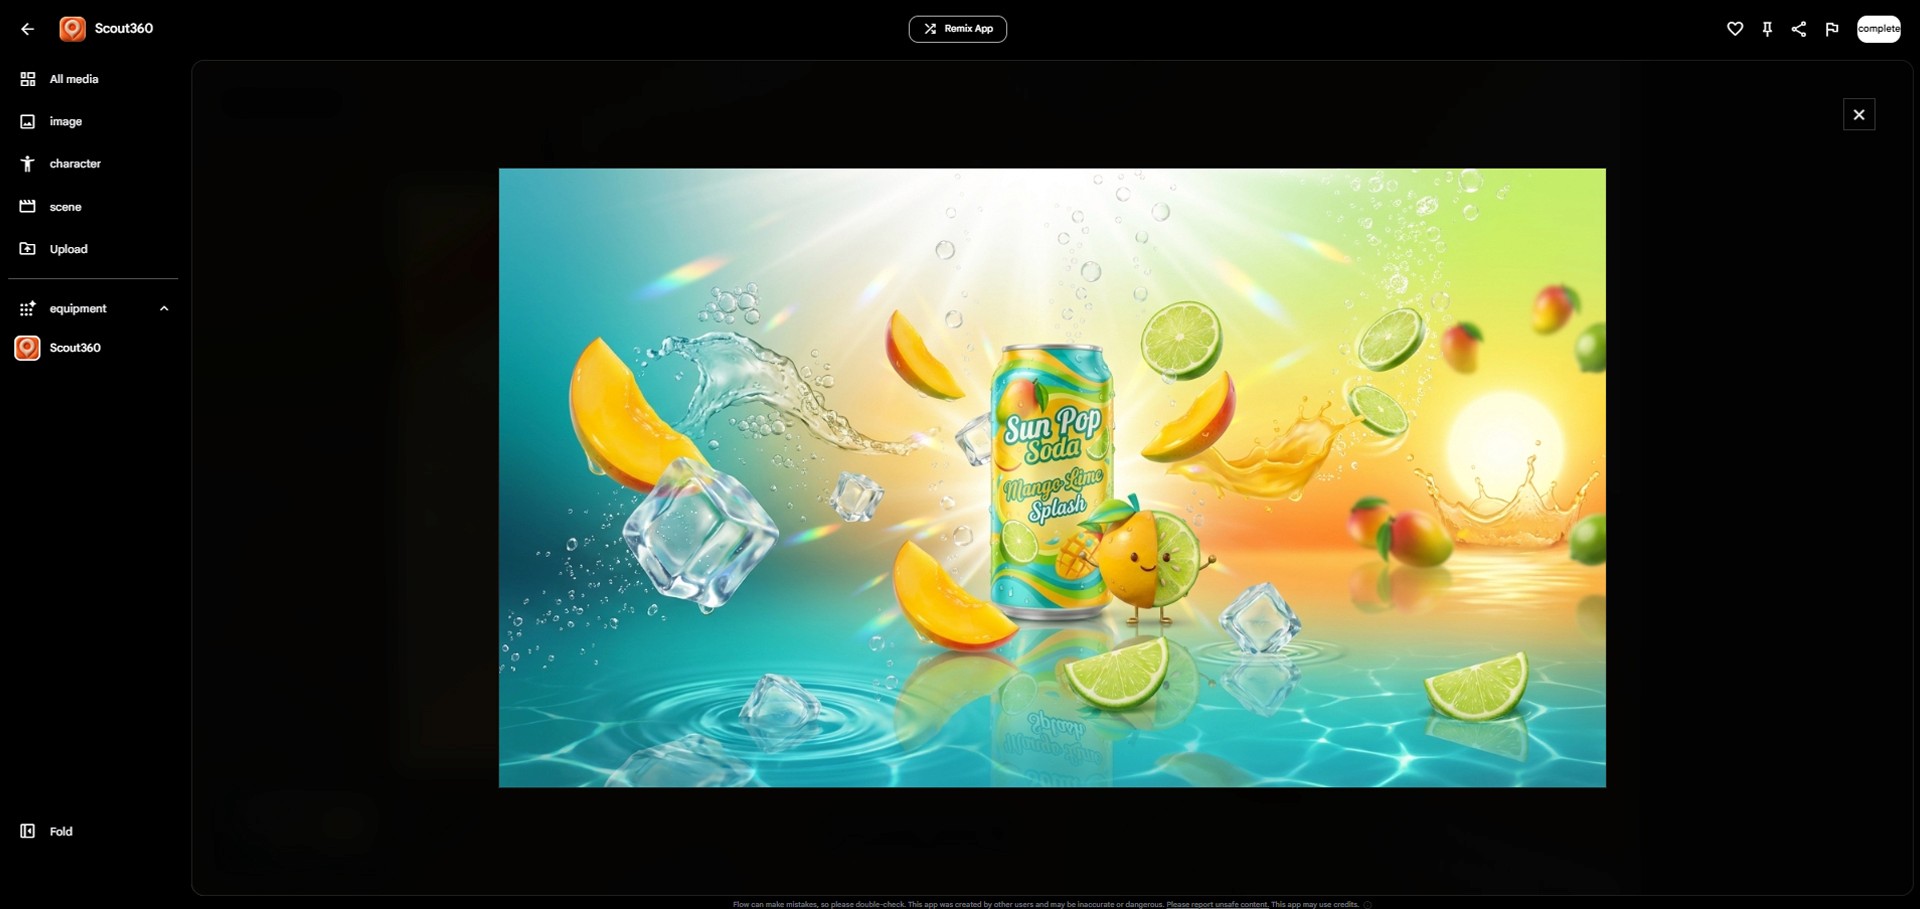
Image caption: After generating the 360-degree environment, refine the result so the product and mascot remain clear, consistent, and usable for a short-form ad.
Step 8: Create the Short-Form Video with Gemini Omni Flash
Now use the Scout360 environment as the main reference for Gemini Omni Flash.
Gemini Omni is described as a multimodal video generation and editing model that can blend text, images, and video inputs to create motion, and Google notes that Flow supports creative workflows with Gemini Omni.
For this tutorial, create a vertical 9:16 short-form ad.
Start with an 8-second test.
In the Flow generation settings, use:
video
Assets
9:16
x1
Omni Flash
8s
For the first test, choose x1 instead of x4.
x4 creates multiple variations at once and can use more credits faster.
Start with x1 to check whether the product and mascot remain stable. If the result looks good, you can later increase to x2 or x4 for more variations.
Also, make sure the selected asset is the Scout360 environment image, not just the original key visual.
Then use this prompt.
Prompt to use:
The key is to make the 360-degree environment feel cinematic without making the camera move too aggressively.
A slow 360-inspired orbit is enough.
Avoid fast spinning camera movement because it can make the result feel more like an experiment than an advertisement.
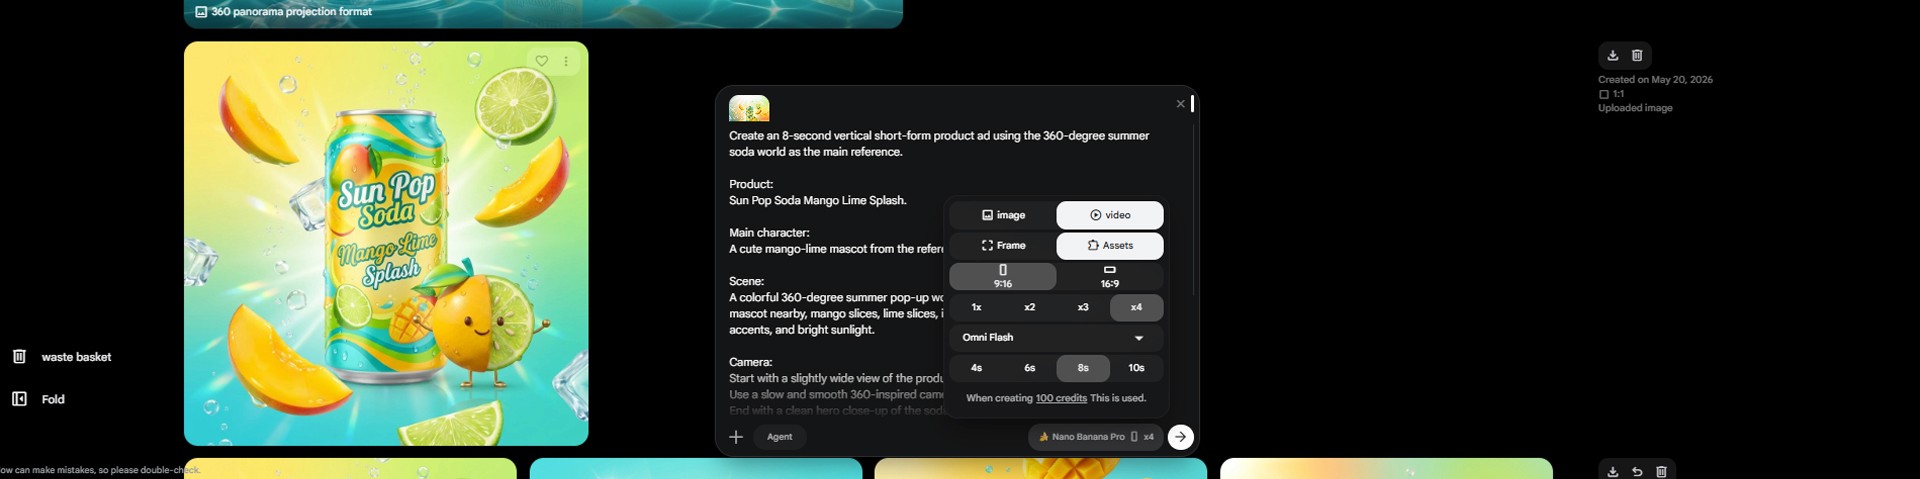
Image caption: Settings.
Image caption: After creating the Scout360 environment, use it as an asset reference in Omni Flash and start with a short 8-second vertical video test before generating multiple variations.
Step 9: Finish the Video with Shader Effects
After the base short-form video is created, you can use Shader Effects from the video category.
Shader Effects is not a prompt-based generation tool.
In the current interface, it works more like a finishing tool.
You choose a filter, adjust visual sliders, preview the result, and export the final video.
For the Mango Lime Splash ad, the goal is not to create a heavy experimental look.
The goal is to add a bright, clean, sparkling summer finish.
On the left side of Shader Effects, you can see filters such as:
LUT
Ghost
Split
Zoom
Mosaic
Oil
Halftone
ASCII
Dither
VHS
For a product ad, LUT is the safest place to start.
LUT can help adjust the overall color feeling without destroying the product shape or mascot identity.
Filters like Mosaic, ASCII, Dither, and VHS are much stronger.
They can work for experimental music videos or retro visuals, but for this product ad, they may make the can and mascot harder to see.
On the right side, you will see controls such as Replace, Reset, Colorize, and Finishing sliders.
Replace lets you swap the current media.
Reset brings the adjustments back to the starting point.
Colorize can push the video toward a stronger color tone, but for product ads, use it carefully because it may change the product colors too much.
The Finishing sliders can include:
Bloom
Exposure
Contrast
Saturation
Shadows
Highlights
Temperature
Tint
Vignette
For this summer soda ad, use a light touch.
Start with LUT.
Raise Bloom only slightly.
Keep Exposure bright enough so the product is not too dark.
Increase Contrast a little so the can and mascot look clearer.
Increase Saturation only enough to bring out mango yellow, lime green, and turquoise.
Move Temperature slightly warmer for a sunny summer feeling.
Use Vignette very lightly or not at all.
A strong vignette can make the ad feel darker and heavier, which does not match this bright soda concept.
The most important rule is simple.
The effect should support the product.
It should not become the main character.
After applying Shader Effects, check whether the can shape, label, mascot face, and color identity are still clear.
If the effect becomes too strong, click Reset or lower the filter and Finishing values.
When the edit feels ready, use Capture Frame or Export mp4.
Capture Frame is useful when you want to save one strong still moment from the video.
This can become a thumbnail, blog image, or social cover image.
Export mp4 is used to download the final edited video.
Before exporting, play the video once more and check whether the product is clear, the effect is not too heavy, and the label does not look strange.
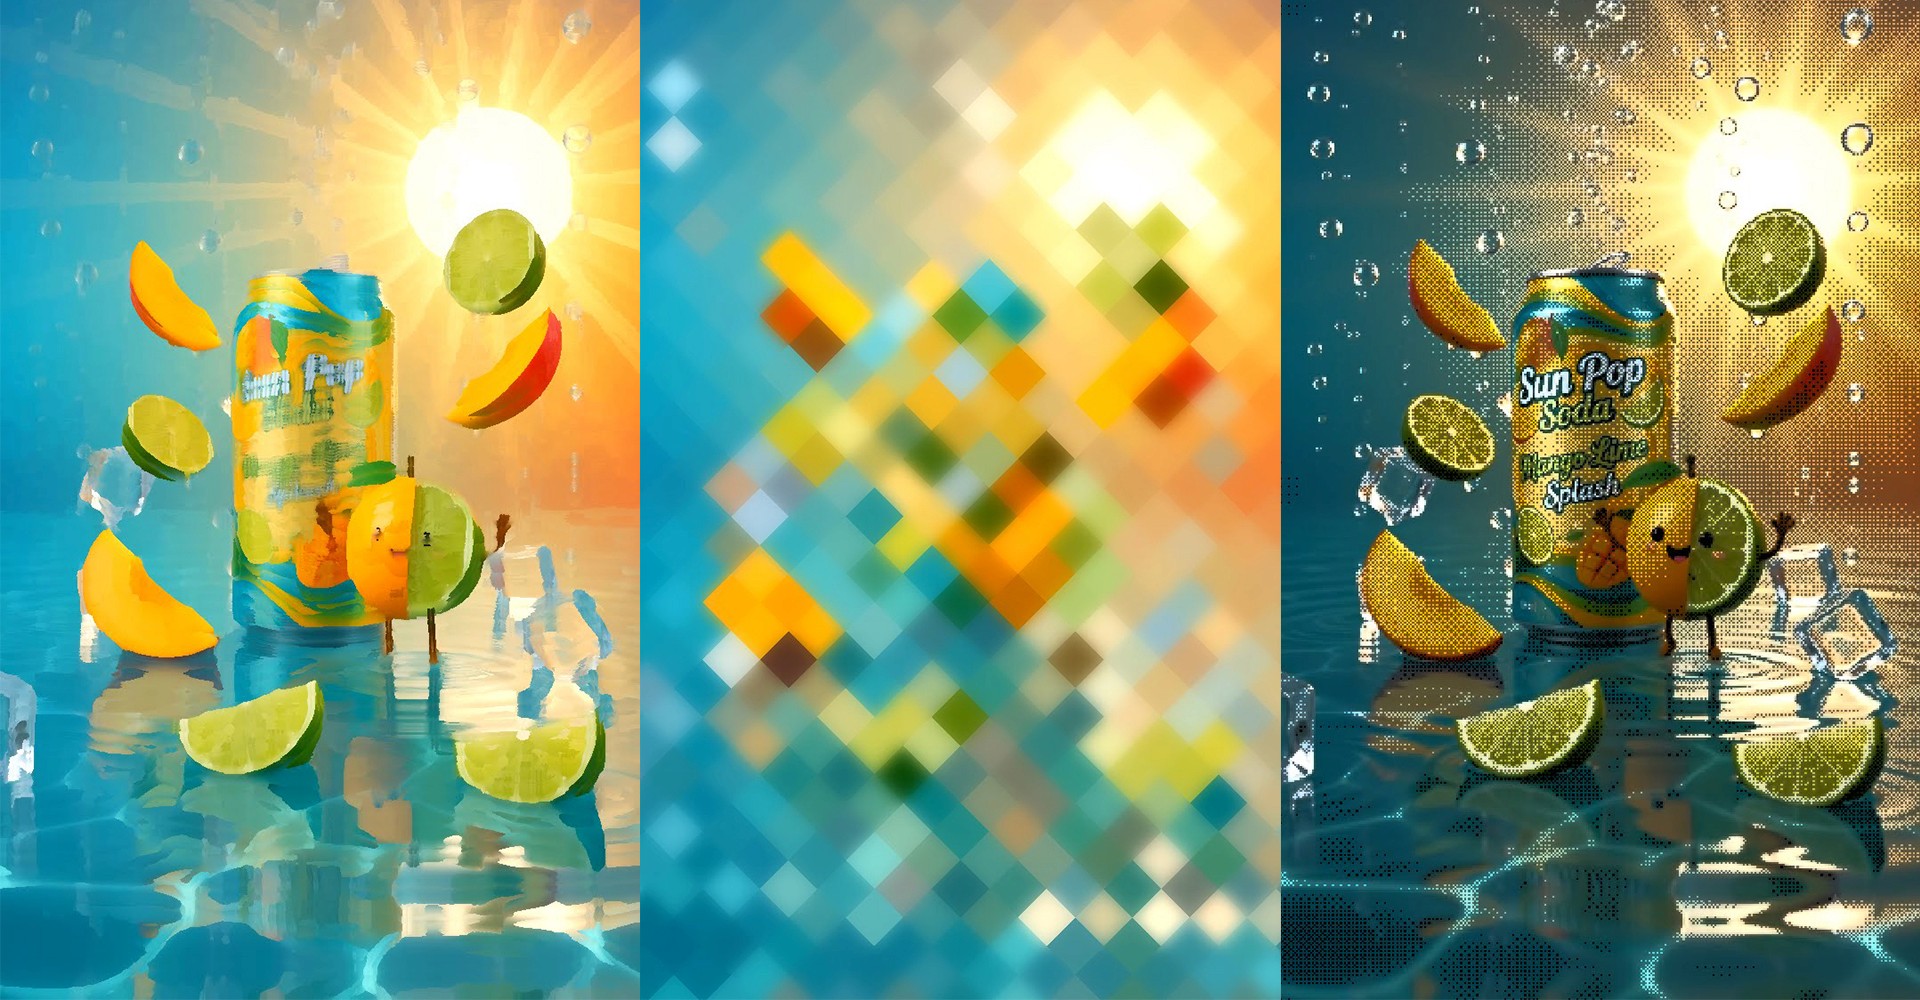
Image caption: Capture Frame is useful for saving a thumbnail moment, while Export mp4 is used to download the final edited video.
Step 10: Prepare the Final Ad Copy
Now prepare short text for the final ad.
It is usually safer to add exact text later in an editing tool instead of relying on AI-generated text inside the video.
AI video models can distort letters, especially on labels or moving text.
For this ad, copy options could include:
Summer in a sip
Fresh. Bright. Fizzy.
Pop the summer open.
Mango Lime Splash
The mascot says hello to summer.
If you want more copy options, ask a text AI tool like Gemini or ChatGPT.
Prompt to use:
For vertical short-form ads, too much text can cover the visual and weaken the product moment.
Step 11: Review the Final Result
Before using the final ad, review it carefully.
Check these points:
Does the soda can still look close to the original reference?
Did the label placement change too much?
Does the mascot still look similar to the original mascot?
Does the 360-degree background support the product instead of distracting from it?
Are the Shader Effects too strong?
Are the colors bright and refreshing?
Does the ad copy avoid exaggerated claims?
Does the final video feel clean enough to use as a short-form product ad?
If the result feels too experimental, go back to the Omni Flash stage and use this correction prompt.
Prompt to use:
This final review helps keep the workflow from becoming messy.
Even when you use several Equipment tools, the final output should still feel like one clear product ad.
Common Issues and Simple Fixes
If the mascot changes too much, add “Preserve the mascot’s face shape, color palette, and playful identity.”
If the can keeps changing, repeat “Preserve the exact can shape, label placement, and product identity.”
If the Scout360 environment becomes too busy, use “Simplify the environment and keep the product as the hero object.”
If the camera moves too fast, use “Use a slow 360-inspired orbit, not a fast spin.”
If Shader Effects feels too strong, switch to a softer filter like LUT and lower Bloom or Saturation.
If LUT makes the colors look dull, slightly increase Exposure and Saturation, then warm up the Temperature.
If Bloom makes the label blurry, lower the Bloom value.
If Mosaic, ASCII, or VHS feels wrong for a product ad, switch back to LUT or a softer filter.
If the video feels too experimental, remove the filter or click Reset, then apply only light finishing adjustments.
If you need a thumbnail, use Capture Frame at the best moment.
If you need the final upload file, use Export mp4.
If text looks broken in the AI video, add the final text later in an editing tool instead of trying to fix it inside the video.
Responsible Use Notes
Google Flow Equipment can be very useful for fast visual experimentation.
But generated content still needs human review before it is used in real advertising or brand content.
Use only product images, logos, labels, and brand assets that you have the right to use.
If this is a real product, check whether the AI changed the package shape, logo, label placement, or product identity.
For beverage ads, avoid exaggerated health, energy, or productivity claims.
Instead of saying things like “guaranteed energy,” “improves focus,” or “boosts health,” use safer brand language such as:
fresh summer moment
bright fizzy mood
playful tropical refreshment
Also, if you use an AI-generated mascot or AI-generated video, make sure the final use does not mislead people into thinking it was filmed with real licensed characters or real customers.
Google’s Flow Help Center also reminds users to check the active model and current credit cost in the prompt box settings before generating, because available features and costs can vary by model.
Conclusion
In this tutorial, we used Google Flow Equipment to create a summer soda short-form ad.
The key idea is not to use every tool at once.
The key idea is to connect the right tools in the right order.
The workflow is simple.
Create a mango-lime mascot with Simple Sketch.
Develop the mascot’s personality and ad role with Character X-Ray.
Create one combined key visual that includes both the soda can and the mascot.
Upload that single image into Scout360 Generate 360°.
Create a 360-degree summer pop-up world.
Use that Scout360 environment as the main reference in Gemini Omni Flash.
Generate an 8-second vertical short-form ad.
Finish the video with LUT and light adjustments in Shader Effects.
Use Capture Frame for a thumbnail or Export mp4 for the final file.
Review the final video and add ad copy carefully.
This workflow uses image, Prompting, experimental, and video tools without making the process feel random.
Google Flow Equipment can look complex at first because there are many tools.
But once you define one clear goal, it becomes much easier to use.
For this tutorial, the goal was simple:
turn a summer soda idea into a mascot-driven 360-degree short-form ad.
That is where Flow becomes more than a video generator.
It becomes a connected AI visual production workflow.
We will return in the next A2SET tutorial with more practical AI workflows for creators, brand builders, marketers, and small teams.
Quick FAQ
What Equipment tools are used in this tutorial?
We use Simple Sketch, Character X-Ray, Scout360, Gemini Omni Flash, and Shader Effects.
Why use these tools together?
They represent a natural workflow: image creation, character development, 360-degree environment generation, video generation, and final video finishing.
What is Scout360 used for?
Scout360 can be used to create a 360-degree environment from a reference image or to work with an existing panorama.
What is the difference between Upload Existing Panorama and Generate 360°?
Upload Existing Panorama is for uploading an existing 360-degree panorama image. Generate 360° is for uploading one reference image and describing the 360-degree environment you want to create.
Can Scout360 Generate 360° use multiple reference images?
In the current UI, Generate 360° uses one reference image. If you want to use both a product and a mascot, first create one combined key visual that includes both of them, then upload that single image into Scout360.
Is Shader Effects prompt-based?
No. In the current UI, Shader Effects is not a prompt input tool. It works through filter selection and Finishing slider adjustments.
Which Shader Effects filter is safest for product ads?
LUT is usually the safest starting point because it can adjust the overall color mood without heavily distorting the product.
When should I use Capture Frame?
Use Capture Frame when you want to save a strong still image from the video for a thumbnail, blog image, or social cover.
When should I use Export mp4?
Use Export mp4 when your Shader Effects adjustments are finished and you want to download the final video file.
Can I use the result directly in a real ad?
It depends on the result and the rights involved. Always check product accuracy, logo usage, label consistency, copyright, advertising claims, and commercial use conditions before publishing.