Hello creators, welcome back to A2SET’s AI Tutorial.
When planning a trip with AI, a simple text answer is not always enough.
A chatbot can recommend places to visit, but real travel planning usually needs more structure. You may want dates, times, transport, food, estimated costs, categories, notes, and links all organized in one clean file.
That is why Excel is still useful.
In this tutorial, we will build a simple AI travel planner that turns a detailed travel request into a visual Excel itinerary.
For this example, we will create a 3-night, 4-day Sapporo travel plan for April 2026. The final output will be a color-coded Excel file with date, time, itinerary, cost, category, memo, and JR Pass cost analysis.
The workflow is simple.
First, we prepare Google Colab.
Then, we connect the OpenAI API.
Next, we define the itinerary data structure with Pydantic.
After that, we ask AI to generate a structured Sapporo travel plan.
Finally, we use openpyxl to render the result into an Excel file.
This workflow does not mean the AI-generated travel plan should be used without checking. Travel routes, opening hours, ticket prices, restaurant details, and map links can change over time. Before using the itinerary for a real trip, always verify important details manually.
Before You Start
To follow this tutorial, you need two things.
First, you need a Google account so you can use Google Colab.
Second, you need an OpenAI API key.
OpenAI API usage is separate from a normal ChatGPT subscription, so check your API billing or credits before running the script.
You will also use the prepared script for this tutorial.
Script Download:
[Insert your script download link here]
If you are not using the downloadable script, you can copy and paste the code blocks below into Google Colab one by one.
Step 1: Open Google Colab
Open Google Colab in your browser.
Create a new notebook and rename it:
Google Colab is useful because you can run Python in the browser without installing a full development environment on your computer.
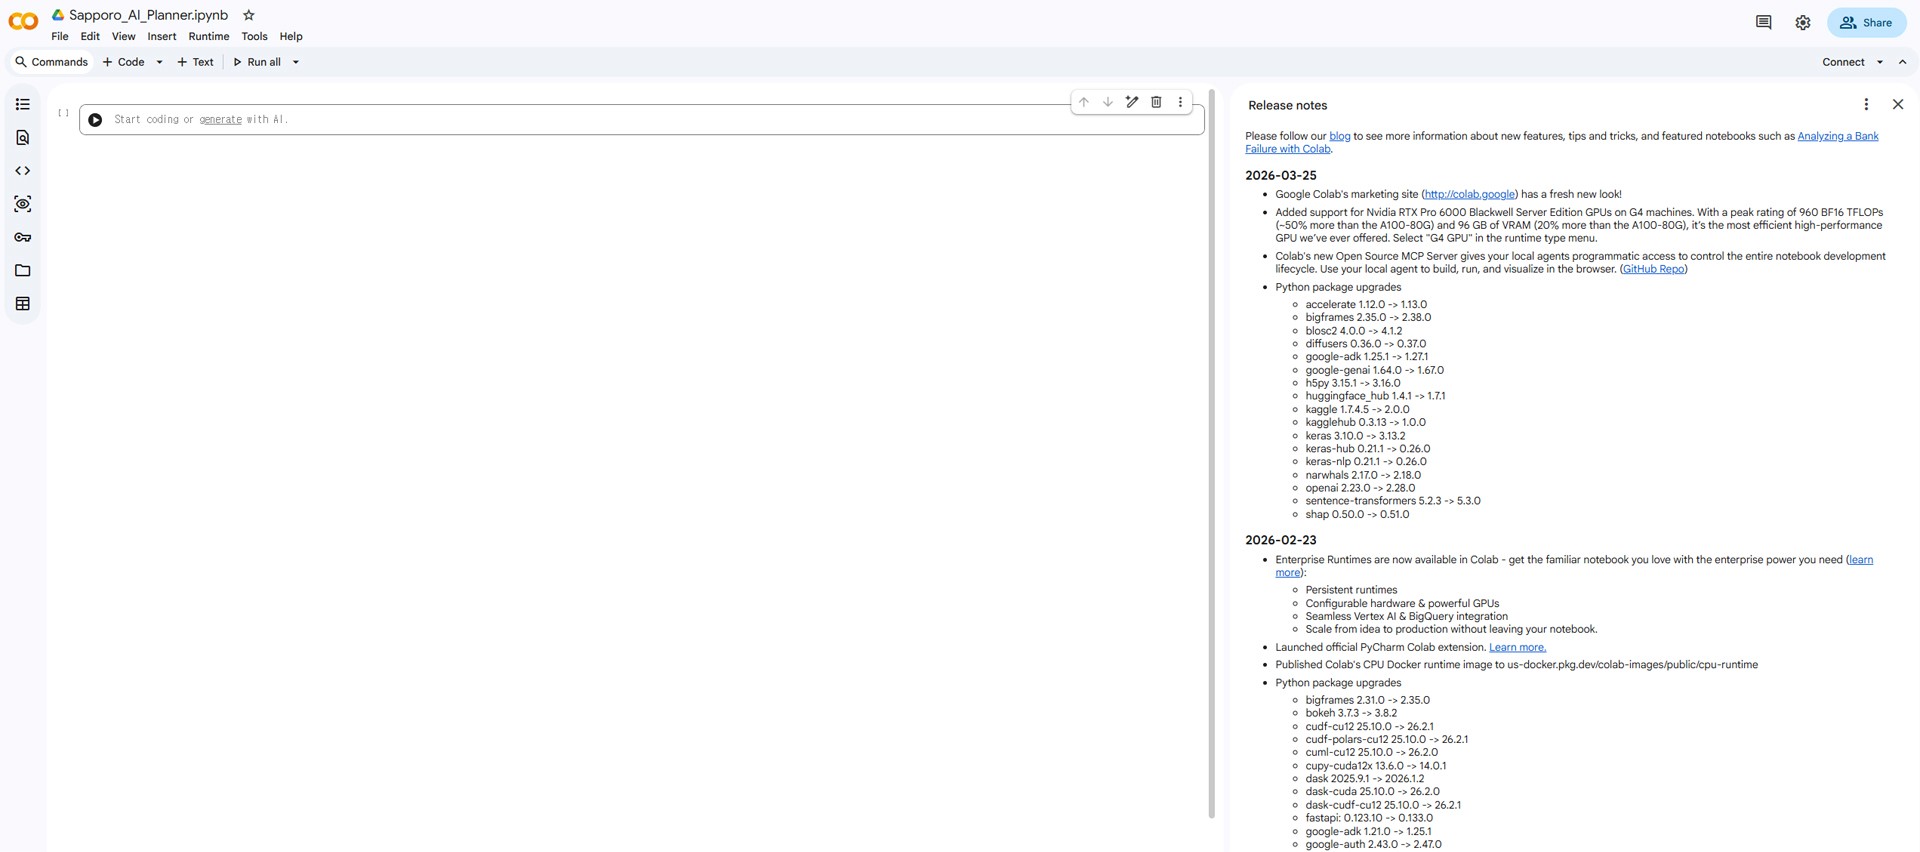
Image caption: Google Colab gives you a browser-based Python workspace for building the Excel travel planner.
Step 2: Install the Required Tools
Copy and paste this into the first Colab cell.
!pip install openai pandas openpyxl pydantic
!pip install openai pandas openpyxl pydantic
!pip install openai pandas openpyxl pydantic
This installs the tools needed for the workflow.
OpenAI is used to generate the structured travel data.
Pydantic is used to define the data format.
openpyxl is used to create the Excel file.
pandas is included for data handling if you want to expand the script later.
Run the cell and wait until the installation is complete.
Step 3: Connect Your OpenAI API Key
Next, connect your OpenAI API key.
Copy and paste this into the next Colab cell.
import os
from openai import OpenAI
os.environ["OPENAI_API_KEY"] = "sk-paste_your_api_key_here"
client = OpenAI()
import os
from openai import OpenAI
os.environ["OPENAI_API_KEY"] = "sk-paste_your_api_key_here"
client = OpenAI()
import os
from openai import OpenAI
os.environ["OPENAI_API_KEY"] = "sk-paste_your_api_key_here"
client = OpenAI()
Replace this part with your actual API key:
Important note: do not share your notebook publicly if your API key is written inside the code. For safer use, remove the key before sharing screenshots, files, or notebooks with other people.

Image caption: Connect your OpenAI API key so the notebook can generate the structured travel plan.
Step 4: Define the Travel Plan Structure
Now we define the exact structure of the itinerary.
Copy and paste this code into the next cell.
from pydantic import BaseModel
class Event(BaseModel):
date: str
time: str
itinerary: str
cost: str
category: str
memo: str
class TravelPlan(BaseModel):
jr_pass_analysis: str
events: list[Event]from pydantic import BaseModel
class Event(BaseModel):
date: str
time: str
itinerary: str
cost: str
category: str
memo: str
class TravelPlan(BaseModel):
jr_pass_analysis: str
events: list[Event]from pydantic import BaseModel
class Event(BaseModel):
date: str
time: str
itinerary: str
cost: str
category: str
memo: str
class TravelPlan(BaseModel):
jr_pass_analysis: str
events: list[Event]This step is important because we do not want the AI to return a random paragraph.
We want the AI to return structured data that can be placed into an Excel grid.
Each row of the itinerary needs a date, time, itinerary item, cost, category, and memo.
The full travel plan also includes a JR Pass analysis, which will be written at the bottom of the Excel file.
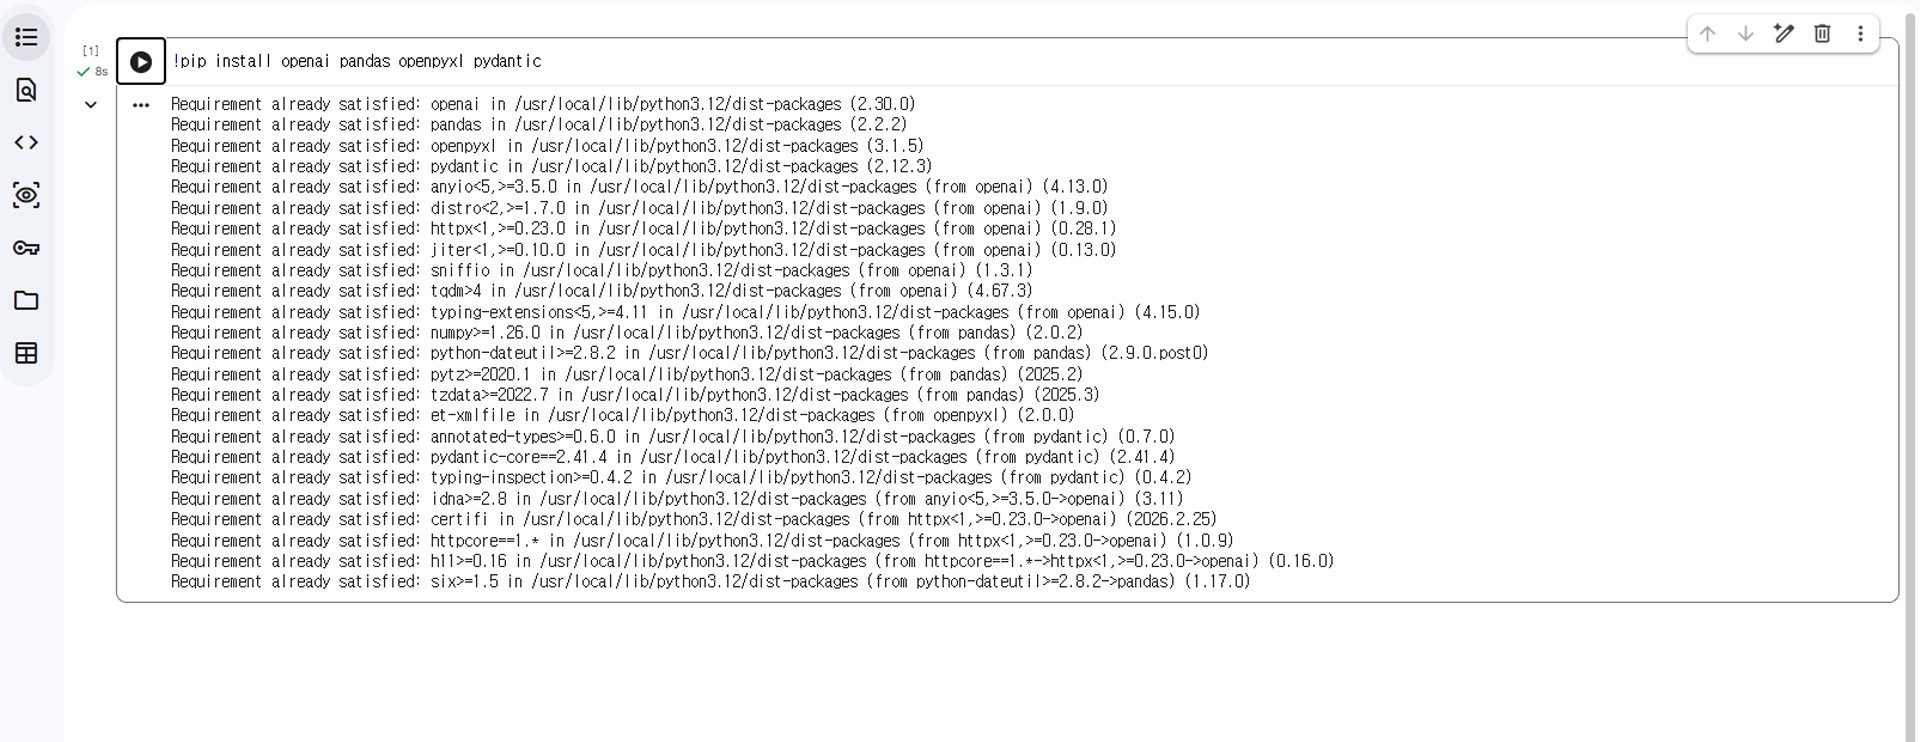
Image caption: Pydantic helps define the exact structure that the AI should follow before the Excel file is created.
Step 5: Generate the Sapporo Travel Plan
Now we ask AI to create the actual Sapporo itinerary.
The script includes a detailed scenario: 3 nights and 4 days in Sapporo, arrival at New Chitose Airport, Susukino check-in, Noboribetsu, Sapporo Beer Museum, Otaru, shopping, and airport return.
Copy and paste this code.
system_prompt = """
You are a top-tier travel planner specializing in Japan trips.
Create a premium vertical timetable for a 3-Night 4-Day trip to Sapporo.
(Ensure ALL output text is written in English for the final Excel file).
1. Target: 3 Nights 4 Days travel to Sapporo, Japan.
2. Flight Schedule (Strictly adhere to this time):
- Departure: April 9, 2026, 10:35 AM (Incheon) -> 1:25 PM (New Chitose)
- Return: April 12, 2026, 2:50 PM (New Chitose) -> 5:55 PM (Incheon)
3. Main Routing Missions:
- Day 1 (Apr 9): Arrival, check-in at Susukino, Sapporo City Tour. Dinner at a highly-rated Genghis Khan restaurant.
- Day 2 (Apr 10): Noboribetsu Tour (Jigokudani, Private Hot springs). Provide train details as a planning draft.
- Day 3 (Apr 11): Sapporo Beer Museum (Morning), Otaru Tour in the afternoon/evening.
- Day 4 (Apr 12): Morning Shopping, early Lunch/Snack, move to the airport.
4. Crucial Guidelines for Output:
- Calculate practical transport routes. Incorporate meals (Breakfast, Lunch, Dinner, Snack) smoothly into the travel path.
- For every Food and Sightseeing event, provide the address or location note and a Google Maps search link in the 'memo' field when possible. Also include recommended menus or visit tips.
- Format 'time' as "HH:MM - HH:MM".
- Analyze the total train costs (Sapporo-Noboribetsu-Otaru-Chitose) and write a 'jr_pass_analysis' comparing individual tickets vs. a Regional JR Pass.
- Important: travel times, prices, restaurant details, opening hours, and links may change. Add verification reminders where needed.
5. Category Classification: Strictly use "Transport", "Food", "Sightseeing", "Accommodation", or "Shopping".
"""
print("🎬 AI Agent is analyzing routes, addresses, links, and generating the Grid...")
response = client.beta.chat.completions.parse(
model="gpt-4o-2024-08-06",
messages=[
{"role": "system", "content": system_prompt},
{"role": "user", "content": "Generate the Sapporo vertical timetable in English with addresses, links, and travel notes."}
],
response_format=TravelPlan
)
travel_data = response.choices[0].message.parsed
print("✅ Detailed routing, addresses, and cost analysis complete!")
system_prompt = """
You are a top-tier travel planner specializing in Japan trips.
Create a premium vertical timetable for a 3-Night 4-Day trip to Sapporo.
(Ensure ALL output text is written in English for the final Excel file).
1. Target: 3 Nights 4 Days travel to Sapporo, Japan.
2. Flight Schedule (Strictly adhere to this time):
- Departure: April 9, 2026, 10:35 AM (Incheon) -> 1:25 PM (New Chitose)
- Return: April 12, 2026, 2:50 PM (New Chitose) -> 5:55 PM (Incheon)
3. Main Routing Missions:
- Day 1 (Apr 9): Arrival, check-in at Susukino, Sapporo City Tour. Dinner at a highly-rated Genghis Khan restaurant.
- Day 2 (Apr 10): Noboribetsu Tour (Jigokudani, Private Hot springs). Provide train details as a planning draft.
- Day 3 (Apr 11): Sapporo Beer Museum (Morning), Otaru Tour in the afternoon/evening.
- Day 4 (Apr 12): Morning Shopping, early Lunch/Snack, move to the airport.
4. Crucial Guidelines for Output:
- Calculate practical transport routes. Incorporate meals (Breakfast, Lunch, Dinner, Snack) smoothly into the travel path.
- For every Food and Sightseeing event, provide the address or location note and a Google Maps search link in the 'memo' field when possible. Also include recommended menus or visit tips.
- Format 'time' as "HH:MM - HH:MM".
- Analyze the total train costs (Sapporo-Noboribetsu-Otaru-Chitose) and write a 'jr_pass_analysis' comparing individual tickets vs. a Regional JR Pass.
- Important: travel times, prices, restaurant details, opening hours, and links may change. Add verification reminders where needed.
5. Category Classification: Strictly use "Transport", "Food", "Sightseeing", "Accommodation", or "Shopping".
"""
print("🎬 AI Agent is analyzing routes, addresses, links, and generating the Grid...")
response = client.beta.chat.completions.parse(
model="gpt-4o-2024-08-06",
messages=[
{"role": "system", "content": system_prompt},
{"role": "user", "content": "Generate the Sapporo vertical timetable in English with addresses, links, and travel notes."}
],
response_format=TravelPlan
)
travel_data = response.choices[0].message.parsed
print("✅ Detailed routing, addresses, and cost analysis complete!")I slightly softened the wording from “flawless” and “perfect” to “premium” and “planning draft.” This is more realistic and safer for a public tutorial.
The AI will now generate structured itinerary data that follows the TravelPlan schema.

Image caption: The AI creates structured itinerary data for the Sapporo trip based on the requested route and schedule.
Step 6: Export the Result as a Visual Excel File
Now we turn the AI-generated travel data into a real Excel file.
This part of the script creates a workbook, adds a title, writes headers, colors each row by category, merges date cells, adjusts column widths, writes the JR Pass analysis, and downloads the final .xlsx file.
Copy and paste this code into the next Colab cell.
from openpyxl import Workbook
from openpyxl.styles import PatternFill, Alignment, Font, Border, Side
from google.colab import files
wb = Workbook()
ws = wb.active
ws.title = "Sapporo Premium Itinerary"
thin_border = Border(left=Side(style='thin'), right=Side(style='thin'), top=Side(style='thin'), bottom=Side(style='thin'))
ws.merge_cells('A1:F1')
title_cell = ws['A1']
title_cell.value = "SAPPORO ❄️"
title_cell.font = Font(size=16, bold=True)
title_cell.alignment = Alignment(horizontal='center', vertical='center')
title_cell.fill = PatternFill(start_color="D9E1F2", end_color="D9E1F2", fill_type="solid")
ws.row_dimensions[1].height = 30
headers = ["Date", "Time", "Itinerary", "Cost", "Category", "Memo (Address/Links & Tips)"]
ws.append(headers)
for col in range(1, 7):
cell = ws.cell(row=2, column=col)
cell.font = Font(bold=True)
cell.alignment = Alignment(horizontal='center', vertical='center')
cell.border = thin_border
cell.fill = PatternFill(start_color="EDEDED", end_color="EDEDED", fill_type="solid")
colors = {
"Transport": "FFFFFF",
"Food": "FFF2CC",
"Sightseeing": "E2EFDA",
"Accommodation": "D9E1F2",
"Shopping": "FCE4D6"
}
current_row = 3
start_merge_row = 3
current_date = travel_data.events[0].date if travel_data.events else None
for i, event in enumerate(travel_data.events):
ws.cell(row=current_row, column=1, value=event.date)
ws.cell(row=current_row, column=2, value=event.time)
ws.cell(row=current_row, column=3, value=event.itinerary)
ws.cell(row=current_row, column=4, value=event.cost)
ws.cell(row=current_row, column=5, value=event.category)
ws.cell(row=current_row, column=6, value=event.memo)
fill_color = colors.get(event.category, "FFFFFF")
for col in range(1, 7):
cell = ws.cell(row=current_row, column=col)
cell.border = thin_border
cell.alignment = Alignment(horizontal='center', vertical='center', wrap_text=True)
if col > 1:
cell.fill = PatternFill(start_color=fill_color, end_color=fill_color, fill_type="solid")
is_last_item = (i == len(travel_data.events) - 1)
next_date = travel_data.events[i+1].date if not is_last_item else None
if is_last_item or next_date != current_date:
ws.merge_cells(start_row=start_merge_row, start_column=1, end_row=current_row, end_column=1)
merged_date_cell = ws.cell(row=start_merge_row, column=1)
merged_date_cell.alignment = Alignment(horizontal='center', vertical='center', wrap_text=True)
merged_date_cell.fill = PatternFill(start_color="F2F2F2", end_color="F2F2F2", fill_type="solid")
start_merge_row = current_row + 1
current_date = next_date
current_row += 1
ws.column_dimensions['A'].width = 12
ws.column_dimensions['B'].width = 18
ws.column_dimensions['C'].width = 35
ws.column_dimensions['D'].width = 15
ws.column_dimensions['E'].width = 15
ws.column_dimensions['F'].width = 50
ws.merge_cells(start_row=current_row, start_column=1, end_row=current_row, end_column=3)
analysis_title = ws.cell(row=current_row, column=1, value="JR Pass Tip / Cost Analysis:")
analysis_title.font = Font(bold=True)
analysis_title.alignment = Alignment(horizontal='center', vertical='center')
analysis_title.fill = PatternFill(start_color="D9E1F2", end_color="D9E1F2", fill_type="solid")
ws.merge_cells(start_row=current_row, start_column=4, end_row=current_row, end_column=6)
analysis_body = ws.cell(row=current_row, column=4, value=travel_data.jr_pass_analysis)
analysis_body.alignment = Alignment(wrap_text=True, vertical='center')
analysis_body.fill = PatternFill(start_color="F2F2F2", end_color="F2F2F2", fill_type="solid")
for col in range(1, 7):
ws.cell(row=current_row, column=col).border = thin_border
ws.row_dimensions[current_row].height = 80
file_name = "Sapporo_Premium_Itinerary_a2set.xlsx"
wb.save(file_name)
print(f"🎉 Rendering successful! Downloading '{file_name}' to your computer.")
files.download(file_name)from openpyxl import Workbook
from openpyxl.styles import PatternFill, Alignment, Font, Border, Side
from google.colab import files
wb = Workbook()
ws = wb.active
ws.title = "Sapporo Premium Itinerary"
thin_border = Border(left=Side(style='thin'), right=Side(style='thin'), top=Side(style='thin'), bottom=Side(style='thin'))
ws.merge_cells('A1:F1')
title_cell = ws['A1']
title_cell.value = "SAPPORO ❄️"
title_cell.font = Font(size=16, bold=True)
title_cell.alignment = Alignment(horizontal='center', vertical='center')
title_cell.fill = PatternFill(start_color="D9E1F2", end_color="D9E1F2", fill_type="solid")
ws.row_dimensions[1].height = 30
headers = ["Date", "Time", "Itinerary", "Cost", "Category", "Memo (Address/Links & Tips)"]
ws.append(headers)
for col in range(1, 7):
cell = ws.cell(row=2, column=col)
cell.font = Font(bold=True)
cell.alignment = Alignment(horizontal='center', vertical='center')
cell.border = thin_border
cell.fill = PatternFill(start_color="EDEDED", end_color="EDEDED", fill_type="solid")
colors = {
"Transport": "FFFFFF",
"Food": "FFF2CC",
"Sightseeing": "E2EFDA",
"Accommodation": "D9E1F2",
"Shopping": "FCE4D6"
}
current_row = 3
start_merge_row = 3
current_date = travel_data.events[0].date if travel_data.events else None
for i, event in enumerate(travel_data.events):
ws.cell(row=current_row, column=1, value=event.date)
ws.cell(row=current_row, column=2, value=event.time)
ws.cell(row=current_row, column=3, value=event.itinerary)
ws.cell(row=current_row, column=4, value=event.cost)
ws.cell(row=current_row, column=5, value=event.category)
ws.cell(row=current_row, column=6, value=event.memo)
fill_color = colors.get(event.category, "FFFFFF")
for col in range(1, 7):
cell = ws.cell(row=current_row, column=col)
cell.border = thin_border
cell.alignment = Alignment(horizontal='center', vertical='center', wrap_text=True)
if col > 1:
cell.fill = PatternFill(start_color=fill_color, end_color=fill_color, fill_type="solid")
is_last_item = (i == len(travel_data.events) - 1)
next_date = travel_data.events[i+1].date if not is_last_item else None
if is_last_item or next_date != current_date:
ws.merge_cells(start_row=start_merge_row, start_column=1, end_row=current_row, end_column=1)
merged_date_cell = ws.cell(row=start_merge_row, column=1)
merged_date_cell.alignment = Alignment(horizontal='center', vertical='center', wrap_text=True)
merged_date_cell.fill = PatternFill(start_color="F2F2F2", end_color="F2F2F2", fill_type="solid")
start_merge_row = current_row + 1
current_date = next_date
current_row += 1
ws.column_dimensions['A'].width = 12
ws.column_dimensions['B'].width = 18
ws.column_dimensions['C'].width = 35
ws.column_dimensions['D'].width = 15
ws.column_dimensions['E'].width = 15
ws.column_dimensions['F'].width = 50
ws.merge_cells(start_row=current_row, start_column=1, end_row=current_row, end_column=3)
analysis_title = ws.cell(row=current_row, column=1, value="JR Pass Tip / Cost Analysis:")
analysis_title.font = Font(bold=True)
analysis_title.alignment = Alignment(horizontal='center', vertical='center')
analysis_title.fill = PatternFill(start_color="D9E1F2", end_color="D9E1F2", fill_type="solid")
ws.merge_cells(start_row=current_row, start_column=4, end_row=current_row, end_column=6)
analysis_body = ws.cell(row=current_row, column=4, value=travel_data.jr_pass_analysis)
analysis_body.alignment = Alignment(wrap_text=True, vertical='center')
analysis_body.fill = PatternFill(start_color="F2F2F2", end_color="F2F2F2", fill_type="solid")
for col in range(1, 7):
ws.cell(row=current_row, column=col).border = thin_border
ws.row_dimensions[current_row].height = 80
file_name = "Sapporo_Premium_Itinerary_a2set.xlsx"
wb.save(file_name)
print(f"🎉 Rendering successful! Downloading '{file_name}' to your computer.")
files.download(file_name)After running this cell, Colab will download the Excel file to your computer.
Step 7: Review the Excel File
Open the downloaded Excel file.
You should see a structured travel timetable with dates, times, itinerary items, costs, categories, and memo notes.
The row colors make the file easier to read.
Transport rows are clean and white.
Food rows are soft yellow.
Sightseeing rows are soft green.
Accommodation rows are light blue.
Shopping rows are soft orange.
At the bottom of the sheet, you will also see the JR Pass Tip / Cost Analysis section.
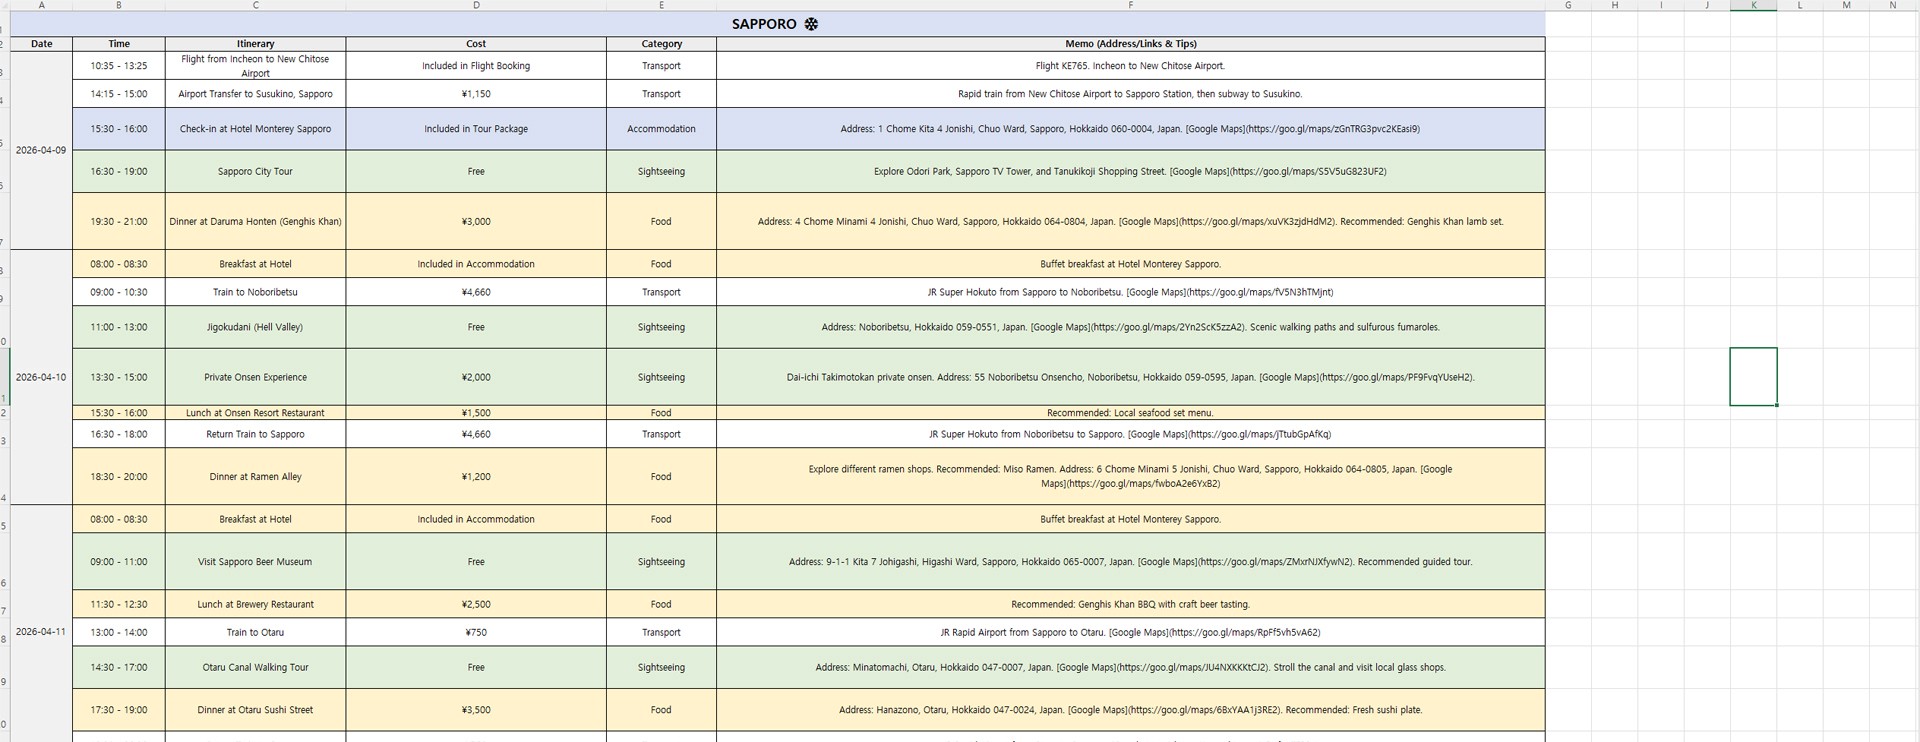
Image caption: The final Excel file organizes the Sapporo itinerary into a readable visual timetable with category colors and JR Pass analysis.
This is much easier to review than a long paragraph of travel advice.
However, do not treat the generated itinerary as a confirmed booking.
Before the real trip, check flight details, train times, restaurant hours, reservation availability, entrance fees, route changes, and official transportation information.
Why This Workflow Is Useful
This workflow is useful because it separates the task into two parts.
The AI handles the travel planning and structured data generation.
Python handles the Excel design, colors, formatting, and final download.
That makes the output more practical than a normal text response.
You can also reuse the same structure for other destinations.
For example, you can change the prompt from Sapporo to Tokyo, Osaka, Seoul, Bangkok, Paris, New York, or any other city.
You can also change the categories and memo fields depending on the purpose.
For a business trip, you might add meeting location and contact person.
For a family trip, you might add child-friendly notes.
For a food trip, you might add recommended menu and reservation status.
For a budget trip, you might add estimated total cost.
The important part is that the data structure decides what the Excel file can organize.
Common Issues and Simple Fixes
If the Excel file looks too crowded, reduce the number of itinerary events or make the memo field shorter.
If the AI gives vague activities, add this to the prompt:
If transport costs look unreliable, add this:
If the memo column becomes too long, add this:
If the code gives an error, check whether the OpenAI API key is entered correctly and whether all libraries were installed successfully.
If the output does not download, run the final cell again or check the Colab file browser on the left side.
Responsible Use Notes
AI travel planning can be very helpful, but travel information changes often.
Train schedules, weather, restaurant hours, entrance fees, reservation policies, hotel check-in times, and transportation passes can all change.
Do not rely only on AI-generated travel data for final travel decisions.
Before traveling, verify important information with official websites, map services, transportation operators, hotel pages, and restaurant booking platforms.
Also be careful with personal information.
If you adapt this workflow for a real client or group trip, avoid entering passport numbers, private contact details, payment information, or sensitive personal data into the prompt.
Conclusion
In this tutorial, we created a visual Excel travel planner using OpenAI, Google Colab, Pydantic, and openpyxl.
The workflow started with a detailed Sapporo travel request.
Then we used a structured data schema to organize the itinerary.
After that, Python turned the data into a color-coded Excel timetable.
Finally, we downloaded the file as Sapporo_Premium_Itinerary_a2set.xlsx.
This approach is useful because it turns AI’s text-based planning ability into a file format people can actually use.
It is not a replacement for real travel verification, and it should not be treated as confirmed booking information. But as a planning draft, it can save time and make trip organization much easier.
Start with one destination.
Define the structure clearly.
Generate the travel data.
Render it into Excel.
Then verify the details before using it for a real trip.
That is how AI becomes more useful as a practical planning workflow.
We will return in the next A2SET tutorial with more AI workflows for creators, planners, and small teams.
Quick FAQ
Can AI create an Excel travel itinerary?
Yes. AI can generate structured travel data, and Python can convert that data into an Excel file using a library such as openpyxl.
Does this require coding experience?
Basic Python knowledge helps, but this tutorial is designed so you can copy and run each Colab cell step by step.
Are the travel routes and prices guaranteed to be accurate?
No. AI-generated travel details should be treated as a planning draft. Always verify routes, prices, hours, and reservations before traveling.
Can I use this for another city?
Yes. Change the destination, dates, flight schedule, and route requirements inside the prompt.
Can I customize the Excel design?
Yes. You can change colors, column widths, headers, row height, fonts, borders, and the output file name in the openpyxl code.
Why use Pydantic?
Pydantic helps define the output structure, so the AI response can be organized into predictable fields such as date, time, itinerary, cost, category, and memo.
Can I use this for client travel planning?
You can use it as a draft planning tool, but you should verify all important details manually before sending final information to a client.
