No Audio Recording Needed: Create Photorealistic AI Talking Videos with Google Flow
Hello creators, welcome back to A2SET’s AI Tutorial.
When you scroll through TikTok, Instagram Reels, or YouTube Shorts these days, you can often find natural UGC-style videos of creators reviewing beauty products, sharing daily routines, or introducing a brand from a cozy room.
This kind of video feels simple, but producing it is not always easy.
You may need a model, a camera, lighting, location, voice recording, editing, and multiple revisions before the result feels natural. For small brands, solo creators, or early-stage product teams, that process can take more time and budget than expected.
In this tutorial, we will use Google Flow to create a photorealistic creator-style talking video using an AI-generated image and a dialogue prompt.
The workflow is simple:
create a realistic influencer-style image with Nano Banana Pro,
add that image to the video prompt,
generate the first talking video with Veo 3.1,
extend the video if the dialogue is cut off,
and refine the final connection in an editing tool.
The goal is not to say that AI video will be perfect every time. AI-generated videos can still have small issues with lip movement, face consistency, hands, or transitions. However, this workflow can be a useful way to test product videos, social media concepts, and global creator-style content before planning a full production.
Step 1: Casting — Generate a Photorealistic Influencer Image
The first step is to create a strong reference image.
This image will become the visual starting point for the video, so it should look like a natural creator-style shot rather than a polished studio portrait.
In the original workflow, we use Nano Banana Pro inside Google Flow to generate a realistic K-pop style Korean female influencer image for a beauty product video.
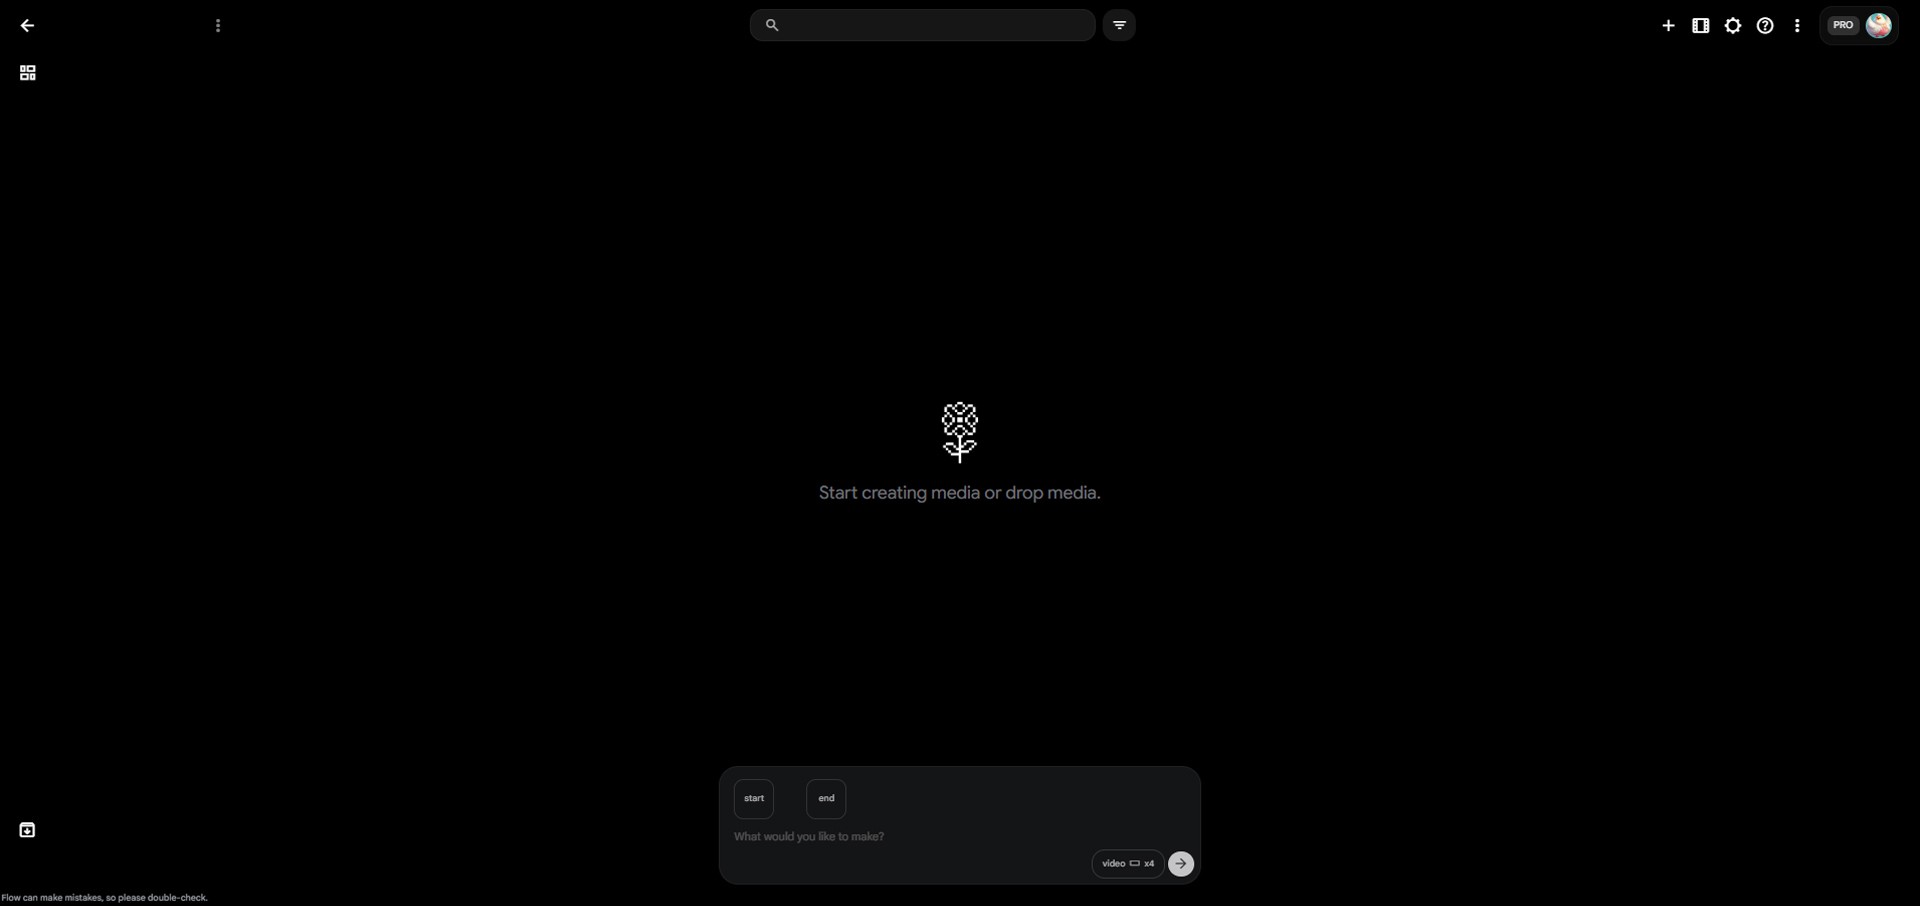
Image caption: Start by creating a realistic vertical image that can work as the main visual source for the talking video.
Go to your Google Flow workspace and open the image generation area.
Then select Nano Banana Pro from the model selector if it is available in your account.
For a Reels or Shorts-style video, set the aspect ratio to 9:16.
Then copy and paste the prompt below.
Pro Prompt for Viral Influencer Image
A2SET Tip
For this type of image, keywords like raw, candid, front camera, and UGC style are useful because they guide the image toward a natural social media look.
If the prompt only says “beautiful influencer,” the image may become too polished or commercial. But if you describe the camera style, lighting, and casual room mood, the result is more likely to feel like a real creator video still.
For better results, keep the scene simple:
one main person,
one product,
clean background,
soft indoor lighting,
vertical composition,
and no text inside the image.
Avoid adding too many props or complicated backgrounds at this stage. The cleaner the image is, the easier it will be to animate later.
Step 2: Add the Image to Prompt and Generate the First Talking Cut
Once you have a good image, the next step is to turn it into a talking video.
In the past, you would usually need to record voice audio separately. In this workflow, we use a dialogue prompt inside the video generation step, so the AI can generate the voice and lip movement from the written script if the selected model supports native audio generation.
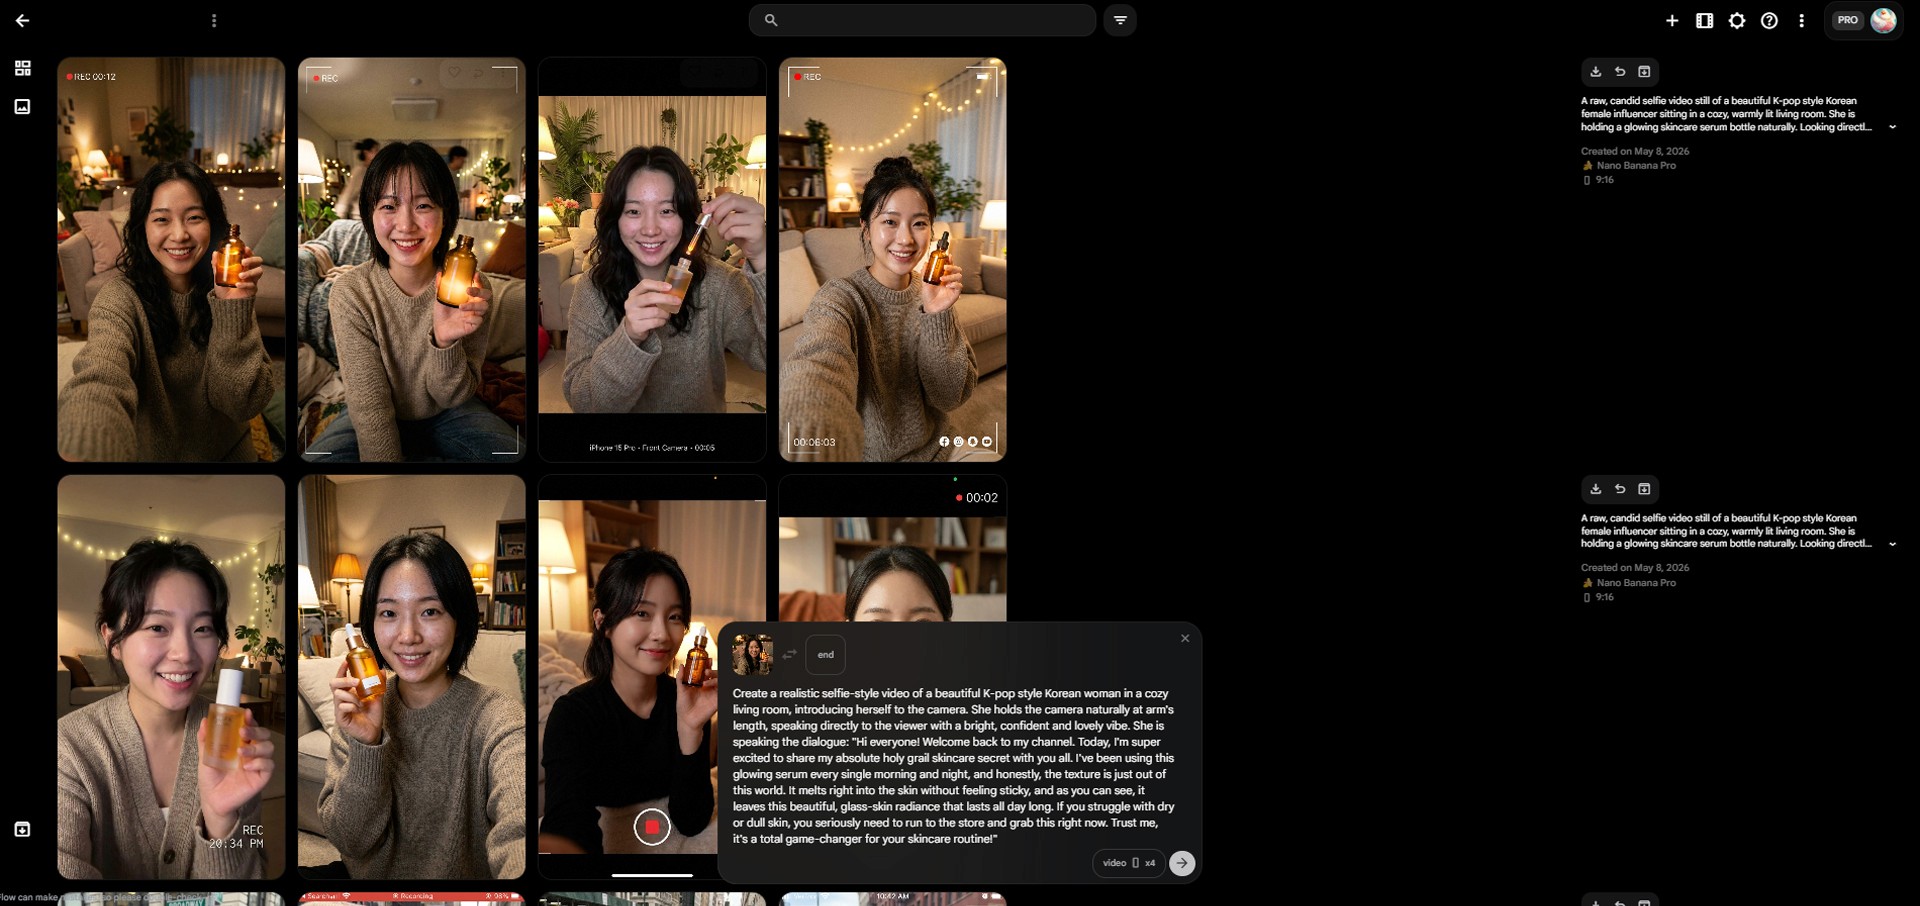
Image caption: Add the selected influencer image to the prompt so the video model can use it as the visual reference for the talking scene.
Choose your favorite generated image from the gallery.
Click the More button on the image thumbnail and select Add to Prompt.
Then set the video model to Veo 3.1 Fast or another available Veo 3.1 option in your account. Keep the ratio at 9:16 for vertical social media content.
In the prompt box, write both the scene direction and the dialogue you want the influencer to speak.
First Video Prompt Example
This prompt does three important things.
First, it tells the model what kind of video to create.
Second, it keeps the visual style close to the uploaded image.
Third, it gives the exact dialogue that should be spoken in the video.
A2SET Tip
Do not only write the dialogue.
If you only paste the script, the model may not understand the camera style, mood, or visual continuity you want. Always include a short description of the scene before the dialogue.
For example, include details such as:
selfie-style video,
cozy living room,
direct eye contact,
natural arm’s length camera,
confident creator tone,
and product review mood.
This helps the video feel more intentional.
Step 3: Extend the Video When the Dialogue Gets Cut Off
Sometimes, the generated video may stop before the full dialogue is finished.
For example, the video may end around:
“Today, I'm super excited to share my absolute holy grail skincare secret with you all.”
This does not mean the workflow failed. AI video models usually generate within a limited duration, so longer dialogue may need to be continued with an extension workflow.
In Google Flow, you can use the Extend or Expansion option to continue from the previous video.
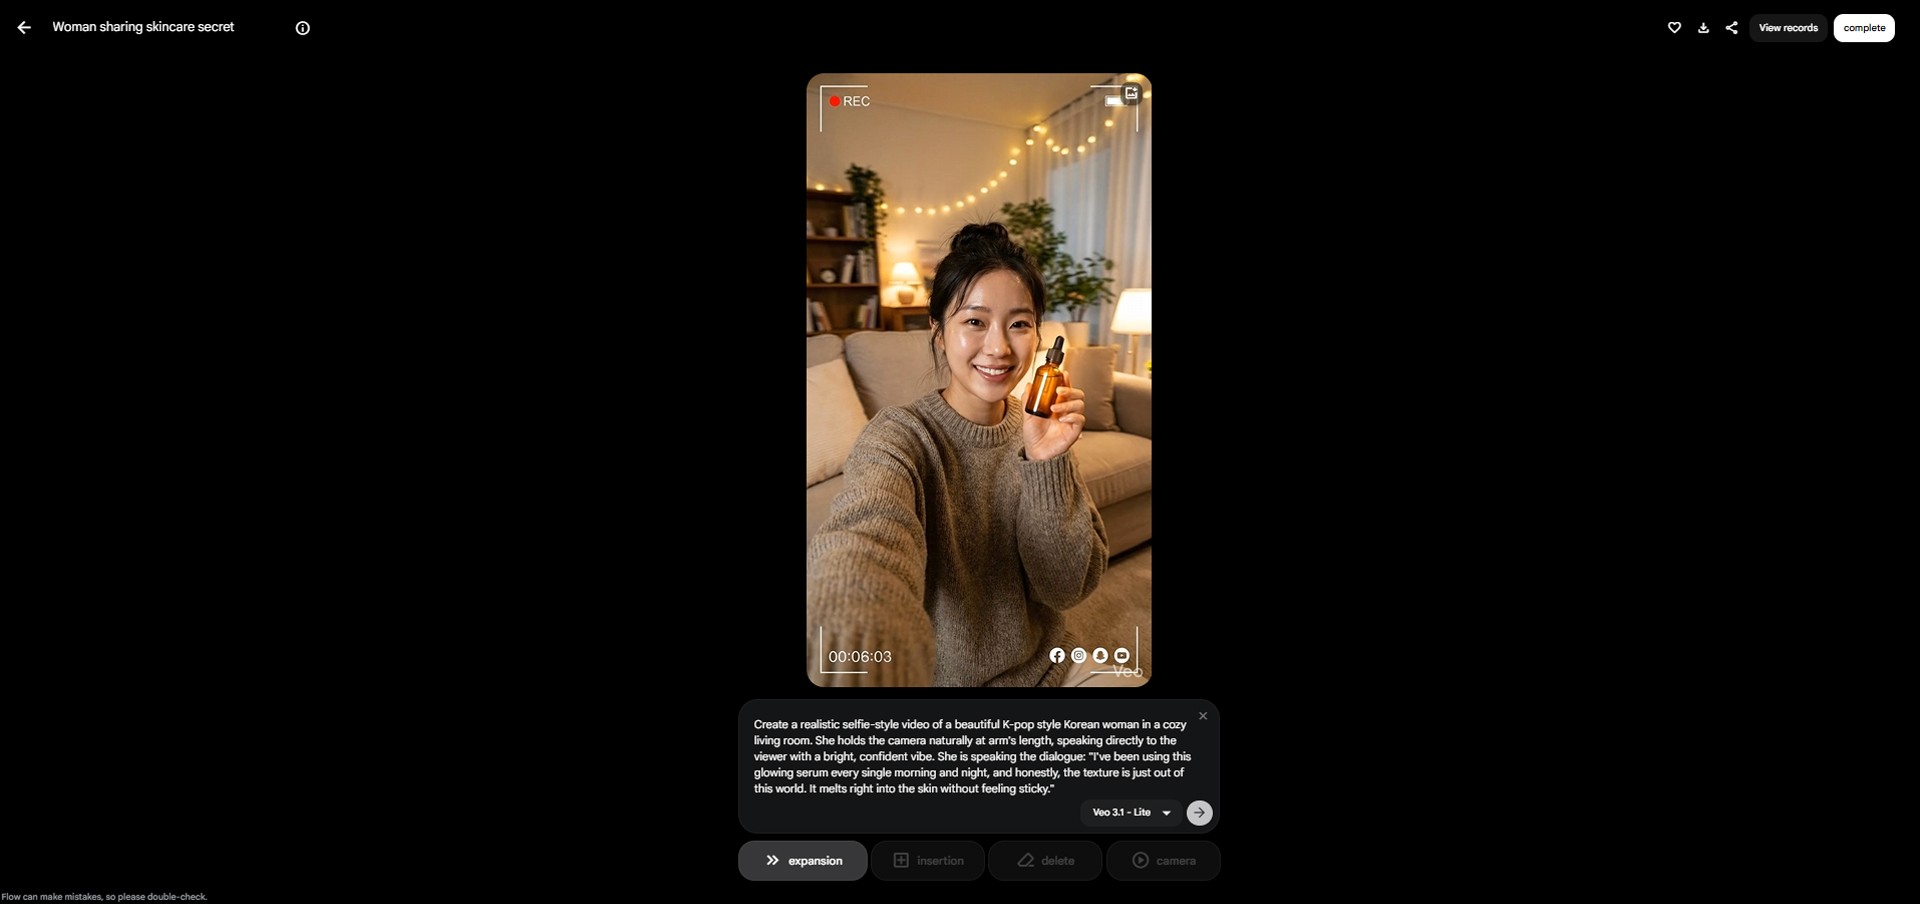
Image caption: Use the Extend workflow when the first generated video stops before the full dialogue is complete.
Click the Expansion button from the generated video preview.
The key point is this:
Do not write only the remaining dialogue.
If you only write the next sentence, the AI may forget the previous camera angle, room lighting, subject identity, and creator-style mood. Instead, keep the same visual description and replace only the dialogue part with the continuation.
Natural Extend Prompt Example
This keeps the same style and continues the message more naturally.
A2SET Tip
When extending, repeat the important visual information:
same person,
same room,
same lighting,
same camera angle,
same creator tone,
and same product review mood.
This gives the model a better chance to make the second clip feel connected to the first one.
Pro Tip: How to Make Extensions Feel More Natural
Even with a good extension prompt, the connection between two AI-generated clips may not always be perfect.
You may notice:
a small face shift,
a slight pause,
a mouth movement mismatch,
a change in eye direction,
or a tiny glitch near the cut point.
This is common in AI video workflows. The solution is to plan the script and edit the connection carefully.
Tip 1: End the First Clip at a Natural Pause
Try to make the first video end at a comma or period.
If the video cuts in the middle of a word, the extension will feel more awkward.
For example, this is harder to connect:
This is easier to connect:
A sentence ending or short pause gives you a cleaner place to extend or edit the video.
Tip 2: Trim the Connection in CapCut
AI-generated videos may slightly slow down, distort, or morph near the beginning or end of a clip.
If the transition feels awkward, import both clips into CapCut or another editing tool.
Then trim a small amount from the end of the first clip and the beginning of the extended clip.
In many cases, removing a short unstable section can make the final edit feel much smoother.
You do not need a complex edit. A simple trim at the joint is often enough.
Common Issues and Simple Fixes
If the voice or lip-sync feels rushed
Shorten the dialogue and divide the script into smaller sections.
You can also add this line to the prompt:
If the face changes during the video
Add this line:
If the product changes shape
Add this line:
If the camera moves too much
Add this line:
If the video looks too polished
Add this line:
Why This Workflow Is Useful for Creators
This workflow is useful because it separates the process into clear steps.
The image generation step creates the visual identity.
The video prompt creates the motion and dialogue.
The Extend workflow helps continue longer scripts.
The editing step helps clean up the final connection.
This is much easier to control than trying to generate a complete long video from one prompt.
For creators and small teams, this workflow can be useful for:
beauty product concepts,
UGC-style ad drafts,
influencer-style product videos,
global marketing tests,
short-form video experiments,
landing page video mockups,
and multilingual campaign planning.
It is especially helpful when you want to test the look and message before spending budget on a real shoot.
Responsible Use Notes
AI talking videos can be powerful, so they should be used carefully.
Do not use someone’s real face, voice, or likeness without permission.
Do not impersonate celebrities, public figures, private individuals, or real customers.
Do not present an AI-generated person as a real customer testimonial if that is not true.
Do not make beauty, health, or product claims that you cannot support.
For commercial content, always check the usage rights, plan limitations, watermark policy, and commercial terms of the tools you use.
It is also a good habit to keep a simple production record:
original prompt,
generated image,
video prompt,
extended prompt,
generated clips,
edited final video,
and usage notes.
This helps keep the workflow organized if you later use the content for a brand, client, or public campaign.
Conclusion
Let’s summarize the Google Flow workflow.
First, use Nano Banana Pro to create a photorealistic vertical creator-style image.
Second, add that image to the video prompt.
Third, use Veo 3.1 to generate a talking video by writing the scene direction and dialogue.
Fourth, if the dialogue is cut off, use Extend and continue with a prompt that keeps the same style and camera direction.
Finally, trim the connection in CapCut or another editor if the transition feels slightly awkward.
This workflow does not guarantee a perfect video every time, but it gives creators a practical way to test photorealistic AI talking videos without recording separate audio first.
For small teams, solo creators, and brands testing short-form content, it can be a useful production shortcut.
Start with a simple script.
Use a clean 9:16 image.
Keep the camera style natural.
Divide long dialogue into smaller sections.
Review the result carefully.
Then edit the final connection if needed.
That is how AI video becomes less random and more useful as a real creator workflow.
Quick FAQ
Can I create a talking video without uploading an audio file?
Yes, if the selected video model and platform support dialogue or native audio generation from text prompts. Availability may depend on your account, region, model, and plan.
Why does the video sometimes stop before the dialogue is finished?
AI video generation usually has duration limits. If the script is too long, the video may end before the full dialogue is spoken. Use the Extend workflow or divide the script into shorter parts.
Should I write only the dialogue in the prompt?
No. It is better to include the scene style, camera direction, subject description, and dialogue together. This helps the AI keep the visual style more consistent.
What aspect ratio should I use for Reels or Shorts?
Use 9:16 for vertical short-form platforms such as TikTok, Instagram Reels, and YouTube Shorts.
What should I do if the extension looks awkward?
Try ending the first clip at a natural pause, then trim a small section around the connection point in an editing tool such as CapCut.
Can I use this workflow for brand promotion?
Yes, but review the platform’s commercial usage policy and make sure your product claims are accurate. Also avoid using real people’s likenesses without permission.
Is the result always photorealistic?
No. Results can vary depending on the reference image, prompt, model, and generation settings. A clean image and clear prompt usually improve the starting point.