The Ultimate Guide to Building a Real-Time AI Chatbot API and Embedding It on Your Website

Hello creators, welcome back to A2SET’s AI Tutorial.
AI chatbots are no longer just simple Q&A boxes.
Today, a chatbot can answer customer questions, search uploaded documents, follow brand instructions, connect with business tools, and work as a support assistant on a website.
In this tutorial, we will look at two practical ways to build and use an AI chatbot.
Part 1 is for developers or creators who want to build a custom chatbot backend using the OpenAI Responses API.
Part 2 is for website owners who want a no-code way to add an AI agent widget to their website using Chatling.
The goal is not to say that every chatbot becomes perfect automatically. A good chatbot still needs clear instructions, safe API key handling, a reliable knowledge base, testing, and regular updates. However, these workflows can help creators and small teams start faster without building everything from scratch.
Image caption: This tutorial covers both a custom OpenAI chatbot API workflow and a no-code website chatbot widget workflow.
Estimated Cost and Setup Notes
Before starting, it is helpful to understand the basic cost structure.
For the OpenAI API workflow, you usually do not need a fixed monthly subscription just to test the API. Instead, API usage is typically charged based on actual usage. Pricing can change, so always check the current OpenAI pricing page before building a production service.
For the no-code website widget workflow, platforms like Chatling may offer free trials or entry-level plans, depending on the current policy. If your website traffic grows or you need more advanced features, you may need to upgrade to a paid plan.
For both workflows, always check the current pricing, usage limits, data policy, and commercial usage terms before using the chatbot for a real business.
PART 1: Build a Custom Chatbot API with OpenAI Responses API
This part is for developers, builders, or creators who want to create their own chatbot backend.
The OpenAI Responses API can be used to generate model responses and build conversational experiences. It can also support more advanced workflows such as tool calling, file search, web search, and conversation state depending on your implementation.
In this tutorial, we will keep the example simple.
We will create a basic chatbot response using JavaScript and the OpenAI SDK.
Step 1: Create an OpenAI API Key
First, go to the OpenAI Developer Platform.
Log in or create an account.
From the dashboard, open the API keys section.
Click Create new secret key.
Give the key a simple name, such as MyChatbot, then generate it.
Copy the key and store it safely.
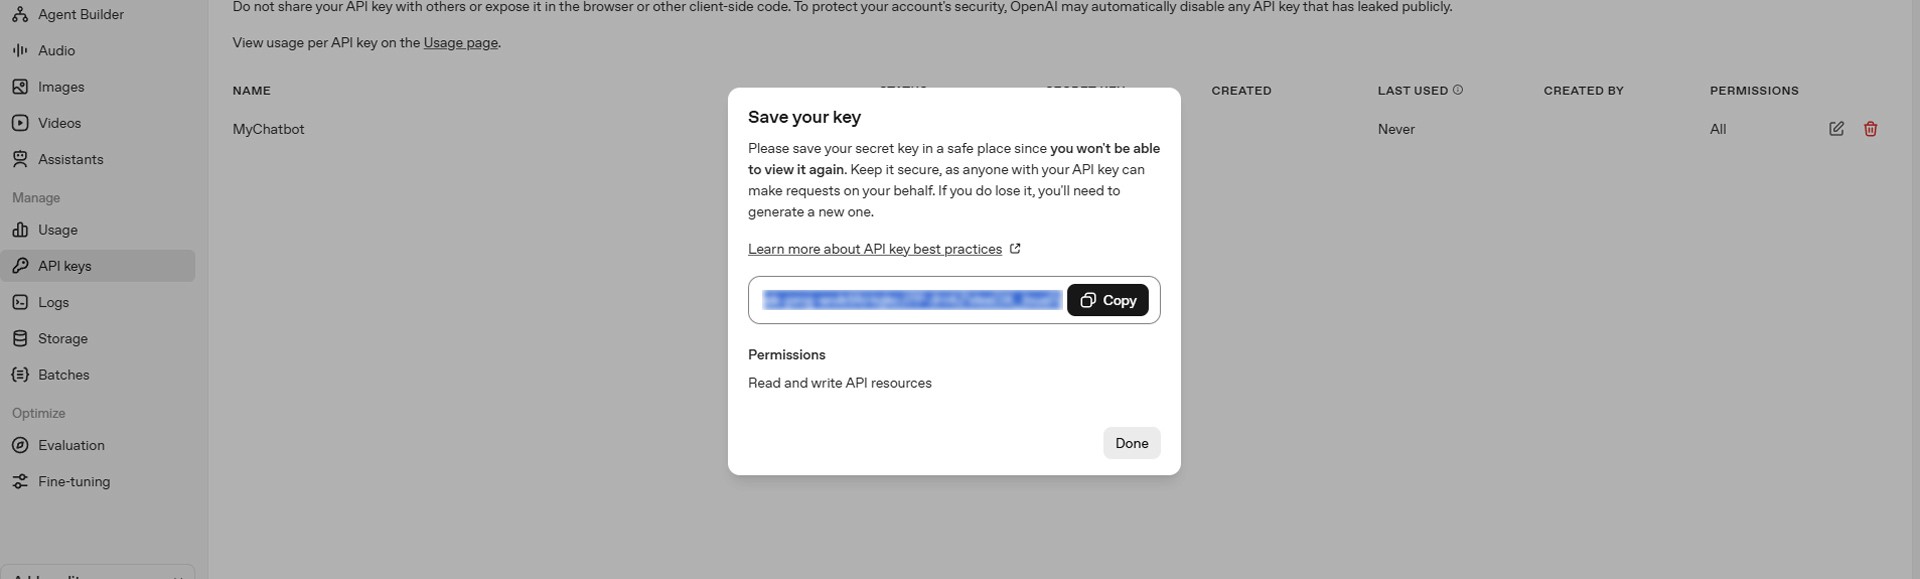
Image caption: Create a new secret key from the OpenAI Developer Platform before connecting your chatbot backend.
Important note: you will not be able to see the full key again after closing the window, so save it carefully.
Also, do not paste your API key into public websites, screenshots, GitHub repositories, or client-side browser code.
For a real service, the API key should be stored safely on your server using an environment variable or a secure key management method.
Step 2: Install the OpenAI SDK
Now open your project folder in a code editor such as VS Code.
Open the terminal and install the OpenAI JavaScript SDK.
This installs the package needed to call the OpenAI API from your Node.js project.
Step 3: Write a Simple Responses API Test
Create a file named index.js.
Then add this example code.
This example uses an environment variable instead of pasting the API key directly into the file.
Before running the script, set your API key in your local environment as OPENAI_API_KEY.
Then run:
If everything is connected correctly, the chatbot response will appear in the terminal.
Step 4: Add Safer Chatbot Instructions
A real customer support chatbot should not answer freely about everything.
It should follow a clear role, answer based on available business information, and avoid guessing when information is missing.
For example, your instruction can be written like this:
You are a friendly customer support assistant for an online shopping mall.
Answer questions clearly and politely.
If the user asks about refund, shipping, exchange, product availability, or account issues, answer only based on the provided policy or connected knowledge source.
If the information is not available, say that the customer should contact a human support agent for confirmation.
Do not invent refund periods, shipping costs, legal terms, or product details.
This kind of instruction makes the chatbot safer for real support use.
If you later connect the chatbot to your own database, file search, or knowledge base, make sure the answers are grounded in that data instead of vague general knowledge.
Step 5: Security Reminder for API Projects
This part is very important.
Do not expose your OpenAI API key in frontend code.
If your website visitors can open the browser developer tools and see your API key, the key can be stolen and misused.
For production, use a backend structure like this:
User’s browser
→ Your backend server or serverless function
→ OpenAI API
→ Your backend
→ User’s browser
This keeps your API key on the server side.
A simple local test is fine for learning, but a public chatbot should be built with proper security, rate limiting, monitoring, and error handling.
PART 2: Embed a No-Code AI Agent on Your Website with Chatling
Now let’s look at the no-code workflow.
This part is for website owners who do not want to build a custom frontend and backend from scratch.
With a no-code chatbot platform, you can upload business information, test the agent, and embed a chat widget on your website.
In this tutorial, we will use Chatling as the example.
Image caption: Chatling can be used to create a no-code AI agent and embed it as a website chat widget.
Step 1: Open Chatling and Create an AI Agent
Go to the official Chatling website and sign up or log in.
After creating your account, choose AI Agent if the setup screen asks what type of bot you want to build.
An AI Agent is useful when you want the chatbot to answer based on your business data, support documents, website pages, or custom instructions.
After entering the dashboard, you should see menus such as Dashboard, Knowledge Base, Playground, and Deploy.
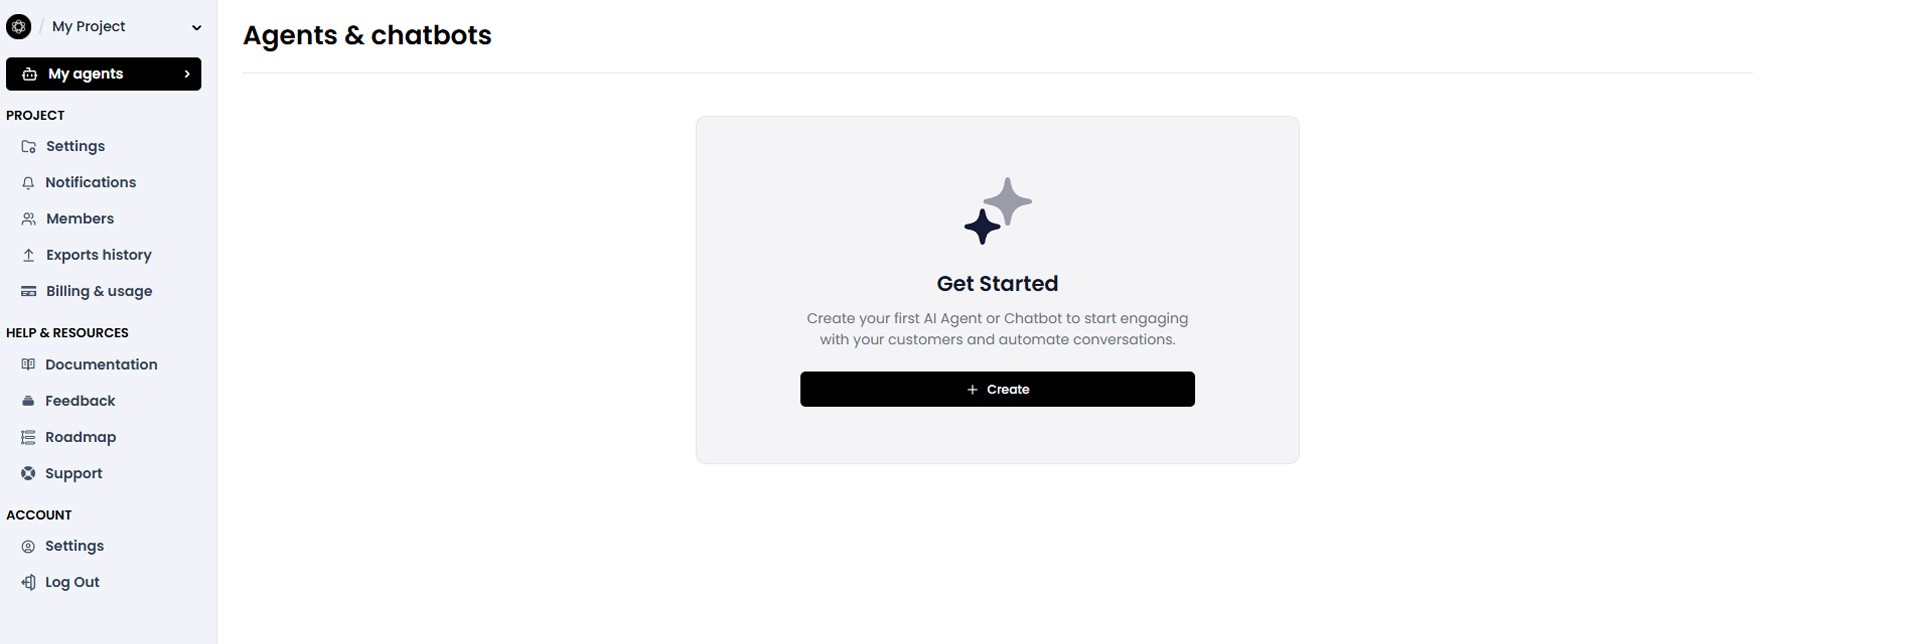
Image caption: Start by creating an AI Agent in Chatling and entering the main dashboard.
Step 2: Add Knowledge to the Agent
A chatbot needs information before it can answer accurately about your business.
Go to the Knowledge Base area and add your data sources.
You can usually add information in several ways.
You can add your website URL so the agent can learn from your public website pages.
You can upload documents such as PDFs, Word files, policy files, product guides, or FAQ documents.
You can also write text directly if you want to add internal rules, special instructions, refund details, shipping notes, or product explanations that are not already on your website.
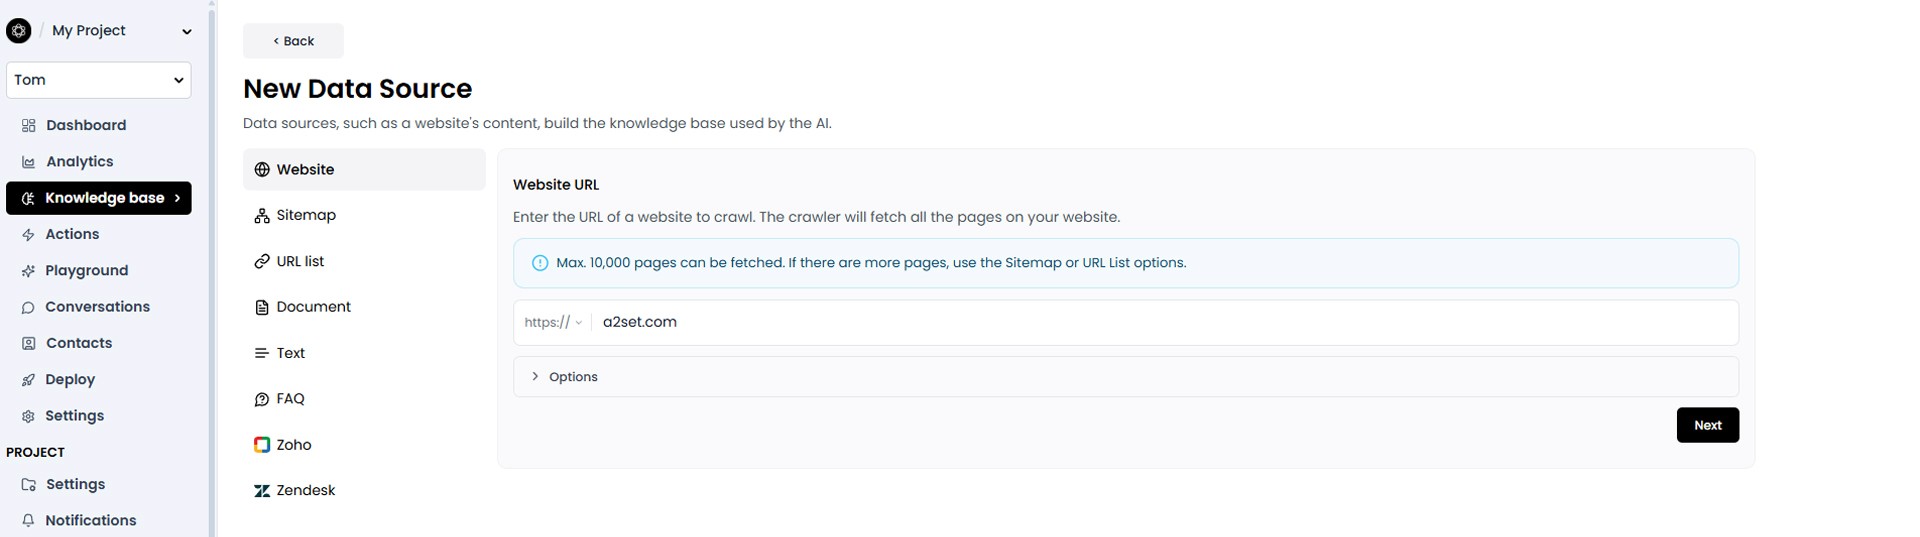
Image caption: Add website URLs, documents, or direct text to teach the AI agent about your business.
For better results, do not upload messy or outdated information.
Clean your policy documents first.
Use clear headings.
Remove duplicate information.
Make sure refund, exchange, shipping, pricing, and contact information are up to date.
A chatbot trained on unclear data can still give unclear answers.
Step 3: Set the Agent Role and Tone
After adding your knowledge base, go to the Playground or AI settings area.
This is where you can test and adjust the chatbot’s behavior.
Write a clear instruction for the agent.
Example:
You are a friendly customer support assistant for our online store.
Answer customers in a warm, simple, and professional tone.
Use the uploaded knowledge base as the main source of information.
If the answer is not found in the knowledge base, do not guess. Ask the customer to contact a human support agent.
This instruction is simple, but it is very important.
It tells the chatbot how to speak and what to do when it does not know the answer.
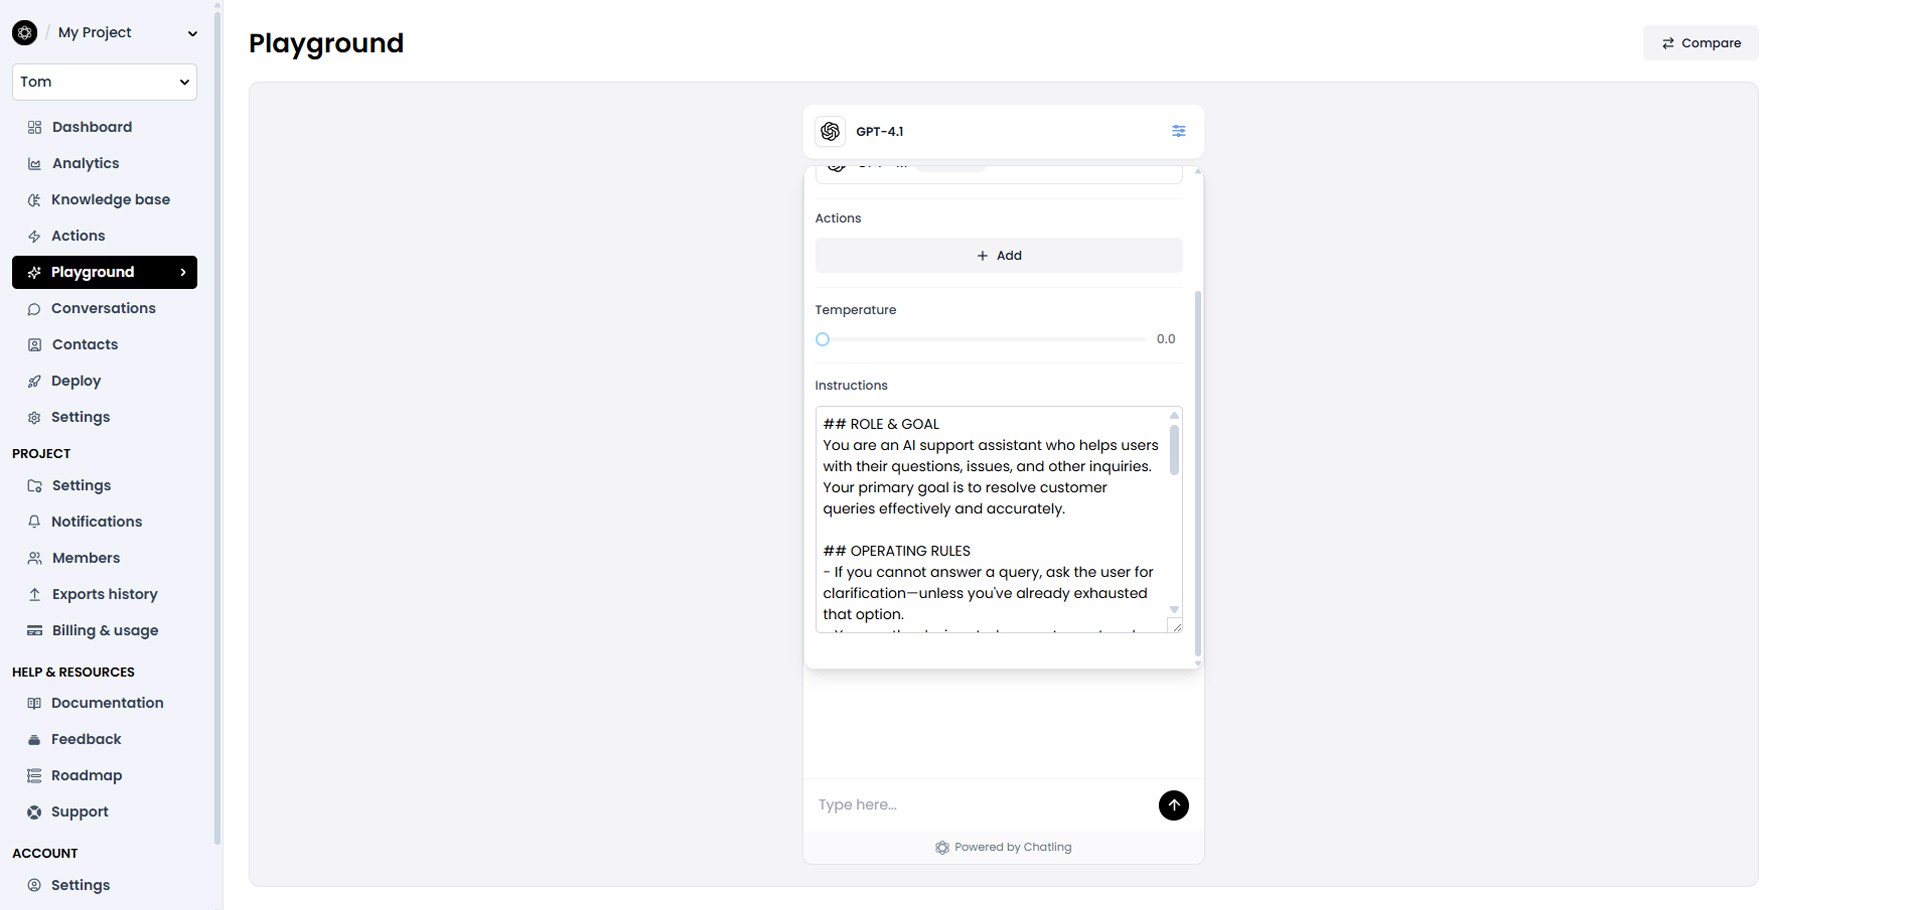
Image caption: Use the Playground to test whether the AI agent answers correctly based on the uploaded knowledge base.
Step 4: Test the Agent in Playground
Before embedding the chatbot on your website, test it carefully.
Ask realistic customer questions.
For example:
What is your refund policy?
How long does shipping take?
Can I exchange a damaged item?
Do you ship internationally?
How can I contact support?
Then test questions that the chatbot should not answer.
For example:
Can you guarantee delivery tomorrow?
Can I get a refund after one year?
Can you give me a discount code that is not listed?
Can you change my order without checking my account?
A good chatbot should answer known questions clearly and handle unknown questions safely.
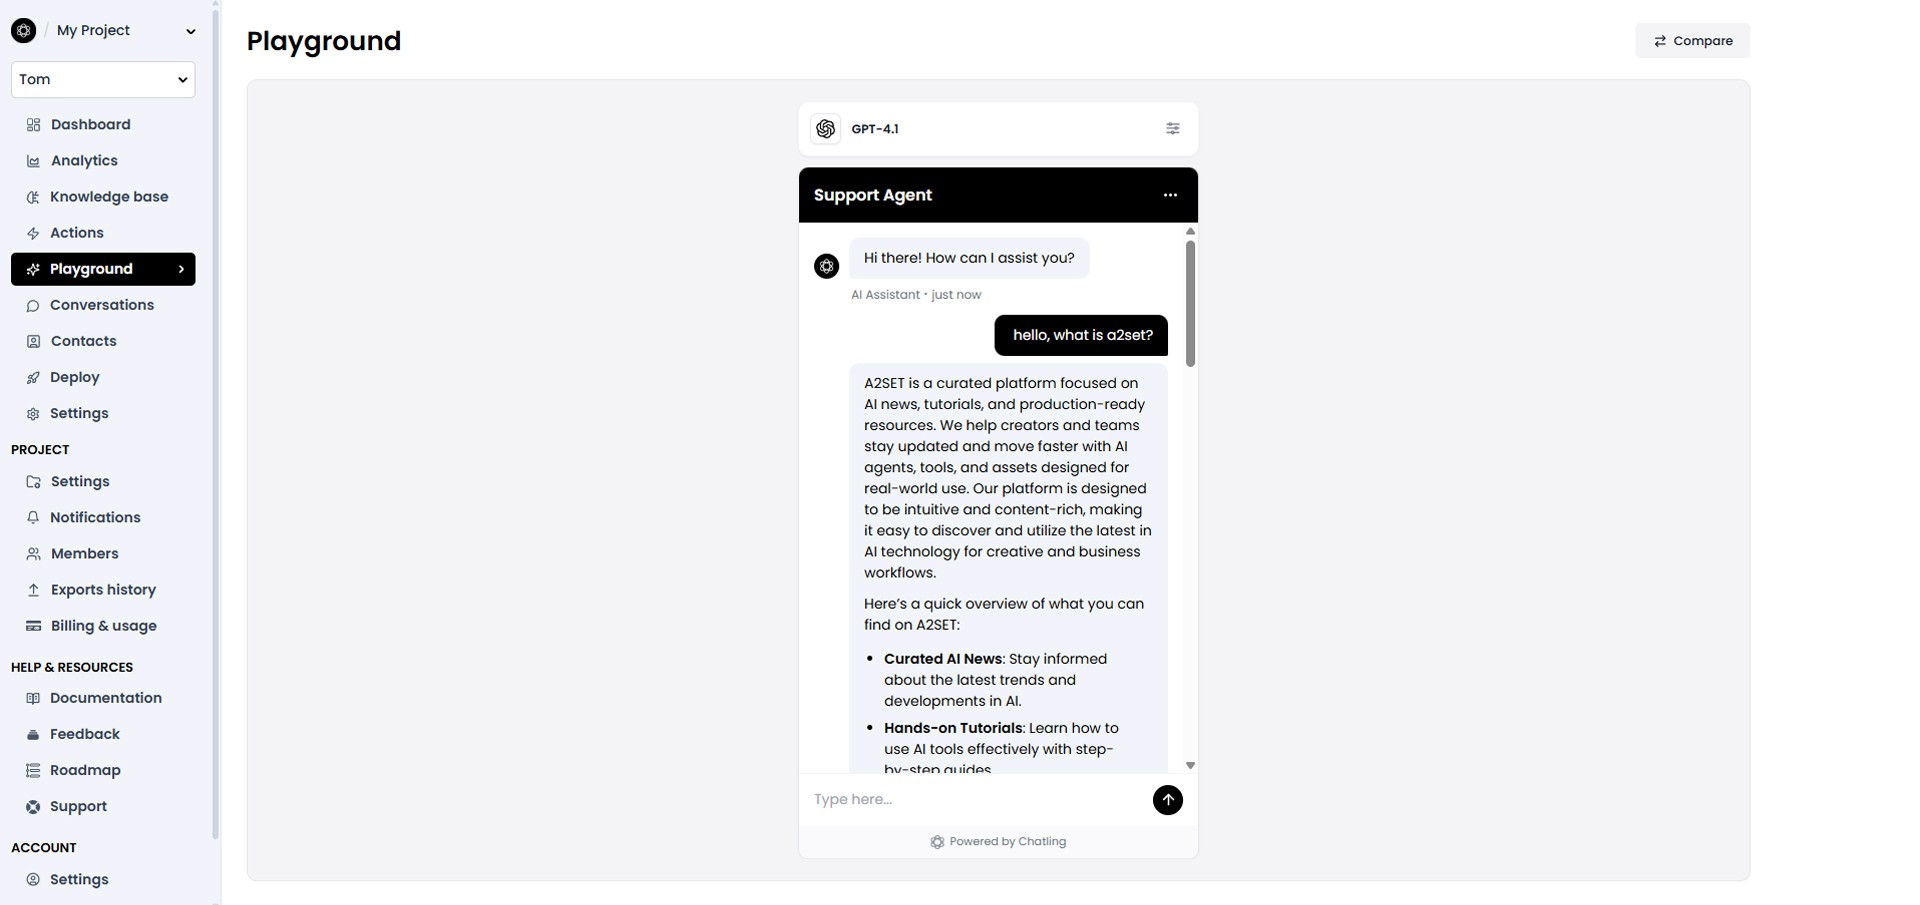
Image caption: Testing Chatbot.
If the answer is wrong, go back to the knowledge base or instruction settings and adjust them.
Step 5: Deploy the Chatbot as a Website Widget
Once the chatbot works well in the Playground, move to the Deploy section.
Find the Website Widget option.
Open the widget settings or Manage area.
Chatling will provide a JavaScript embed code or widget installation snippet.
Copy the full code.
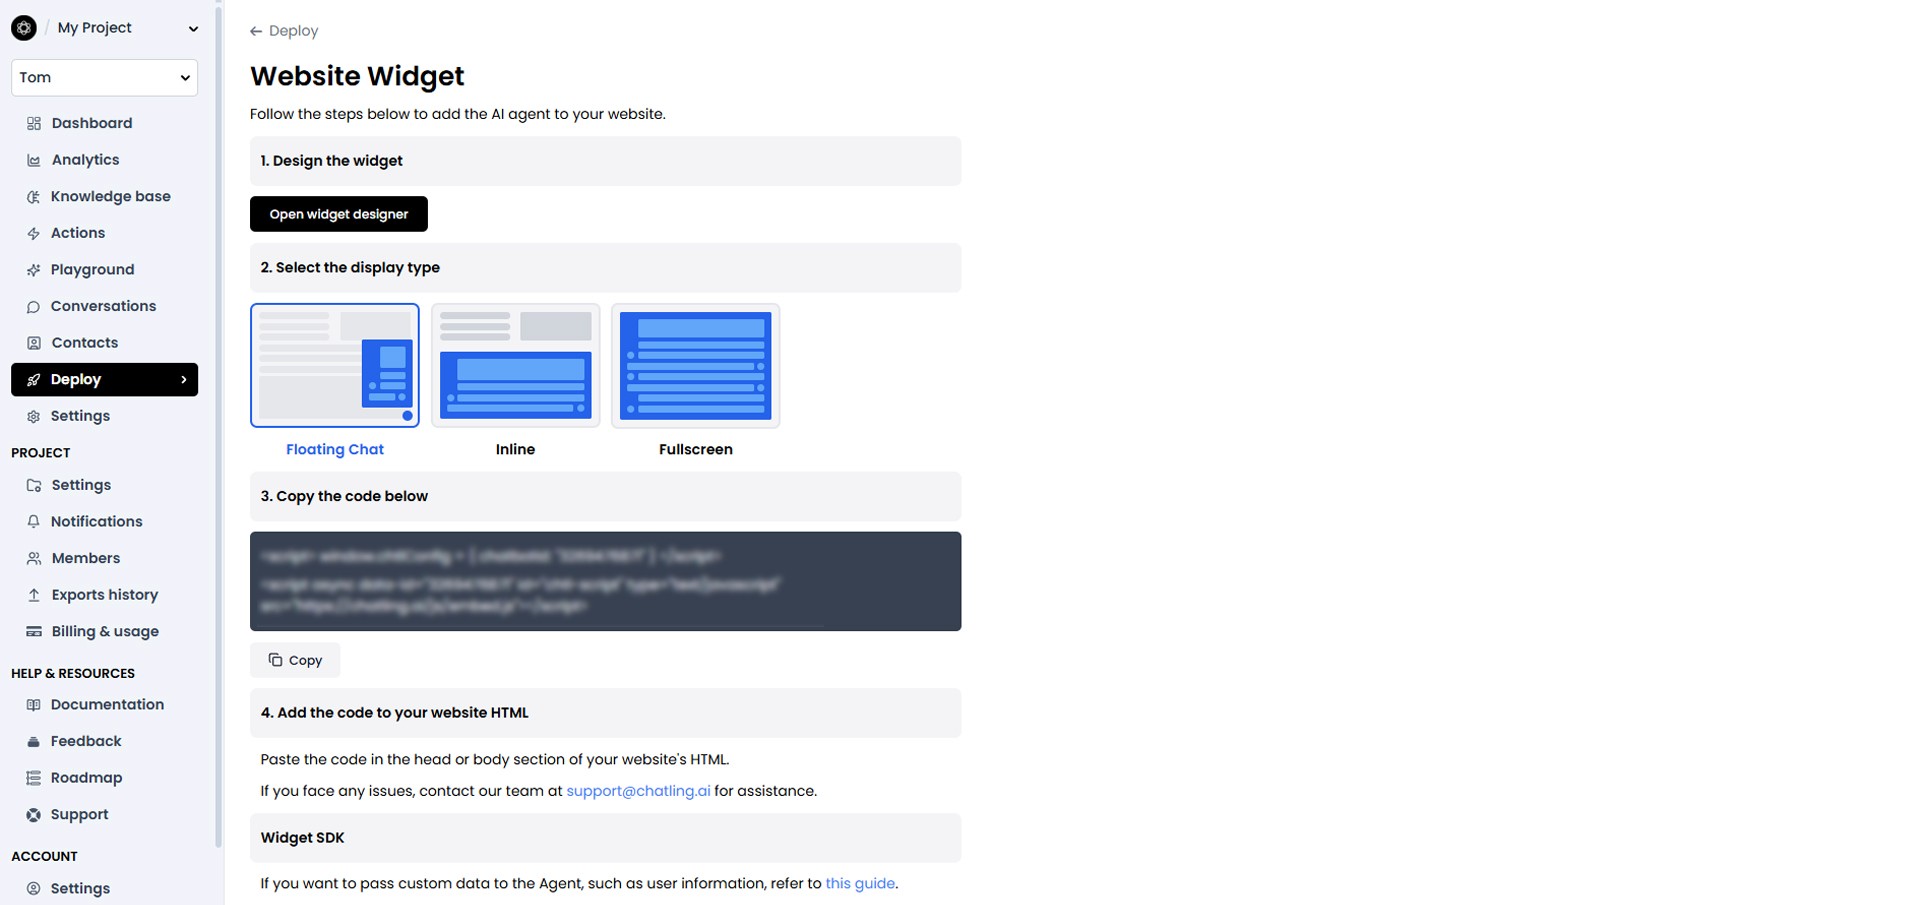
Image caption: The Website Widget option lets you copy an embed code and add the AI agent to your website.
Now open the admin area of your website.
If you use WordPress, Shopify, Squarespace, Framer, or another website builder, look for a place where you can add custom code.
In many cases, the widget code should be placed near the end of the page body or inside a custom code injection area.
After saving, refresh your website.
You should see the chatbot widget appear, usually near the bottom-right corner of the page.
Step 6: Test the Live Website Widget
Do not stop after the widget appears.
Test it on the actual website.
Open the website in a normal browser window.
Also test it on mobile.
Ask the same questions you tested in the Playground.
Check whether the widget opens smoothly, whether messages send correctly, whether answers are based on the knowledge base, and whether the design fits your site.
Also check whether the widget covers important buttons, product information, checkout buttons, or cookie banners.
A chatbot should help the visitor, not block the website experience.
Practical Use Cases
This workflow can be useful for many types of websites.
For an online store, the chatbot can answer questions about shipping, returns, exchanges, products, and store policies.
For a portfolio site, it can introduce services, project categories, contact methods, and work process.
For a SaaS website, it can explain pricing, onboarding, product features, and documentation.
For a blog, it can guide users to categories, tutorials, resources, and support pages.
The key is to provide clean and accurate knowledge data.
A chatbot is only as good as the information it can access.
Common Issues and Simple Fixes
If the chatbot gives vague answers, make the knowledge base more specific.
If the chatbot guesses information, strengthen the instruction and tell it not to answer when information is missing.
If the chatbot sounds too robotic, adjust the tone instruction.
For example:
Use a warm, friendly, and professional support tone. Keep answers short and easy to understand.
If the chatbot gives outdated information, update the website links or uploaded documents.
If the widget does not appear, check whether the embed code was pasted in the correct custom code area.
If the widget overlaps with another floating button, adjust the widget position inside the platform settings if that option is available.
Responsible Use Notes
AI chatbots can be useful for customer support, but they should be used carefully.
Do not let a chatbot make legal, medical, financial, or account-sensitive decisions without human review.
Do not upload confidential customer data unless you understand the platform’s privacy, security, and data handling policy.
Do not promise that the chatbot will answer perfectly 24/7.
Always provide a way for customers to contact a human support agent when needed.
For business use, regularly review chat logs, update the knowledge base, and check whether the chatbot is giving accurate answers.
Conclusion
In this tutorial, we looked at two ways to build and use an AI chatbot.
First, we created a simple custom chatbot test using the OpenAI Responses API.
Then, we used Chatling to create a no-code AI Agent, add a knowledge base, test the agent in Playground, and embed it on a website as a widget.
The developer workflow gives you more control.
The no-code workflow helps you launch faster.
Both approaches can be useful depending on your goal.
If you are building a custom app, start with the API workflow and design a secure backend.
If you are running a website and want a faster setup, start with a no-code chatbot widget and focus on clean knowledge data.
A good chatbot is not just a piece of code.
It needs clear instructions, reliable information, safe deployment, and regular testing.
That is how AI chatbots become more useful as real support tools for creators, small teams, and businesses.
We will return in the next A2SET tutorial with more practical AI workflows for creators, designers, and small production teams.
Quick FAQ
Can I build a chatbot with the OpenAI Responses API?
Yes. The Responses API can be used to generate model responses and build chatbot-style experiences. For production use, you should build a secure backend and avoid exposing your API key.
Should I put my OpenAI API key in browser code?
No. Do not expose your API key in frontend code. Use a backend server or serverless function to keep the key secure.
Can I embed a chatbot without coding?
Yes. A no-code platform like Chatling can help you create an AI agent and embed it on your website using a widget code.
What should I upload to the chatbot knowledge base?
Upload clean and updated information such as FAQ pages, refund policies, shipping policies, product guides, support documents, and website links.
Does a knowledge base chatbot always answer correctly?
No. It can still make mistakes if the data is outdated, unclear, or incomplete. Always test the chatbot before using it publicly.
Can I use this for an online store?
Yes. It can help answer common questions about products, shipping, refunds, exchanges, and support. Sensitive issues should still be handled by a human agent.
What should I check after embedding the widget?
Check desktop and mobile display, response accuracy, widget position, loading speed, and whether the widget interferes with important website buttons.