The Ultimate Guide to ComfyUI App Builder and App View for Beginners

Hello creators, welcome back to A2SET’s AI Tutorial.
ComfyUI is one of the most flexible tools for AI image and video generation.
But for beginners, it can also feel overwhelming.
When you first open a complex workflow, the screen may be filled with nodes, wires, model loaders, samplers, text encoders, image outputs, and settings that are difficult to understand at a glance.
This is why many creators describe complex ComfyUI workflows as “node spaghetti.”
The workflow may be powerful, but it does not always look friendly.
ComfyUI’s App Builder and App View can help solve this problem.
Instead of showing every node to the user, you can select only the important controls and turn the workflow into a cleaner app-style interface.
For example, you can expose only the prompt box, image size, seed, steps, and output preview while keeping the complicated node graph hidden in the background.
This does not mean you no longer need to understand ComfyUI. The node graph is still the engine behind the app. However, App View makes it much easier to use, test, and share a workflow without forcing every user to touch the full node graph.
Step 1: Prepare a Working ComfyUI Workflow
Before building an app, you need a working workflow.
Think of the node graph as the engine behind the app.
If the workflow does not generate properly in Graph view, it will not become a useful app just because you switch to App View.
Start by loading a workflow that already works.
This can be a basic text-to-image workflow, an image-to-image workflow, an upscaling workflow, or a more advanced generation setup.
For beginners, it is better to start with a simple working image generation workflow first.
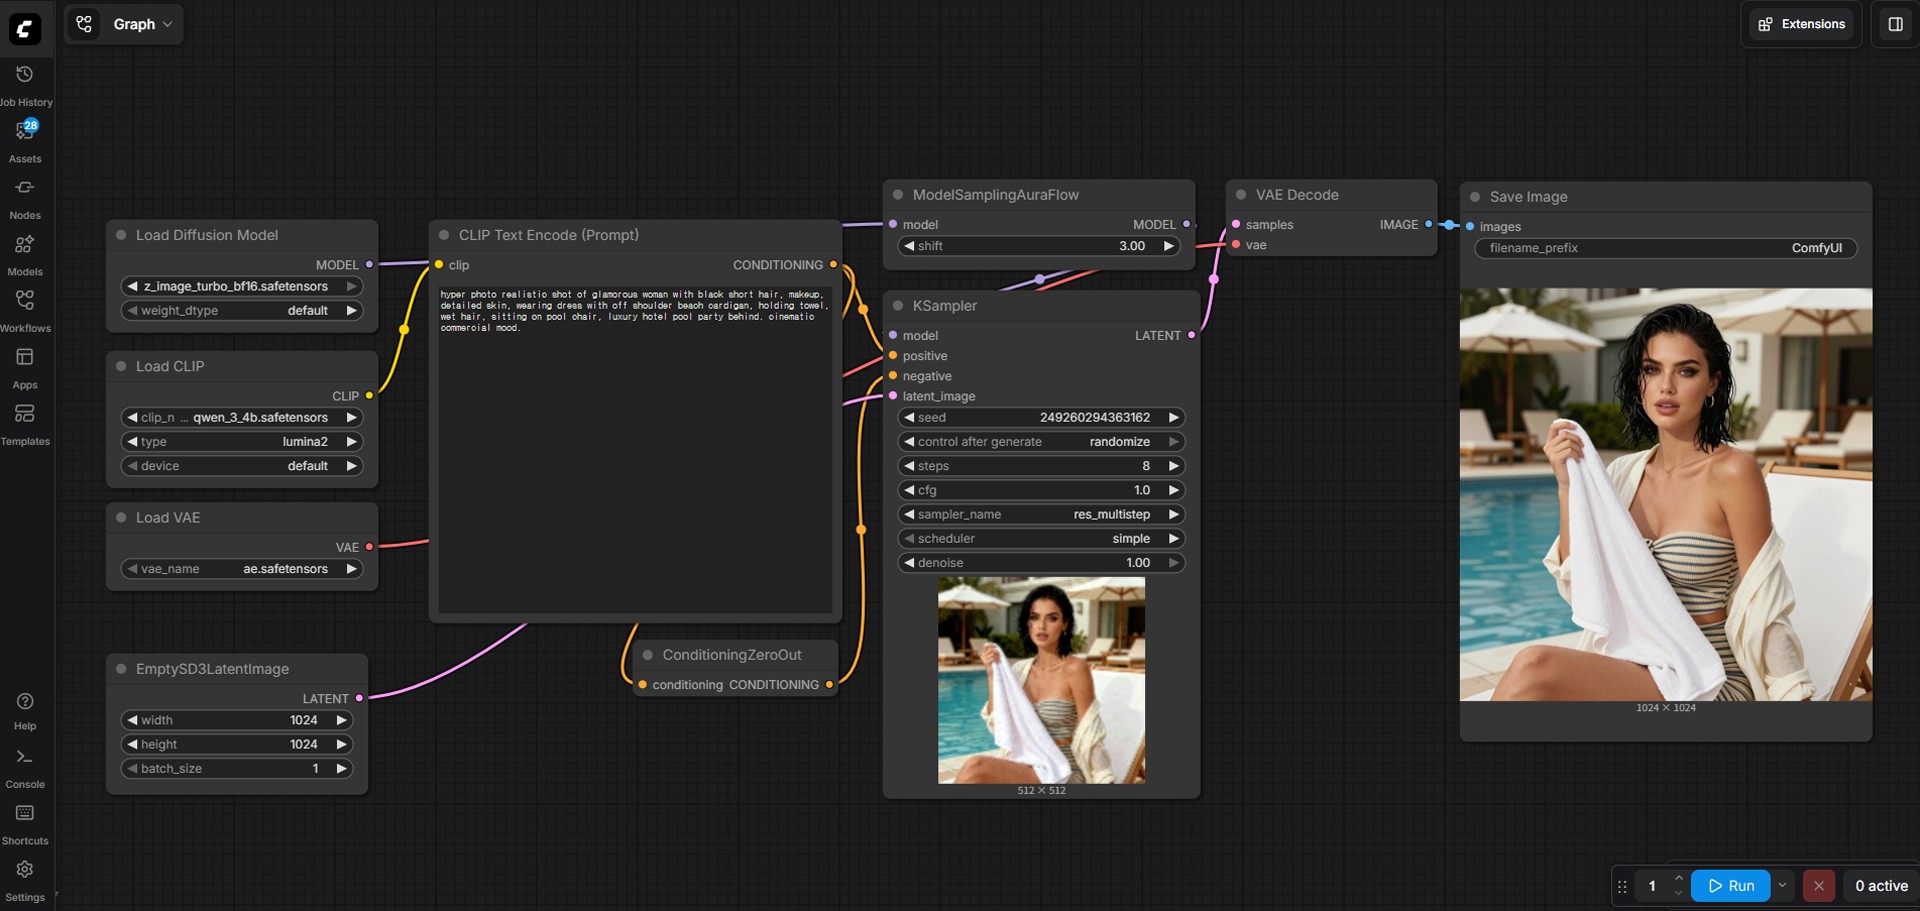
Image caption: Start with a working ComfyUI node workflow before opening App Builder.
Once the workflow is loaded, check whether it can generate an image normally.
Make sure the model loads correctly, the prompt works, the sampler runs, and the output image appears.
After confirming that the workflow works, you can move to the app-building step.
Step 2: Open the Apps Menu
Look at the left sidebar of the ComfyUI interface.
You will see several icons for different areas of the workspace.
Find the Apps area. In the current interface, it appears as an Apps or Apps (BETA) section depending on your version.
Click the Apps icon to open the app-related panel.
Inside the panel, you should see a button such as Build an app.
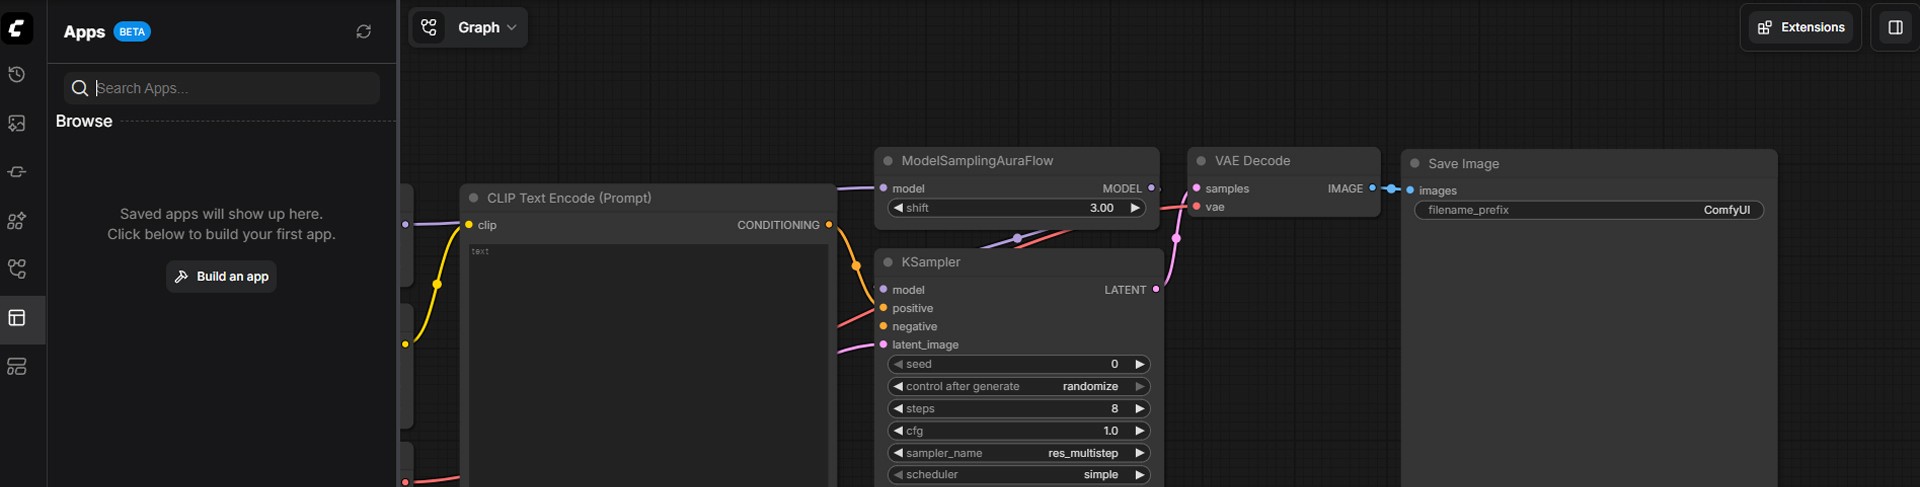
Image caption: Open the Apps menu from the left sidebar to start creating an App View from your workflow.
Click Build an app.
This opens App Builder, where you can decide which parts of the node workflow should be visible to the user.
The important idea is simple.
The full node graph stays in the background.
The user only sees the controls you choose.
Step 3: Select the Inputs Users Should Control
After entering App Builder, you will start by choosing inputs.
Inputs are the controls that the final user will be able to edit.
For example, in a typical text-to-image workflow, useful inputs might include the prompt text, width, height, seed, and steps.
You do not need to expose every setting.
In fact, exposing too many settings can make the App View confusing again.
The goal is to choose only the controls that a normal user actually needs.
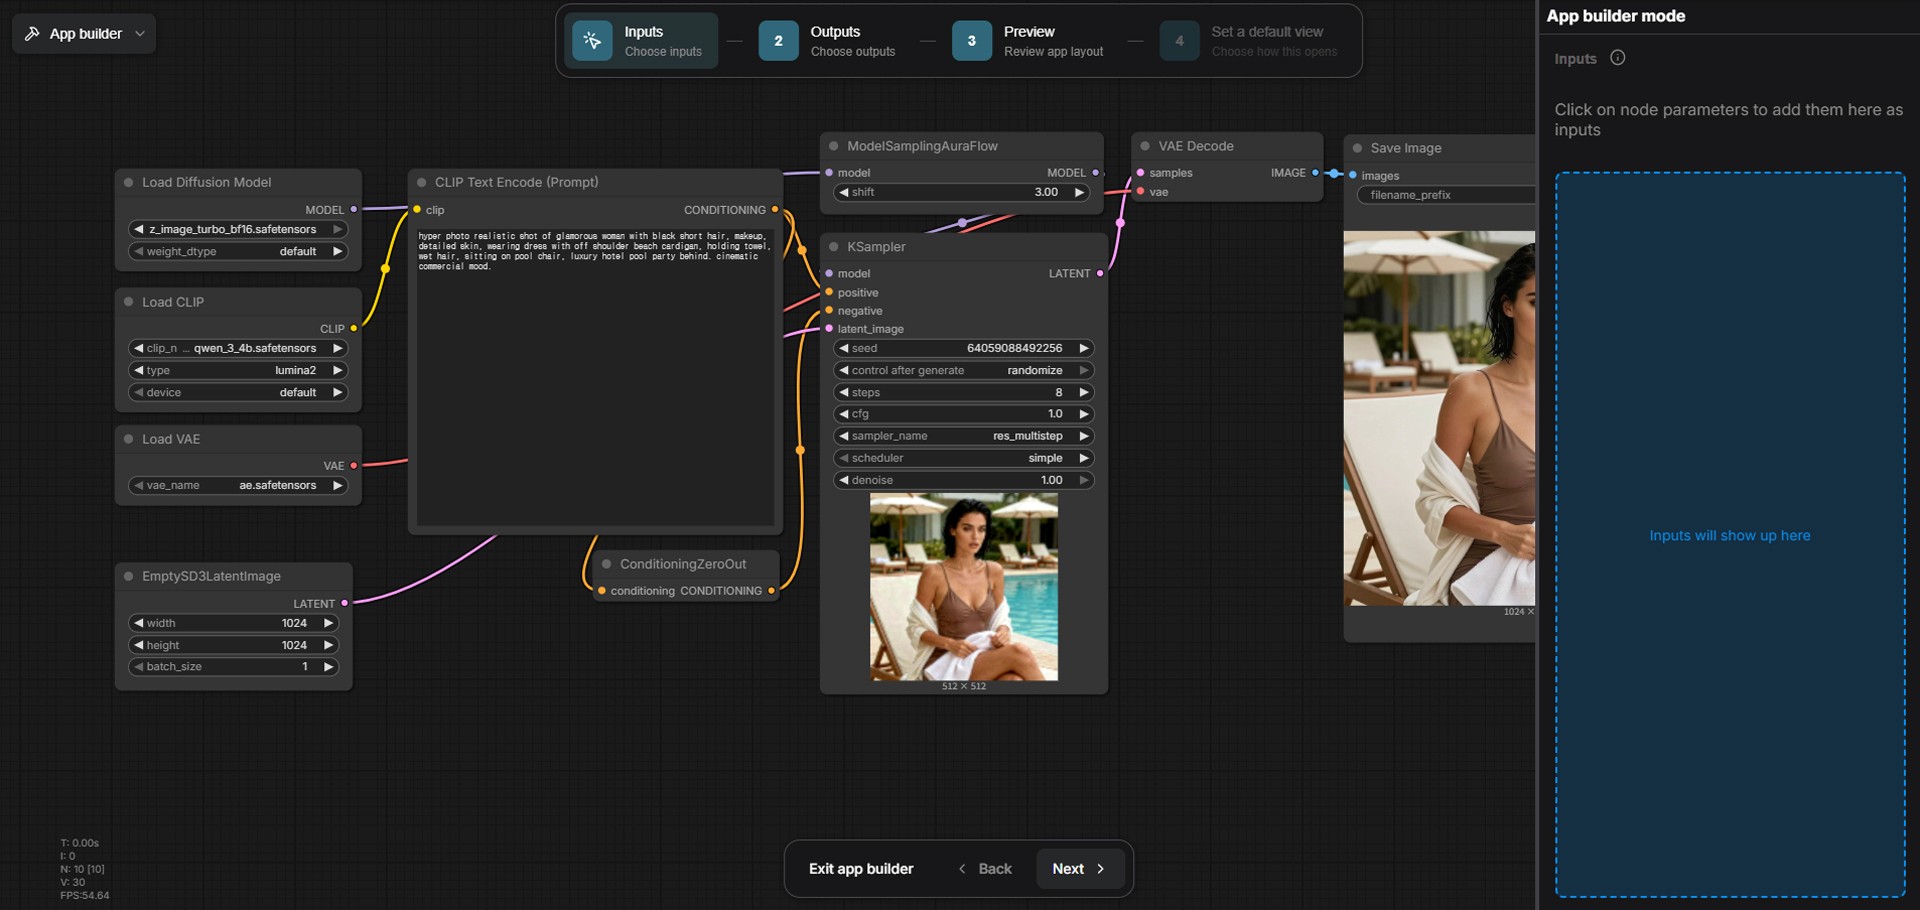
Image caption: In App Builder, select the important node parameters that should appear as user controls in App View.
For example, you can click the text field inside a CLIP Text Encode node so users can enter their own prompt.
You can also click width and height fields if you want users to control image size.
If you want users to create different variations, you can expose the seed.
If you want users to control quality or generation time, you can expose steps.
As you select each parameter, it will appear in the App Builder input panel.
These selected inputs become the controls in your final app interface.
Step 4: Keep the App Interface Simple
When choosing inputs, avoid the temptation to expose everything.
A clean App View should feel simple.
For a beginner-friendly image generation app, these controls are usually enough:
Prompt
Negative prompt, if needed
Width
Height
Seed
Steps
CFG or guidance value, if needed
If the workflow is more advanced, you can expose additional controls such as LoRA strength, denoise value, input image, mask image, or style options.
But for the first version, keep it simple.
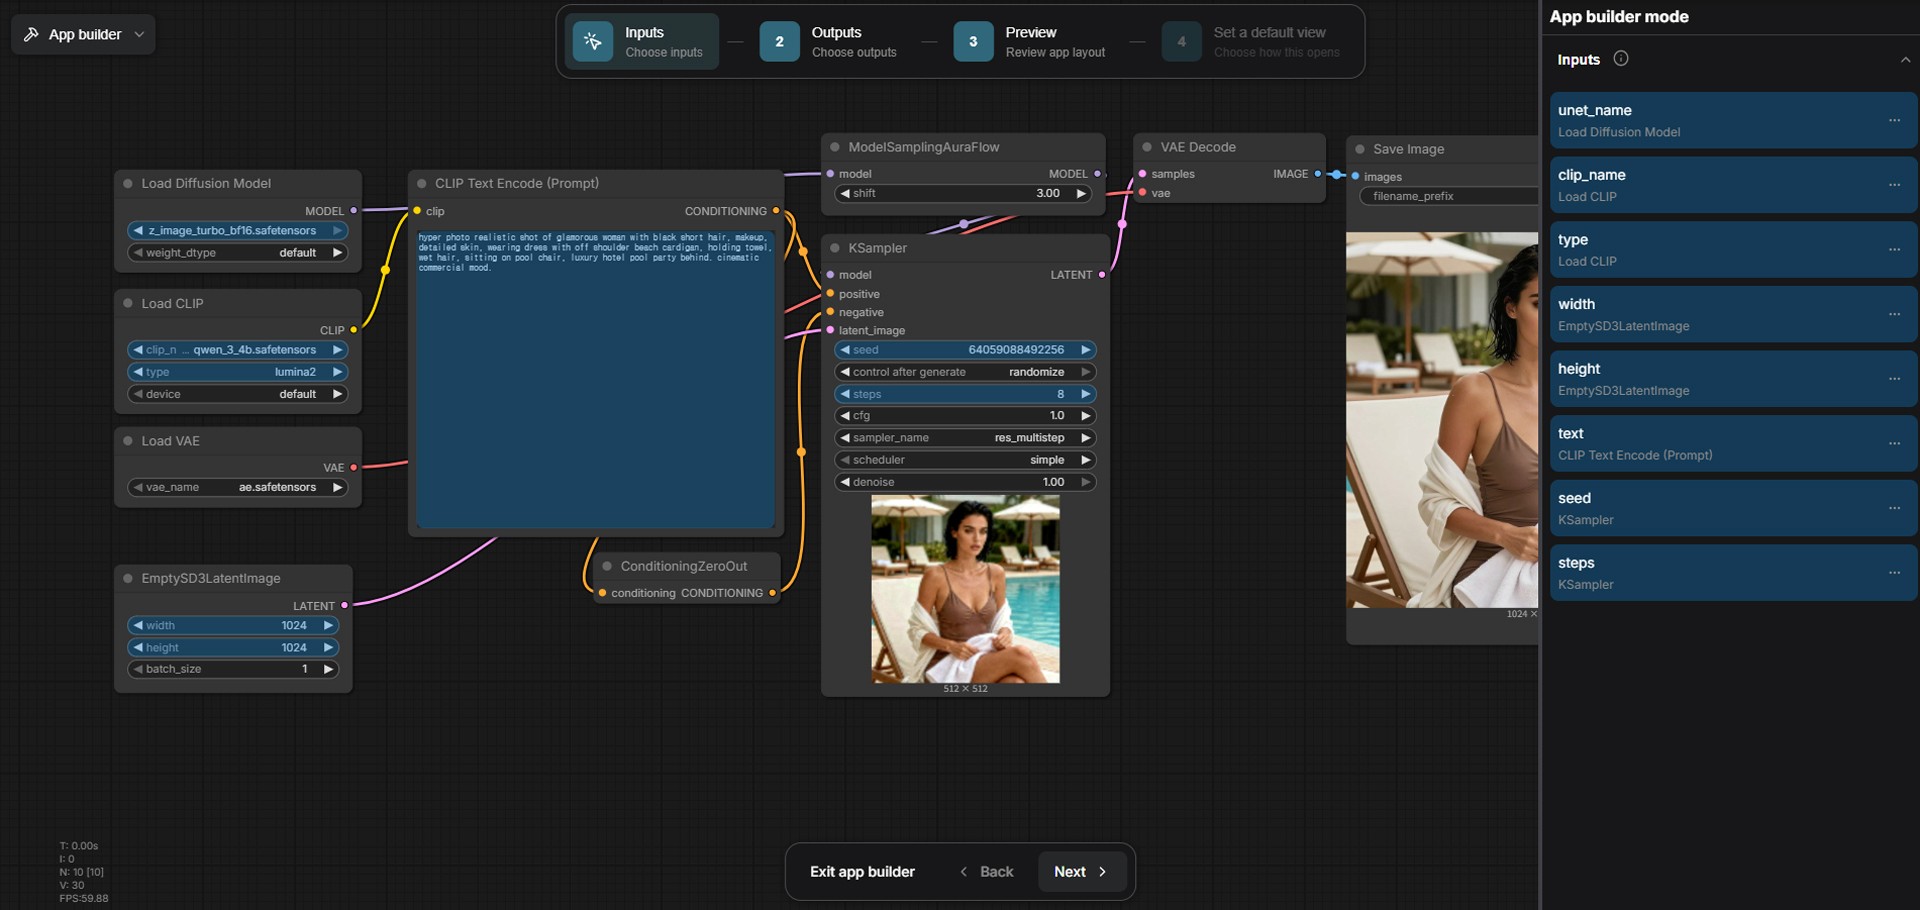
Image caption: A good App View exposes only the controls that users actually need, while hiding the complicated node graph.
The more controls you expose, the more the app starts to feel like the original node graph again.
The best App View is not the one with the most settings.
The best App View is the one that makes the workflow easy to understand and easy to use.
Step 5: Choose the Output Preview
After selecting inputs, continue through the App Builder steps.
You may need to choose which output should be shown in the app.
For an image generation workflow, this is usually the final image preview.
Choose the output that represents the final result clearly.
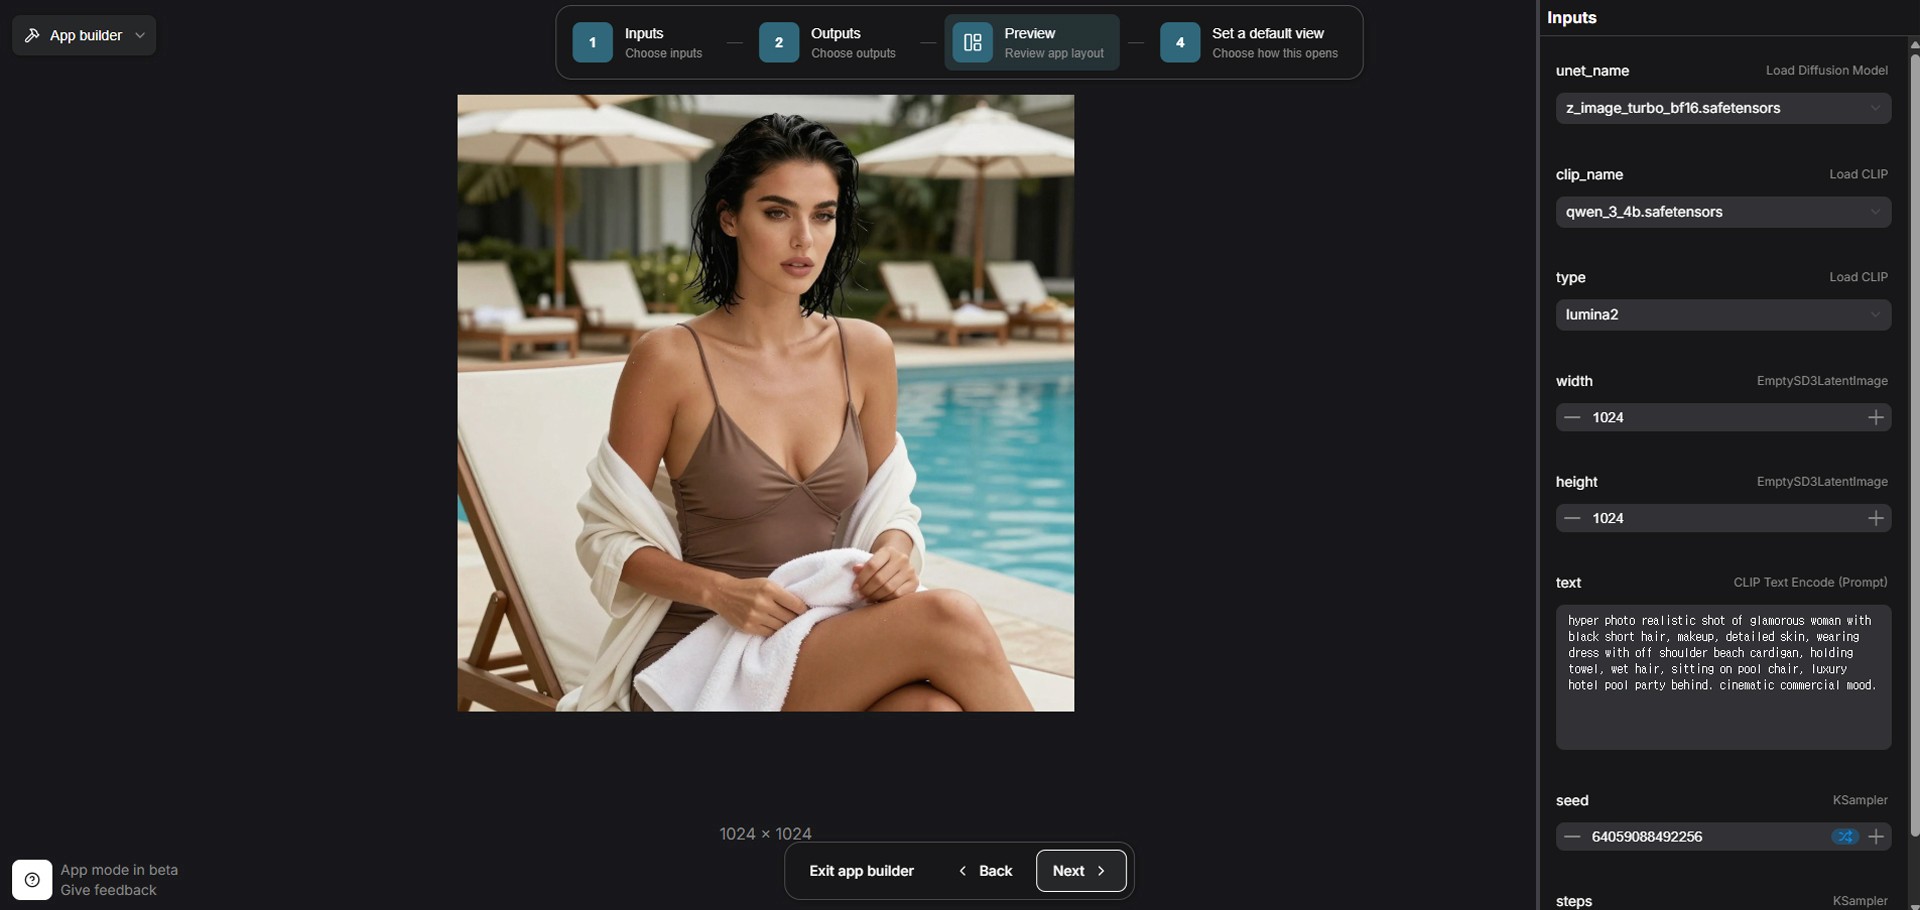
Image caption: Select the final image output so users can see the generated result directly inside App View.
This step is important because the user should not need to search through the node graph to find the result.
A good app interface should show the main controls and the final output in a clean layout.
For example, the prompt and generation settings can appear on the side, while the generated image appears in the main preview area.
Step 6: Preview the App View
After selecting the inputs and output, move to the Preview step.
This is where you can see what the final App View looks like.
The complex node graph disappears from the main user view, and the selected controls appear as a cleaner interface.
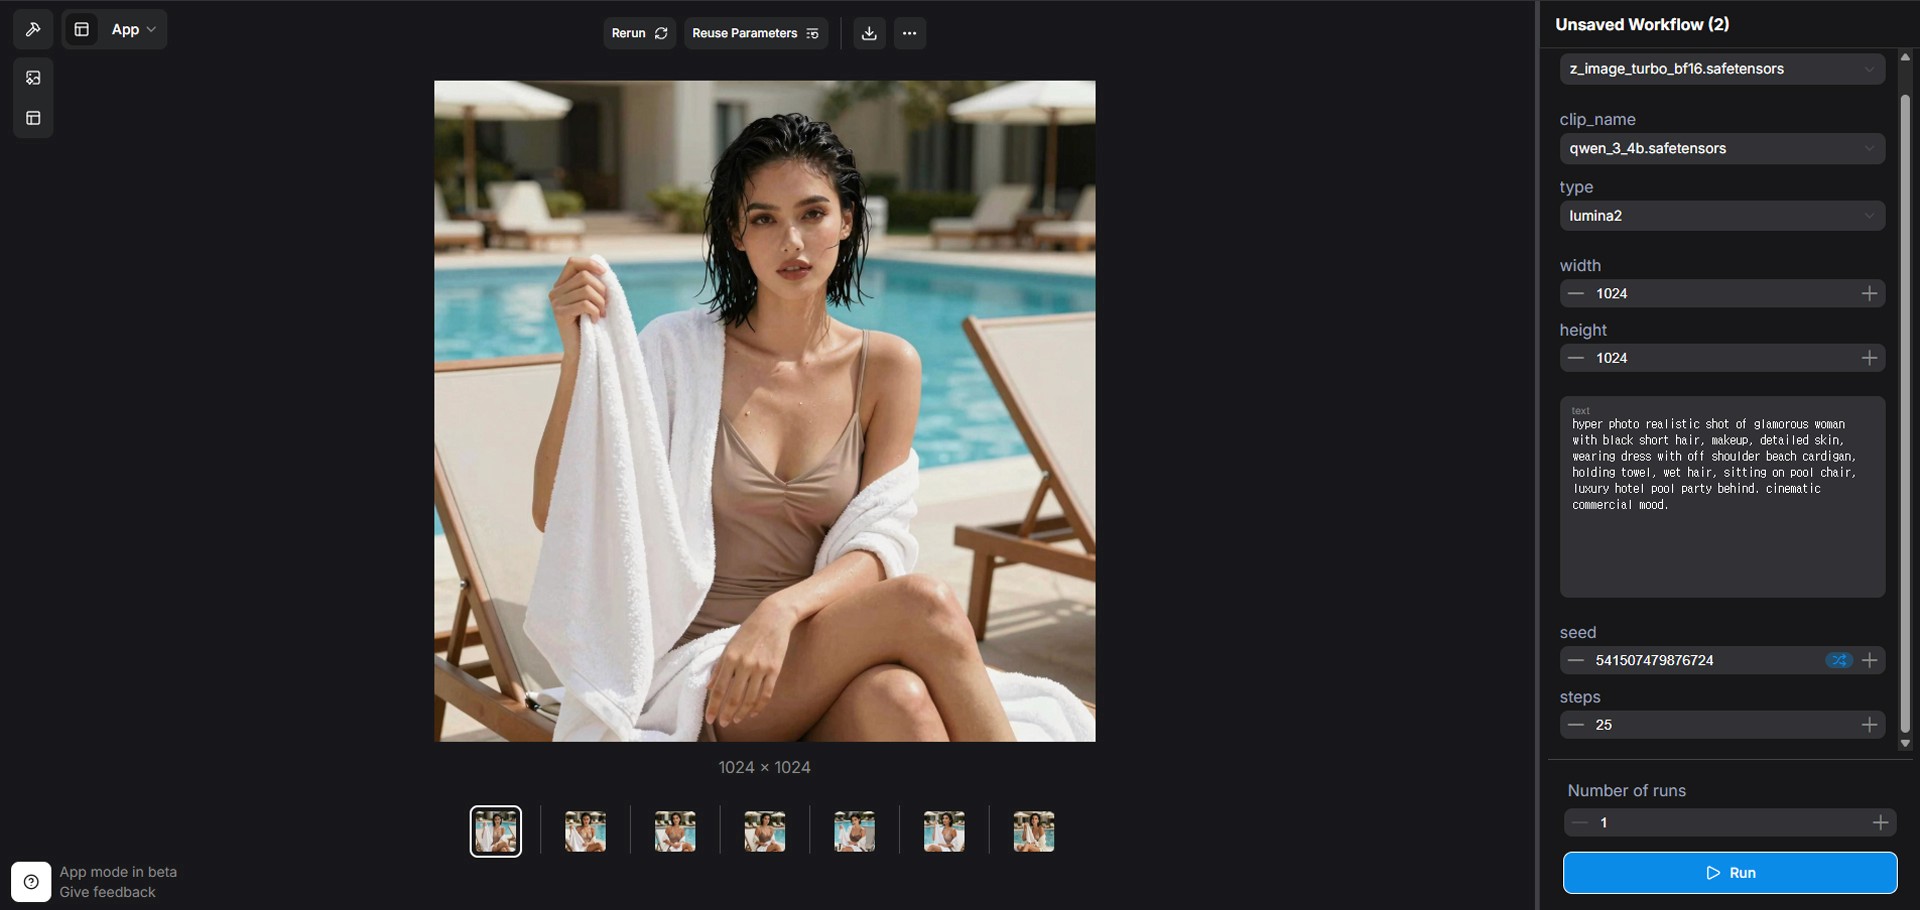
Image caption: App View hides the node graph and shows only the selected controls and output preview.
This is the main benefit of App Builder.
The workflow is still powered by the same nodes, but the user does not need to see every connection.
They can simply change the prompt, adjust the selected settings, and generate results from the clean interface.
If the App View feels too complicated, go back and remove unnecessary inputs.
If something important is missing, return to App Builder and add the missing control.
Step 7: Switch Back to Graph View When Needed
App View is useful for running the workflow, but Graph view is still important for editing.
If you need to change the actual workflow structure, reconnect nodes, add models, adjust samplers, or debug errors, switch back to Graph view.
This is the best way to think about the two modes.
Graph view is for building and editing the engine.
App View is for using the engine through a cleaner interface.
Both views are useful.
You do not need to choose one forever.
Use Graph view when you are designing the workflow.
Use App View when you want to run, test, or share the workflow more easily.
Step 8: Share Through ComfyHub When Available
After building a clean App View, you may want to share it with other people.
ComfyHub is designed as a place where ComfyUI workflows and apps can be discovered and shared.
Depending on the current ComfyUI and ComfyHub setup, publishing and sharing options may require account access, supported workflow settings, or a publishing process.
Before sharing, check whether your workflow includes custom nodes, model dependencies, private file paths, or assets that other users may not have.
If your workflow depends on specific models or custom nodes, explain that clearly.
A shared app is much more useful when people know what they need to install or connect before using it.
Why App Builder Is Useful
App Builder is useful because it separates the creator’s workflow from the user’s interface.
The creator can still build a complex node graph.
The user can interact with a clean app-style view.
This is especially useful when you want to create reusable tools for yourself, teammates, clients, or non-technical users.
For example, you can create:
a simple text-to-image app,
a portrait style generator,
a product image upscaler,
a character reference generator,
a social media thumbnail tool,
or a repeatable workflow for a specific visual style.
Instead of explaining the full node graph every time, you can give users a cleaner interface with only the controls they need.
Common Issues and Simple Fixes
If App View looks too complicated, remove unnecessary inputs and keep only the essential controls.
If users cannot change an important setting, go back to App Builder and expose that node parameter as an input.
If the output does not appear, check whether you selected the correct final output node.
If the workflow fails in App View, test it again in Graph view first.
If another user cannot run your shared app, check whether they have the required models, custom nodes, and dependencies.
If your app is slow, reduce image size, steps, or workflow complexity before sharing it with others.
Responsible Use Notes
When sharing ComfyUI workflows or apps, make sure you understand what is inside the workflow.
Do not share workflows that include private file paths, unpublished client assets, licensed models you cannot redistribute, or personal information.
If your workflow uses custom models, LoRAs, or special nodes, explain the dependencies clearly.
If you are sharing an app with clients or collaborators, test it carefully before sending the link.
Also remember that simplified App View does not remove the need for proper workflow testing.
A clean interface is helpful, but the underlying workflow still needs to be stable.
Conclusion
In this tutorial, we looked at how ComfyUI App Builder and App View can make complex workflows easier to use.
We started with a working node graph, opened the Apps menu, selected important inputs, chose the output preview, checked the App View, and discussed how the workflow can be shared through ComfyHub when available.
The key idea is simple.
Graph view is for building.
App View is for using.
App Builder connects the two.
This workflow is especially useful for beginners, teams, and creators who want to make ComfyUI less intimidating.
It does not replace understanding the node graph, but it makes the experience cleaner and more approachable.
Start with a simple workflow.
Expose only the controls that matter.
Preview the app.
Remove unnecessary settings.
Then share it only after testing.
That is how ComfyUI can become not only a powerful node-based tool, but also a cleaner app-style experience for real creative workflows.
We will return in the next A2SET tutorial with more practical AI workflows for creators, designers, and small production teams.
Quick FAQ
What is ComfyUI App View?
App View is a simplified interface that lets users run a ComfyUI workflow without directly editing the full node graph.
What does App Builder do?
App Builder lets the workflow creator choose which node inputs and outputs should appear in the simplified App View.
Do I still need Graph view?
Yes. Graph view is still needed for editing, debugging, and building the actual workflow structure.
Should I expose every node setting as an input?
No. It is better to expose only the controls users actually need. Too many inputs can make the app confusing.
Can I share my App View with others?
Depending on the current ComfyUI and ComfyHub setup, you may be able to share app-style workflows. Make sure to explain required models, custom nodes, and dependencies.
What if the app does not generate properly?
Return to Graph view and test the original workflow first. If the graph does not work, App View will not fix it automatically.
Is App Builder good for beginners?
Yes. It can make using existing workflows much easier, but beginners should still learn the basic structure of the workflow over time.