Turning Google Flow Concept Art into 3D Game Assets
Hello creators, welcome back to A2SET’s AI Tutorial.
When creating 3D assets from AI-generated images, the first image matters a lot.
If the concept art has a messy background, extreme shadows, confusing perspective, or hidden parts, the Image-to-3D result can become unstable. The model may misunderstand the shape, create strange geometry, or generate a back side that does not match the original design.
That is why the 2D concept stage is not just a visual step.
It is the foundation of the entire 3D workflow.
In this tutorial, we will use Google Flow to create a clean 2D concept image, refine it with built-in editing tools, and then turn it into a 3D asset using an Image-to-3D platform such as Meshy AI or Tripo AI.
The example concept is a stylized sci-fi cyberpunk hoverbike.
The goal is not to claim that AI can replace professional 3D artists or create final production assets perfectly every time. It cannot. You may still need cleanup, retopology, UV work, material adjustment, or optimization before using the asset in a real game.
However, for concept testing, quick prototypes, pitch visuals, Web AR drafts, and early game asset exploration, this workflow can save a lot of time.
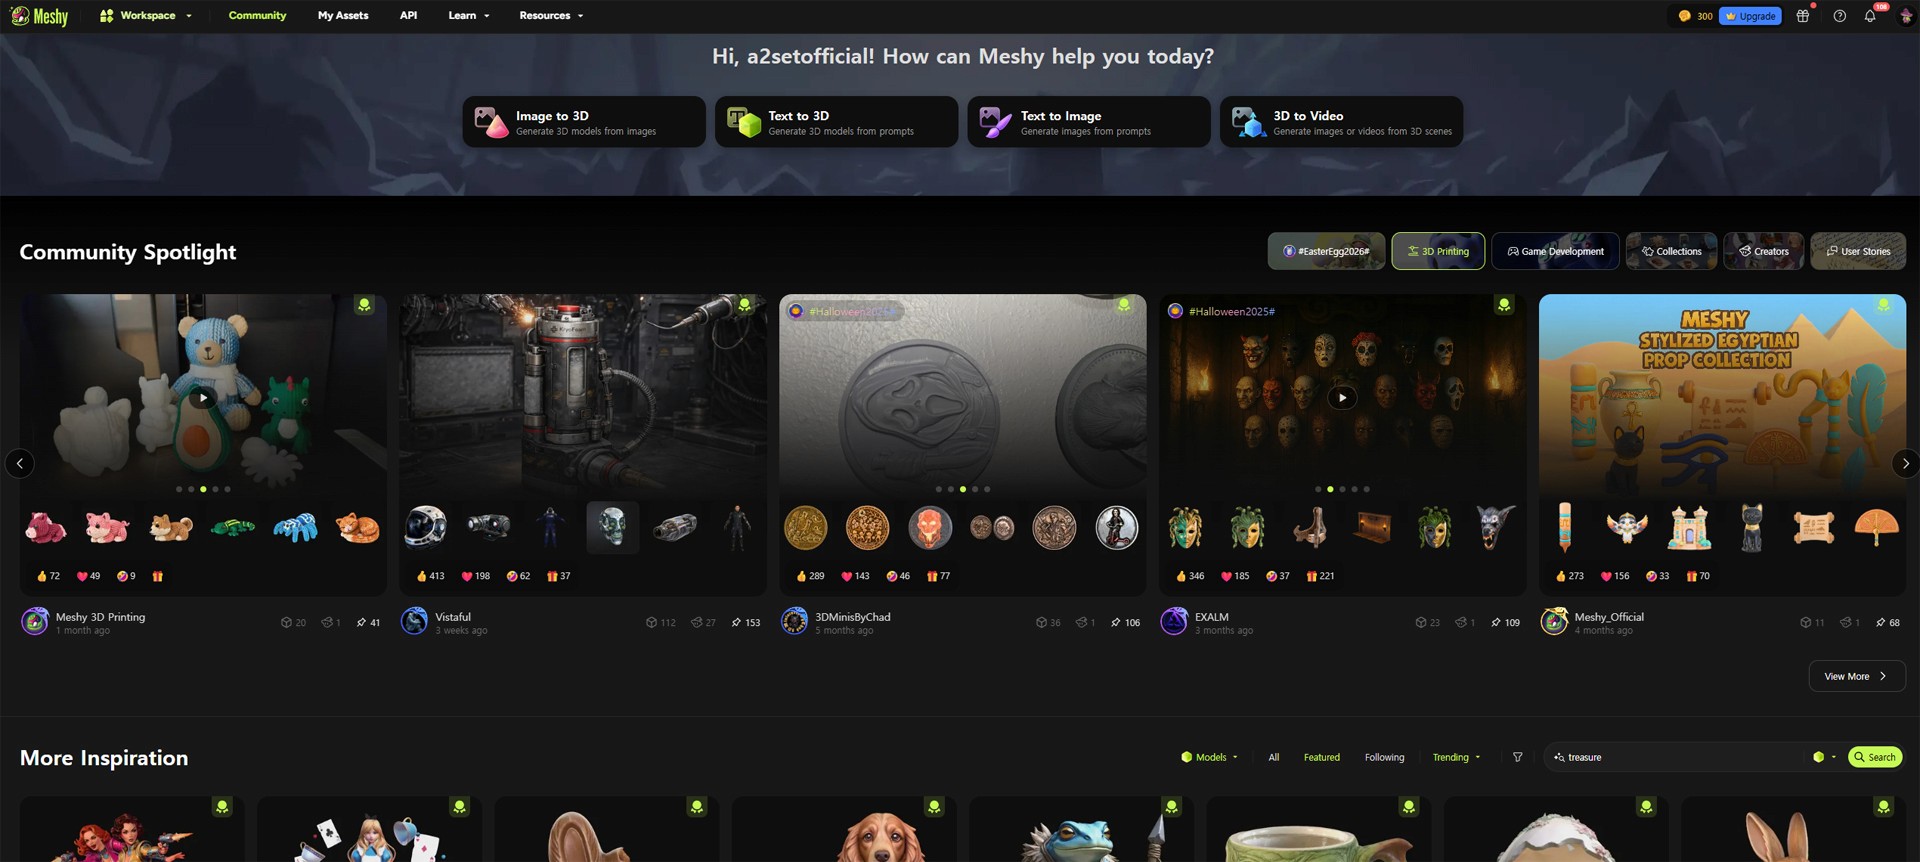
Image caption: This workflow turns a clean 2D concept image into a 3D asset that can be tested in Blender, game engines, or Web AR workflows.
Why the 2D Source Image Matters
Image-to-3D tools work better when the input image is clean and easy to understand.
A good source image should clearly show the object’s shape, silhouette, color, and main details.
For this reason, it is better to avoid overly dramatic camera angles, heavy motion blur, complex backgrounds, or strong shadows that cover the design.
For a 3D conversion workflow, the image should feel more like a clean product concept sheet than a cinematic poster.
The AI needs to understand the object first.
Mood and drama can come later.
Step 1: Generate the Base Image in Google Flow
Open your browser and go to Google Flow.
Start a new project and enter the image generation area.
If Nano Banana Pro is available in your current account or model selector, choose it for this concept image workflow. Model availability and credit limits may change, so always check the current Flow interface before starting a production project.
Now create the base concept image.
Prompt Example:
A stylized sci-fi cyberpunk hoverbike, glowing neon accents, matte black metal plating, isometric view, flat neutral lighting, isolated on a solid white background, clean design, highly detailed.
This prompt is useful because it tells the AI to create a visually interesting object while keeping it easy for 3D conversion.
The key phrases are “isometric view,” “flat neutral lighting,” and “isolated on a solid white background.”
These details help reduce confusion during the Image-to-3D step.
For this stage, avoid asking for a complex city background or cinematic lighting. A beautiful background may look impressive in a thumbnail, but it can make the 3D extraction process harder.
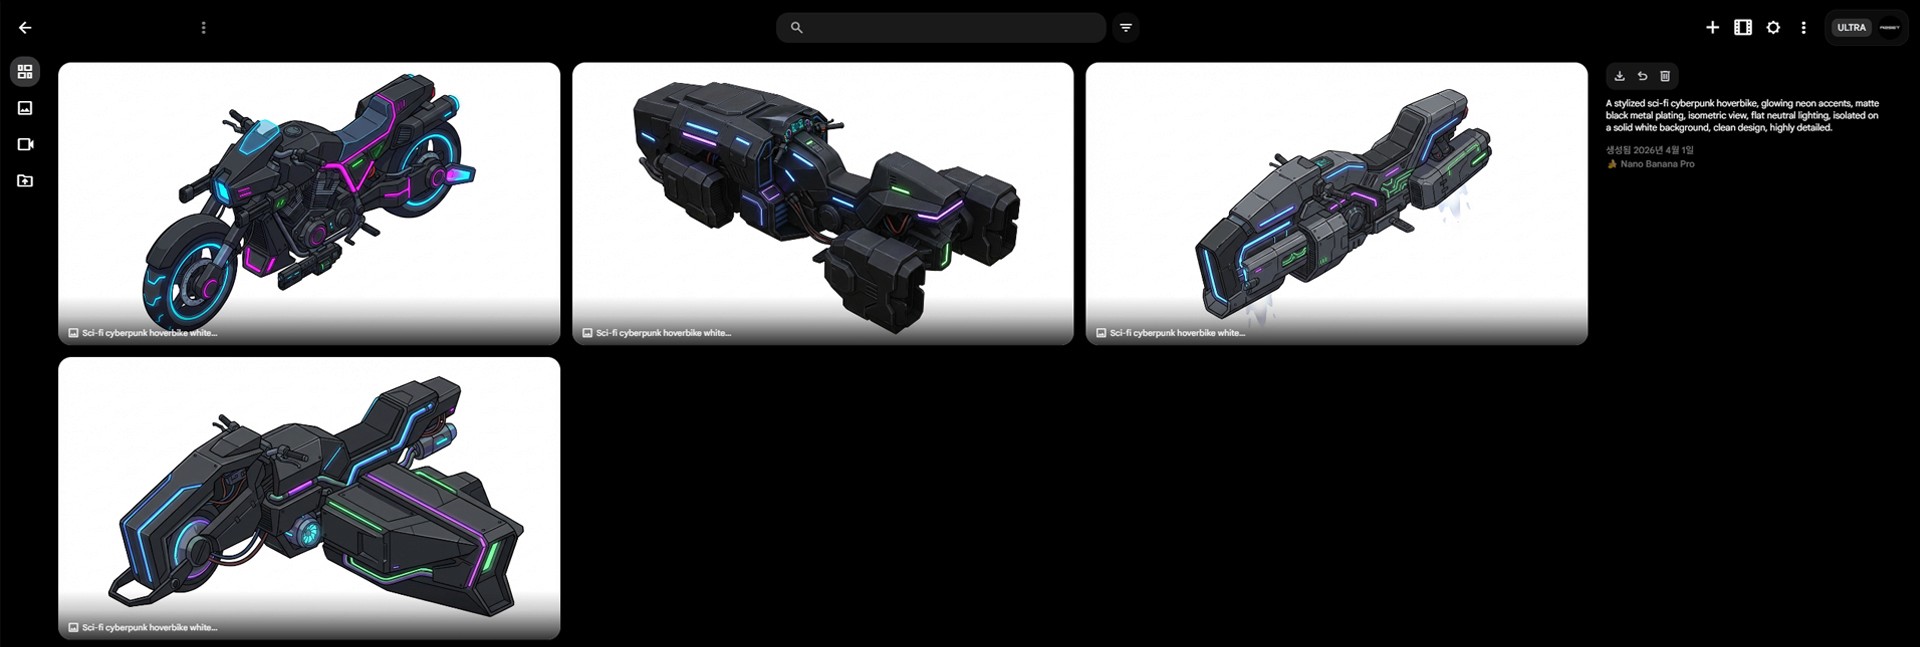
Image caption: The base concept image should clearly show the hoverbike design with simple lighting and a clean background for easier 3D conversion.
Step 2: Refine the Image with Flow’s Editing Tools
After generating the first concept image, review it carefully.
Do not only check whether it looks cool. Check whether it can become a good 3D source.
Look at the silhouette, wheels, body shape, wings, engines, handle area, and any glowing parts.
If the overall shape is good but one part feels wrong, you do not need to regenerate the whole image from scratch.
Use Flow’s editing tools to select the area you want to change.
For example, if the wheel design does not fit the hoverbike concept, select that part and write a local editing prompt.
Prompt Example:
Change the wheels into glowing anti-gravity thrusters.
This keeps the strong parts of the original image while improving only the selected area.
This step is especially useful for 3D workflows because small design problems in the 2D image can become bigger problems after conversion.
Before moving forward, try to create a final image that has a clean object shape, readable design, simple background, and no unnecessary props around it.
Then download the final refined image to your computer.
Step 3: Convert the Image into a 3D Model
Now it is time to turn the refined 2D image into a 3D model.
You can use an Image-to-3D platform such as Meshy AI, Tripo AI, or another 3D generation tool that supports image input.
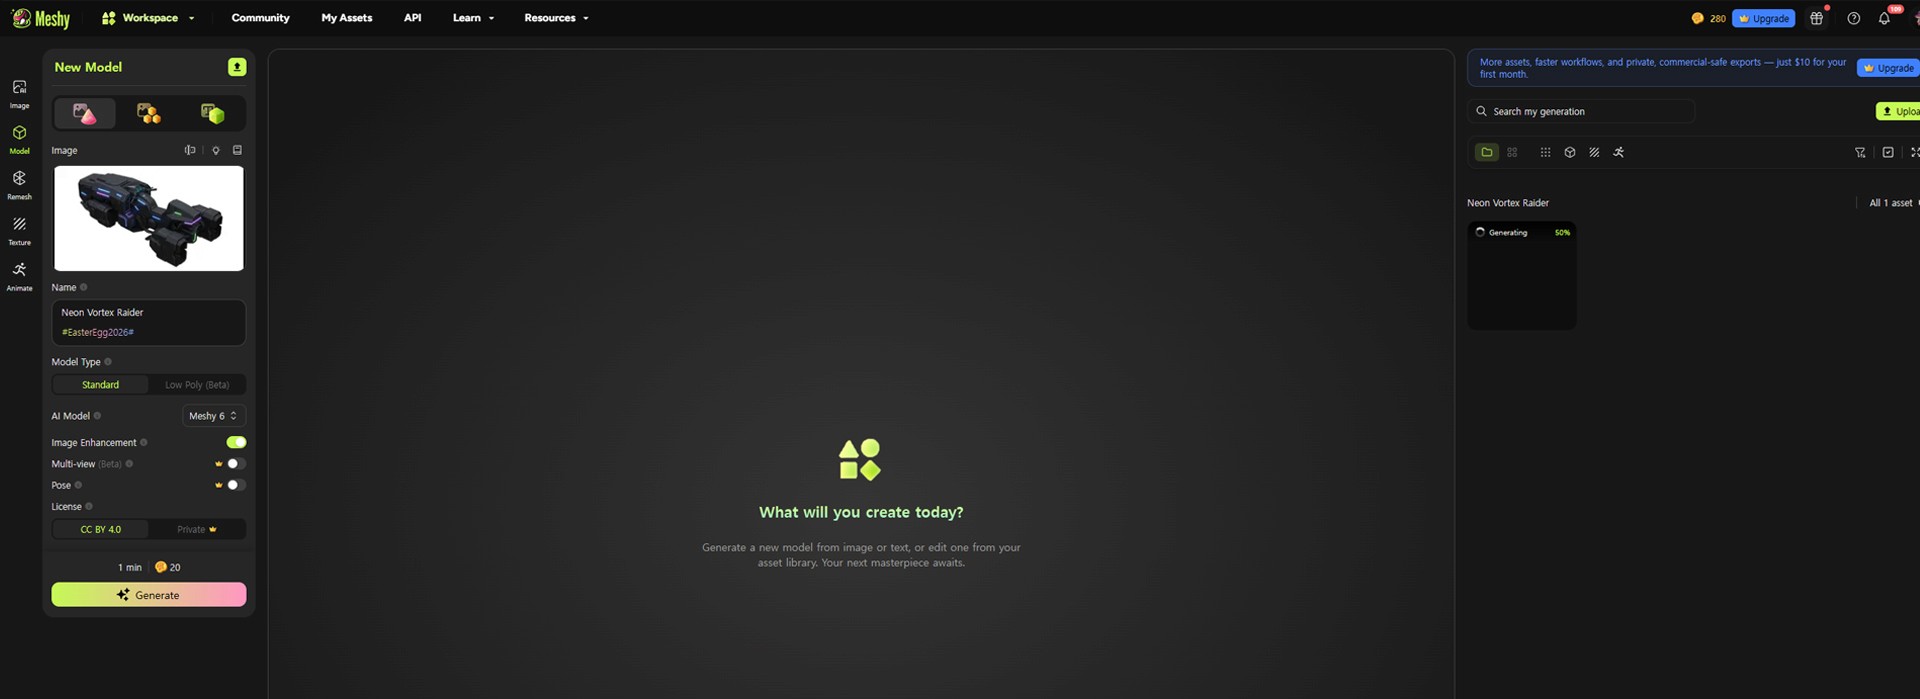
Image caption: Upload the refined concept image into an Image-to-3D tool to generate the first 3D model.
Open your preferred 3D AI platform and choose the Image to 3D feature.
Upload the refined hoverbike image that you downloaded from Google Flow.
Then click Generate.
The AI will analyze the object, estimate the hidden sides, and create a 3D mesh based on the image.
This process can be fast, but the result can vary depending on the input image.
A clean object on a white background usually works better than a busy illustration with dramatic shadows.
After generation, rotate the 3D model in the browser preview.
Check the front, side, back, top, and bottom if possible.
Look for issues such as broken geometry, melted parts, strange symmetry, missing details, or textures that do not align well.
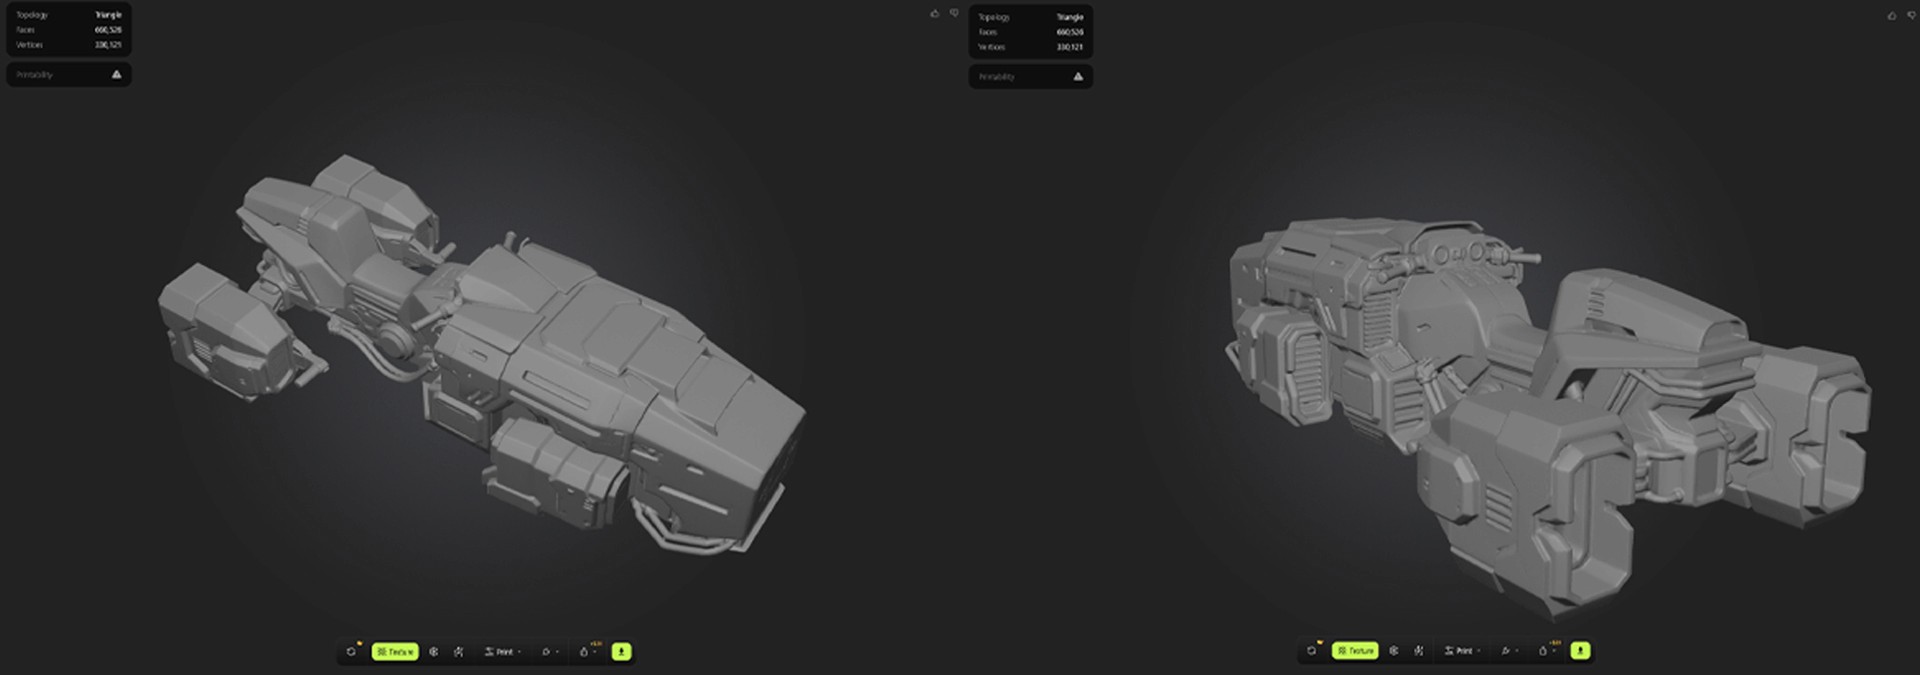
Image caption: After generation, rotate the model and check whether the main silhouette, texture, and object structure are still readable from multiple angles.
Step 4: Review the Mesh and Texture
Once the 3D model is created, inspect both the mesh and texture.
A model may look good from the front, but the back or underside may be less accurate because the AI has to infer details that were not visible in the original 2D image.
This is normal.
For concept previews and early prototypes, the first result may be enough.
For actual game use, you may need additional cleanup.
Check whether the hoverbike keeps its main design language.
Does it still feel like the original cyberpunk vehicle?
Are the neon parts recognizable?
Does the body shape make sense from multiple angles?
Are the materials readable?
Is the silhouette still strong?
If the model is too messy, go back to the 2D image and make the design simpler.
Sometimes, improving the source image is more effective than trying to fix a bad 3D result later.
Step 5: Export the 3D Asset
After reviewing the model, export it in a format that fits your workflow.
Most Image-to-3D platforms provide common export formats such as GLB, GLTF, OBJ, or FBX.
GLB or GLTF is useful when you want a lightweight asset with textures packed for Web AR, web previews, Unity, Unreal Engine, or browser-based 3D tests.
OBJ is useful if you want to bring the model into Blender for cleanup, shape edits, or manual material adjustment.
FBX is useful for game engine workflows, especially if you later plan to rig, animate, or organize the asset inside Unity, Unreal Engine, or another 3D pipeline.
For this hoverbike example, GLB is a good first export format if you want a quick textured preview.
If you plan to clean it up in Blender, OBJ or FBX may be more practical.
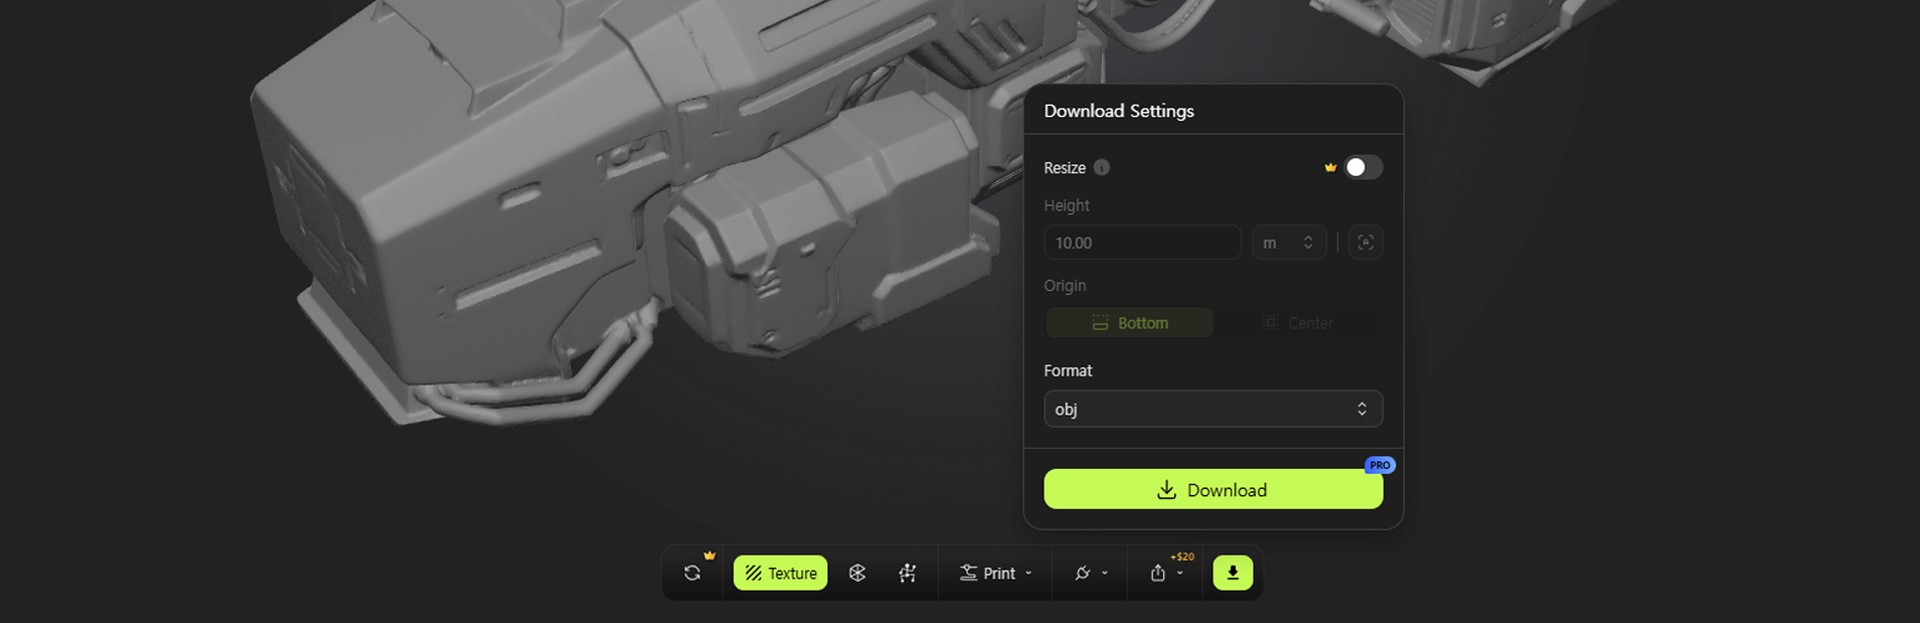
Image caption: Export formats such as GLB, GLTF, OBJ, and FBX allow the generated model to be tested in different 3D workflows.
Step 6: Test the Asset in Blender or a Game Engine
After downloading the file, open it in Blender, Unity, Unreal Engine, or your preferred 3D tool.
Do not assume the asset is ready just because it looked good in the browser preview.
Check the scale, rotation, materials, texture links, mesh density, and overall shape.
If you are using Blender, import the file and rotate around the model.
If you are using Unity or Unreal Engine, drag the asset into the project and place it in a simple test scene.
Add basic lighting and check how the material reacts.
For game use, you may also need to check polygon count, collision, pivot position, texture size, and file weight.
This final check is important because a generated 3D asset may need optimization before it becomes useful in a real-time environment.
Common Issues and Simple Fixes
If the 3D model has strange geometry, simplify the original 2D image and regenerate the 3D model.
If the back side looks weak, create a more design-focused source image or provide additional reference views if your 3D tool supports multi-image input.
If the texture looks stretched, try retexturing inside the 3D platform or adjust materials later in Blender.
If the object looks too flat, use a more three-quarter or isometric source image instead of a pure front view.
If the file is too heavy for a game engine, reduce polygon count, compress textures, or run the asset through a cleanup workflow.
Why This Workflow Is Useful
This workflow is useful because it connects AI concept art and 3D asset creation into one practical pipeline.
Google Flow helps create and refine the 2D source image.
Image-to-3D tools help turn the concept into a 3D model.
Export formats such as GLB, GLTF, OBJ, and FBX make it possible to test the result in real 3D software or game engines.
This can be useful for game prototypes, Web AR concepts, pitch decks, product visualization tests, sci-fi vehicle concepts, and early asset exploration.
It is not a replacement for a complete 3D production pipeline.
For polished games or commercial production, you may still need manual modeling, topology cleanup, UV editing, texture work, rigging, optimization, and engine testing.
But for fast concept-to-3D exploration, this workflow can be very practical.
Responsible Use Notes
When creating 3D assets from AI-generated images, make sure your concept does not copy protected designs, existing game assets, brand vehicles, or another artist’s original work.
If you use this workflow for a client or commercial project, keep a simple production record.
Save the original prompt, generated concept image, edited version, Image-to-3D tool used, exported file format, and final usage notes.
Also check the usage terms of each tool before using the generated asset in a public or commercial project.
Conclusion
In this tutorial, we turned Google Flow concept art into a 3D game asset workflow.
We started by generating a clean cyberpunk hoverbike image.
Then we refined the image with local editing.
After that, we uploaded it into an Image-to-3D platform.
Finally, we exported the result and reviewed how it could be used in Blender, Unity, Unreal Engine, or Web AR.
The most important lesson is simple.
A better 2D source image creates a better 3D starting point.
Do not rush the concept stage.
Keep the background clean.
Use readable lighting.
Make the object shape clear.
Fix design issues before converting to 3D.
Then review the final mesh carefully before using it in a real project.
That is how AI concept art becomes more useful as part of a practical 3D asset workflow.
We will return in the next A2SET tutorial with more AI workflows for creators, designers, and small production teams.
Quick FAQ
Can Google Flow create 3D models directly?
Google Flow is mainly used here to create and refine the 2D concept image. The 3D conversion step is handled by an Image-to-3D tool such as Meshy AI, Tripo AI, or another 3D generation platform.
Why should the background be white or simple?
A simple background helps the 3D AI focus on the object itself. Busy backgrounds can confuse the model and create unwanted geometry.
What export format should I choose?
Use GLB or GLTF for quick textured previews, Web AR, and game engine tests. Use OBJ or FBX if you plan to clean up the model in Blender or another 3D tool.
Is the generated 3D model game-ready?
Not always. It may be useful for prototypes, concept tests, and previews, but production use often requires cleanup, optimization, and manual review.
Can I use this workflow for characters?
Yes, but characters are more difficult than hard-surface objects. For characters, you may need clearer front, side, and full-body references, plus rigging and topology cleanup.
Can I use Meshy or Tripo instead of another tool?
Yes. The workflow works with any Image-to-3D platform that can generate a model from an uploaded image and export common 3D formats.
What should I improve first if the 3D result looks bad?
Start by improving the 2D image. Make the object simpler, cleaner, better lit, and easier to understand before generating the 3D model again.