Building a Personal Intro Page with Google Antigravity

Hello creators, welcome back to A2SET’s AI Tutorial.
Have you ever wanted to create your own personal introduction page, but stopped because coding felt too complicated?
A simple intro page can be useful for many situations.
You can use it as a personal profile, a mini portfolio, a contact page, a creator bio page, or a quick landing page to share your name, interests, and email address.
In the past, even a simple webpage usually required some knowledge of HTML, CSS, file structure, hosting, and deployment.
In this tutorial, we will use Google Antigravity to create a simple personal intro page through the Agent chat window.
The workflow is very simple.
Create a folder on your desktop.
Open that folder in Antigravity.
Ask the Agent to create a personal intro page.
Preview the result.
Then publish the page with Netlify Drop.
This does not mean every website project can be finished perfectly in a few minutes. If you want a complex portfolio, blog, shop, animation, CMS, or backend feature, you will still need more planning and testing.
However, for a simple one-page personal introduction site, this workflow is a very friendly starting point.

Image caption: Google Antigravity can help beginners create a simple personal intro page by chatting with the Agent inside the editor.
Step 1: Create a Folder on Your Desktop
First, create a new folder on your desktop.
You can name it something simple like:
My_Profile
This folder will become the project folder for your personal intro page.
Antigravity is not just a normal website builder. It is an AI-powered development environment that you install and use on your computer.
Think of this folder as a blank sketchbook. The files for your webpage will be created inside this folder.
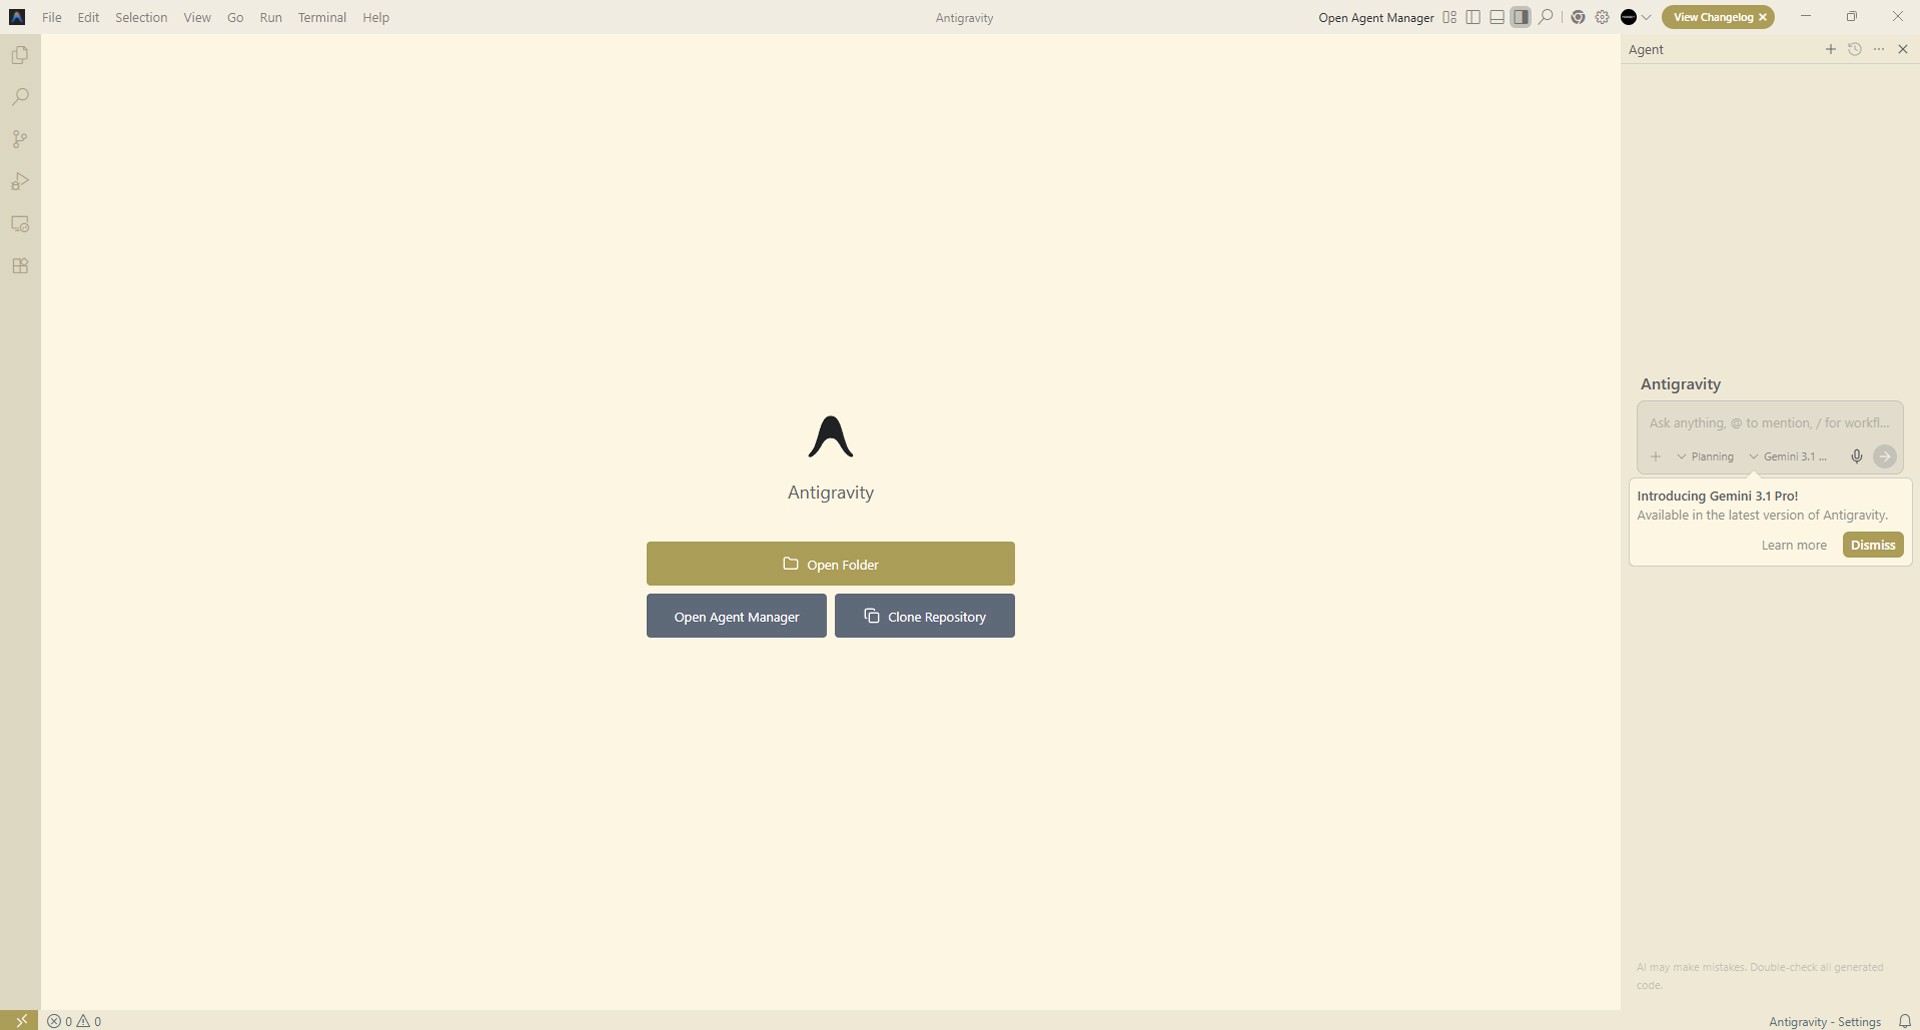
Image caption: Start by creating a clean project folder on your desktop before opening it in Antigravity.
After creating the folder, launch Google Antigravity.
On the start screen, click Open Folder.
Then select the My_Profile folder you just created.
Once the folder is opened, Antigravity will show the workspace where your project files can be created and edited.
Step 2: Use the Agent Chat Window
After opening the folder, look at the right side of the Antigravity interface.
You should see the Agent chat window.
This is where we will ask the AI to create the webpage.
Instead of manually writing HTML and CSS from scratch, we can describe what we want in plain English.
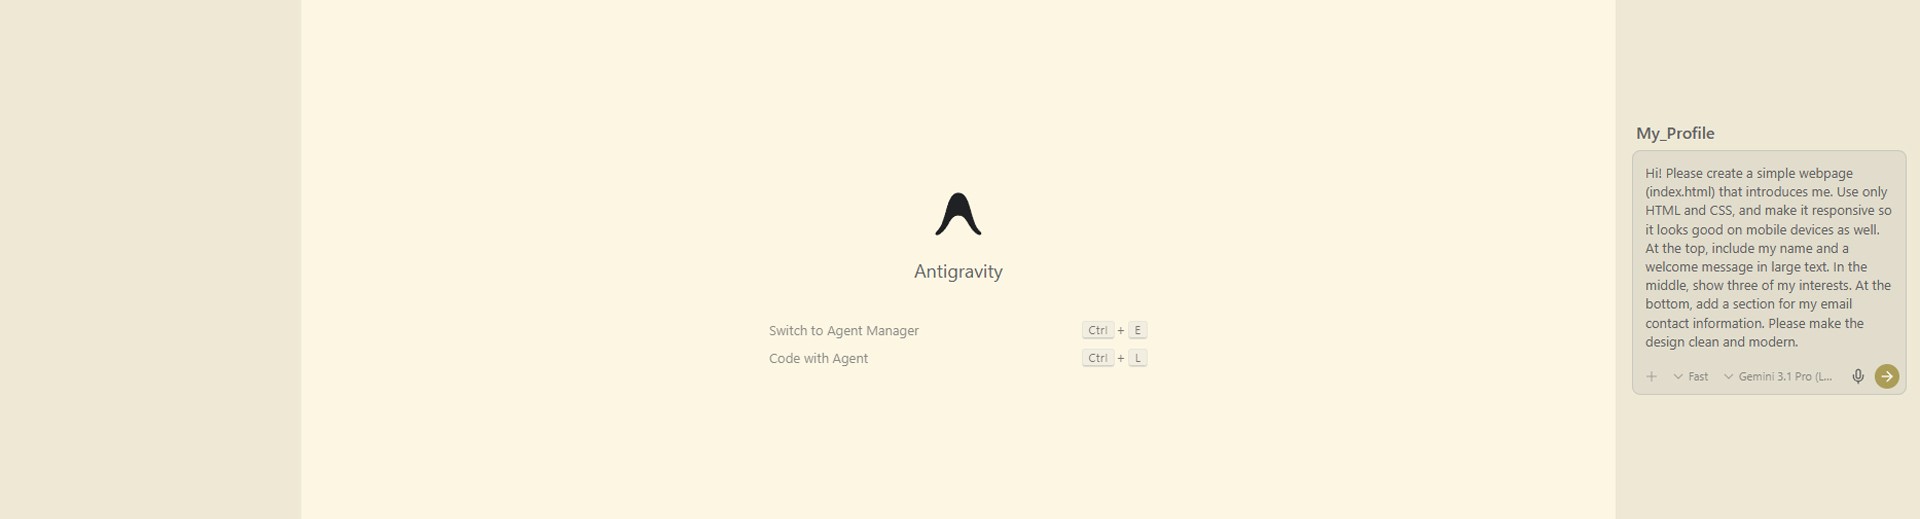
Image caption: The Agent chat window lets you describe the webpage you want instead of manually writing every line of code.
In the Agent input area, write a clear request like this:
Prompt:
Hello! Please create a simple webpage called index.html introducing me. Use HTML and CSS to make it responsive so it looks good on mobile devices too. Put my name and a welcome greeting large at the top, my 3 interests in the middle, and a clean modern design where I can put my email contact at the bottom.
This prompt tells the Agent the key parts of the page.
It asks for one simple webpage.
It asks for responsive design.
It asks for a large name and greeting.
It asks for three interests.
It asks for an email contact area at the bottom.
That is enough for a beginner-friendly intro page.
Step 3: Watch the Page Being Built
After sending the prompt, Antigravity’s Agent will start working on the project.
You may see files such as index.html or style.css appear in the file explorer area.
Depending on the result, the Agent may create everything inside one HTML file or separate the CSS into another file.
Both approaches are fine for this beginner project.
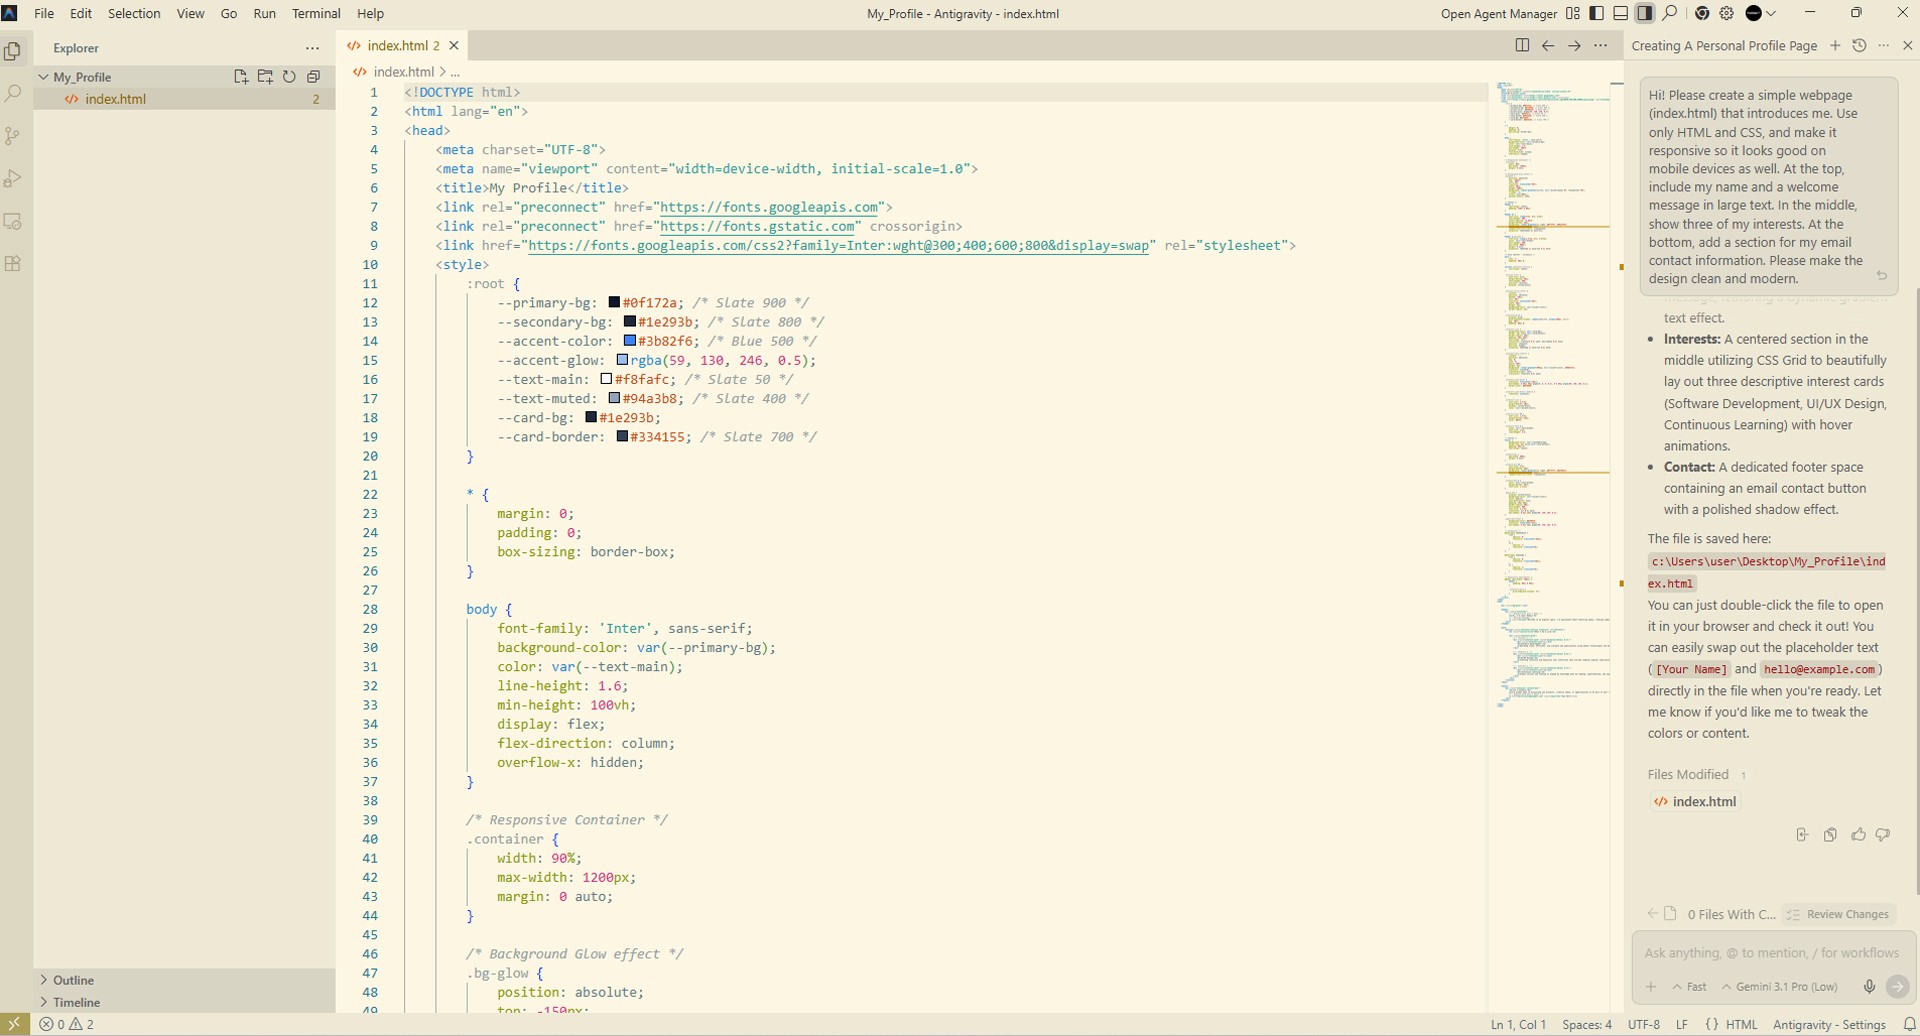
Image caption: As the Agent works, new files such as index.html or style.css may appear inside your project folder.
While the code is being created, use the Preview or Artifacts area to check how the webpage looks.
This is one of the useful parts of AI coding tools.
You do not have to imagine the result only from code. You can see the page visually, then ask the Agent to adjust the design.
If the design feels too plain, you can ask:
Please make the design more modern and clean, with better spacing, a soft background, and rounded cards for the interests.
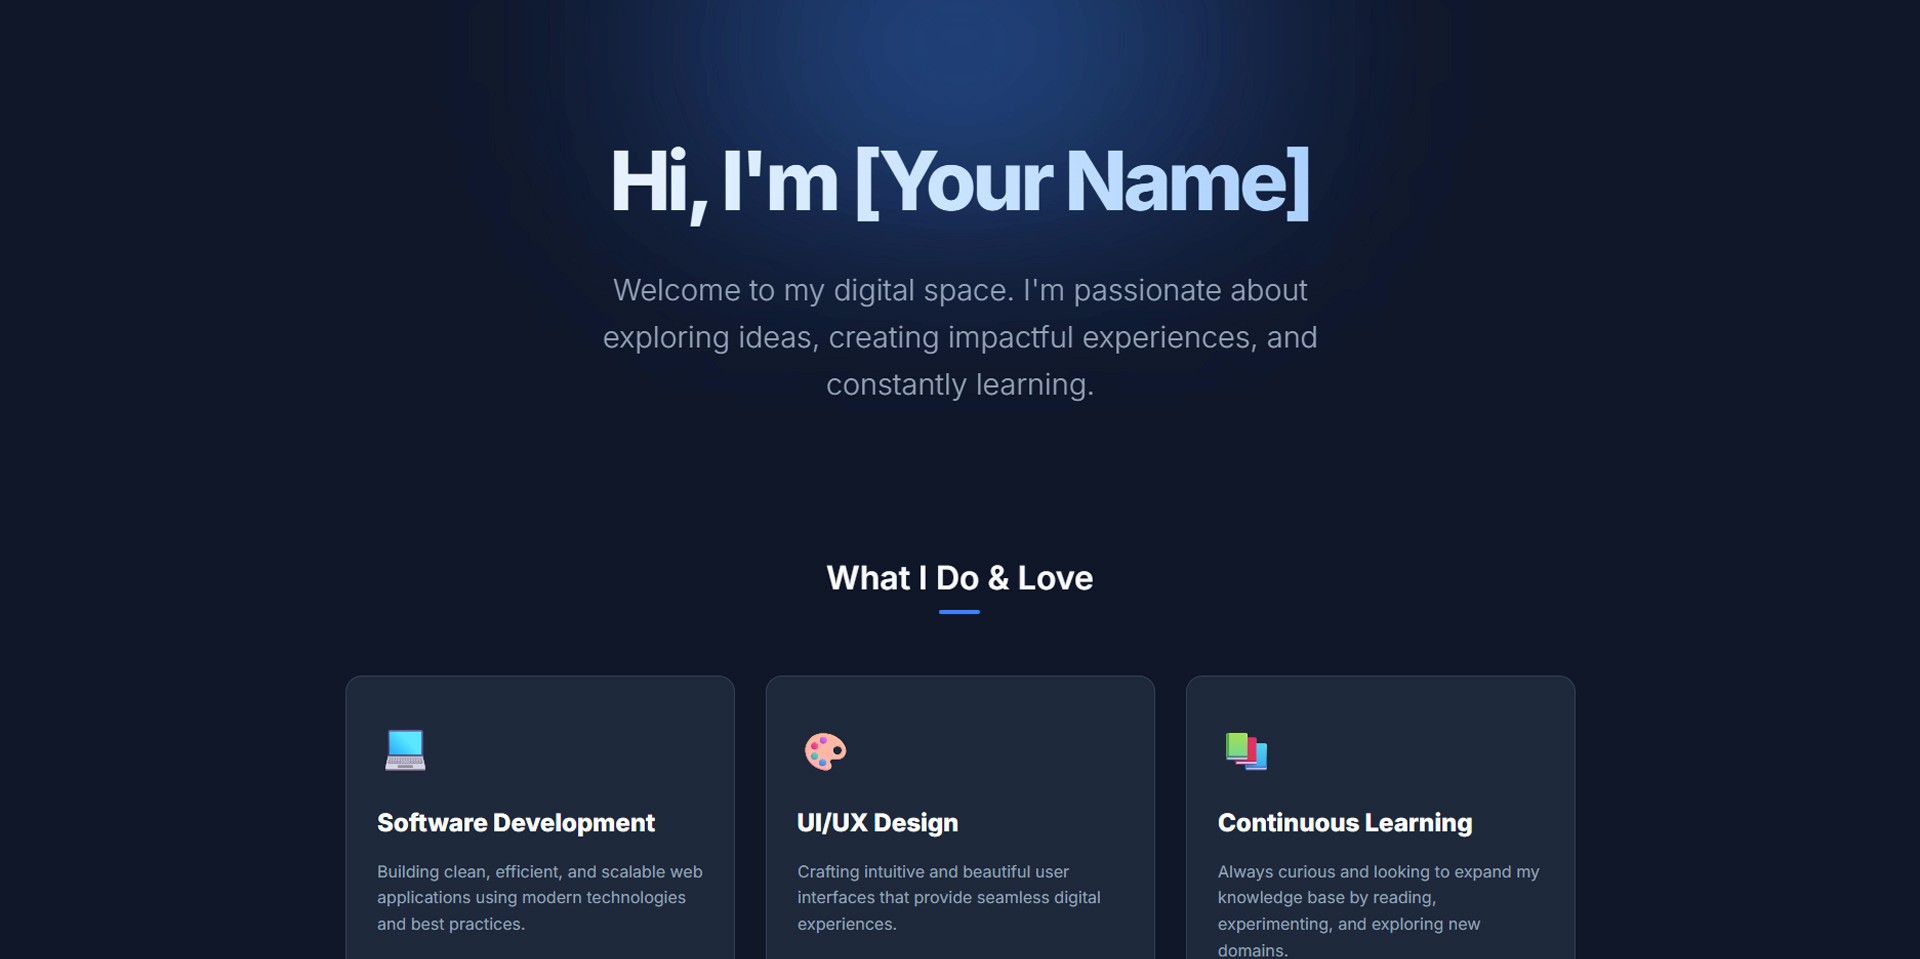
Image caption: Use the Preview or Artifacts area to review the page visually and ask the Agent for design changes.
If the color does not fit your style, you can ask:
Please change the background color to a soft pastel tone and make the text easier to read.
If the mobile layout looks awkward, you can ask:
Please improve the mobile layout so the page looks balanced on a smartphone screen.
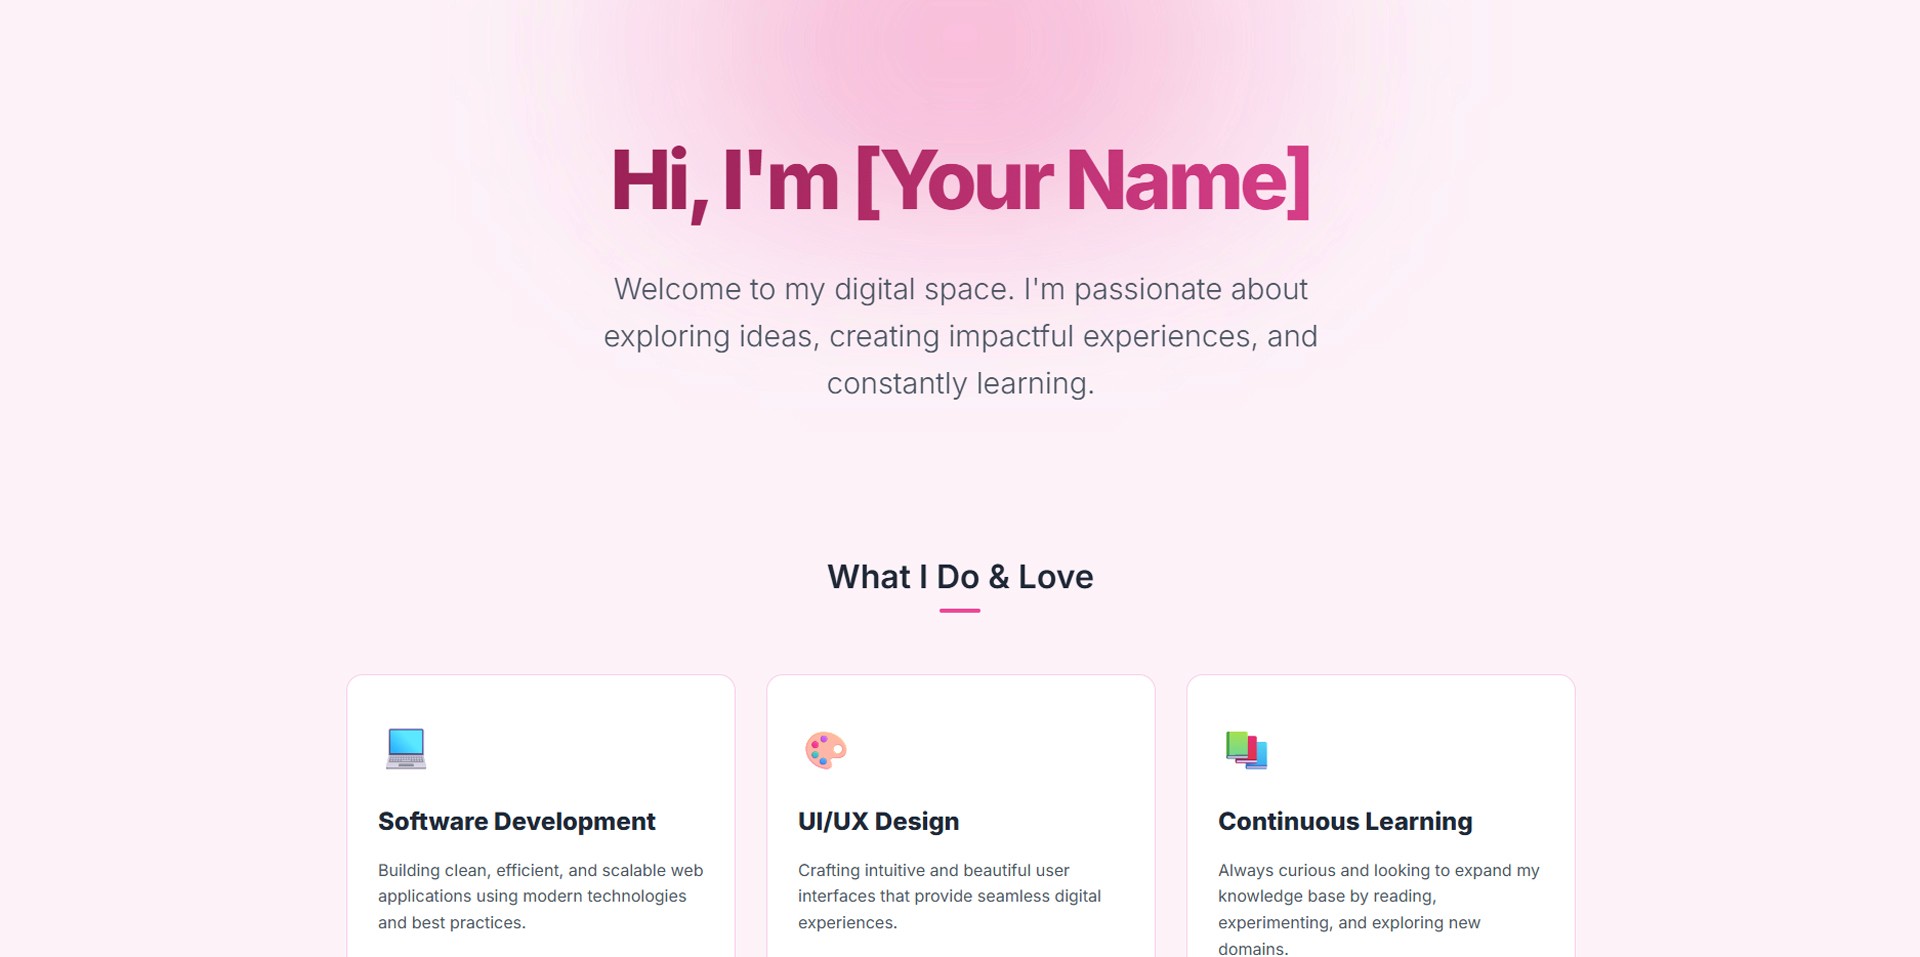
Image caption: Use the Preview or Artifacts area to review the page color.
The important point is that you can keep editing by conversation.
You do not need to manually search for every CSS property at the beginning. You can describe the visual change you want, then review the result.
Step 4: Check the Page Before Publishing
Before publishing the page, review it carefully.
A personal intro page may be simple, but it still needs to feel complete.
Check whether your name is correct, whether the greeting feels natural, whether the three interests are clear, and whether your email contact is written correctly.
Also test the mobile view.
Many people will open personal links on their phone, so the mobile layout is just as important as the desktop layout.
If the page feels too empty, you can ask the Agent to add a short About section.
For example:
Please add a short About Me section under the hero area. Keep it friendly, simple, and professional.
If the page feels too crowded, ask the Agent to simplify it.
For example:
Please simplify the layout and make the page feel cleaner with more spacing.
The goal is not to add too many sections.
For a first personal intro page, simple is better.
Step 5: Publish with Netlify Drop
Once the page looks good, you can publish it with Netlify Drop.
Open the My_Profile folder on your desktop.
Make sure the folder contains the actual website files, especially index.html.
Then open Netlify Drop in your browser.
Drag and drop the My_Profile folder into the upload area.
Netlify will upload the folder and create a live website link.
After the upload is complete, you will receive a website URL ending in netlify.app.
Open the URL and check whether your page loads correctly.
Test it on both desktop and mobile.
If something looks wrong, go back to Antigravity, ask the Agent to fix it, then upload the updated folder again.
Common Issues and Simple Fixes
If Netlify does not show your page correctly, check whether index.html is located at the root of the folder.
If the design looks different after deployment, make sure all CSS files are inside the uploaded folder.
If images are missing, check whether the image files are also inside the same project folder and whether the file paths are correct.
If the page looks bad on mobile, ask Antigravity:
Please improve the responsive design for mobile screens and make the content spacing more balanced.
If the page feels too generic, ask:
Please make this personal intro page feel more unique, with a short bio section, three interest cards, and a simple contact section.
Why This Workflow Is Useful
This workflow is useful because it lowers the first barrier to creating a webpage.
You do not need to start by learning every HTML and CSS rule.
You do not need to set up a complex project.
You do not need to use terminal commands for the first version.
Instead, you can describe the page you want, let the Agent create the first draft, review the preview, and improve it through conversation.
This can be useful for beginners, students, creators, freelancers, and small teams who want to quickly test a personal page idea.
You can also expand this workflow later.
A simple intro page can become a portfolio.
A portfolio can become a service page.
A service page can become a landing page.
A landing page can become a more complete website.
The important thing is to start small and keep improving.
Responsible Use Notes
AI coding tools can save time, but you should still review the output.
Before publishing, check whether the page contains any wrong information, broken links, unwanted placeholder text, or personal data you do not want to share publicly.
Also, do not upload private files, passwords, API keys, or confidential documents into a public website folder.
If you use AI-generated code for a client or business project, test it more carefully before publishing.
For a simple personal intro page, this workflow is a good starting point. For production websites, you should still check performance, accessibility, SEO, privacy policy needs, and long-term maintenance.
Conclusion
In this tutorial, we created a simple personal intro page using Google Antigravity and Netlify Drop.
The workflow was simple.
Create a folder on your desktop.
Open the folder in Antigravity.
Ask the Agent to create an index.html intro page.
Preview and refine the design.
Upload the folder to Netlify Drop.
Then test the live website link.
This is a practical way to experience how AI coding tools can help turn a simple idea into a working webpage.
It does not replace full web development knowledge, but it can make the first step much easier.
Start with a small page.
Review the result carefully.
Make a few design improvements.
Publish a test version.
Then keep building from there.
That is how AI-assisted web creation becomes more useful for beginners and creators.
We will return in the next A2SET tutorial with more practical AI workflows for creators, designers, and small production teams.
Quick FAQ
Do I need coding knowledge to follow this tutorial?
Basic coding knowledge helps, but this workflow is designed for beginners. You describe the page to the Agent, then review and adjust the result.
What is Google Antigravity used for?
Google Antigravity is an agentic development platform that helps users build and edit software projects with AI assistance.
What file do I need for a simple website?
For a very simple static website, an index.html file is enough. Some projects may also include style.css, script.js, images, or other assets.
Can I publish the page for free?
Netlify Drop can publish simple static websites by dragging and dropping a project folder. Check Netlify’s current plan and limits before using it for serious or commercial projects.
Why is my Netlify page not showing correctly?
The most common reason is that index.html is not in the root of the uploaded folder. Make sure the main HTML file is directly inside the folder you upload.
Can I update the website later?
Yes. Edit the files in Antigravity, then upload the updated folder to Netlify again.
Can I use this for a real portfolio?
Yes, but review the design, text, links, mobile layout, SEO, and personal information carefully before sharing it publicly.